Sign Up
Signing up for ODIN Rooms is quick and easy and is a two or three-step process, depending on whether you are want to use the free version or a paid version.
Configure Your Tier
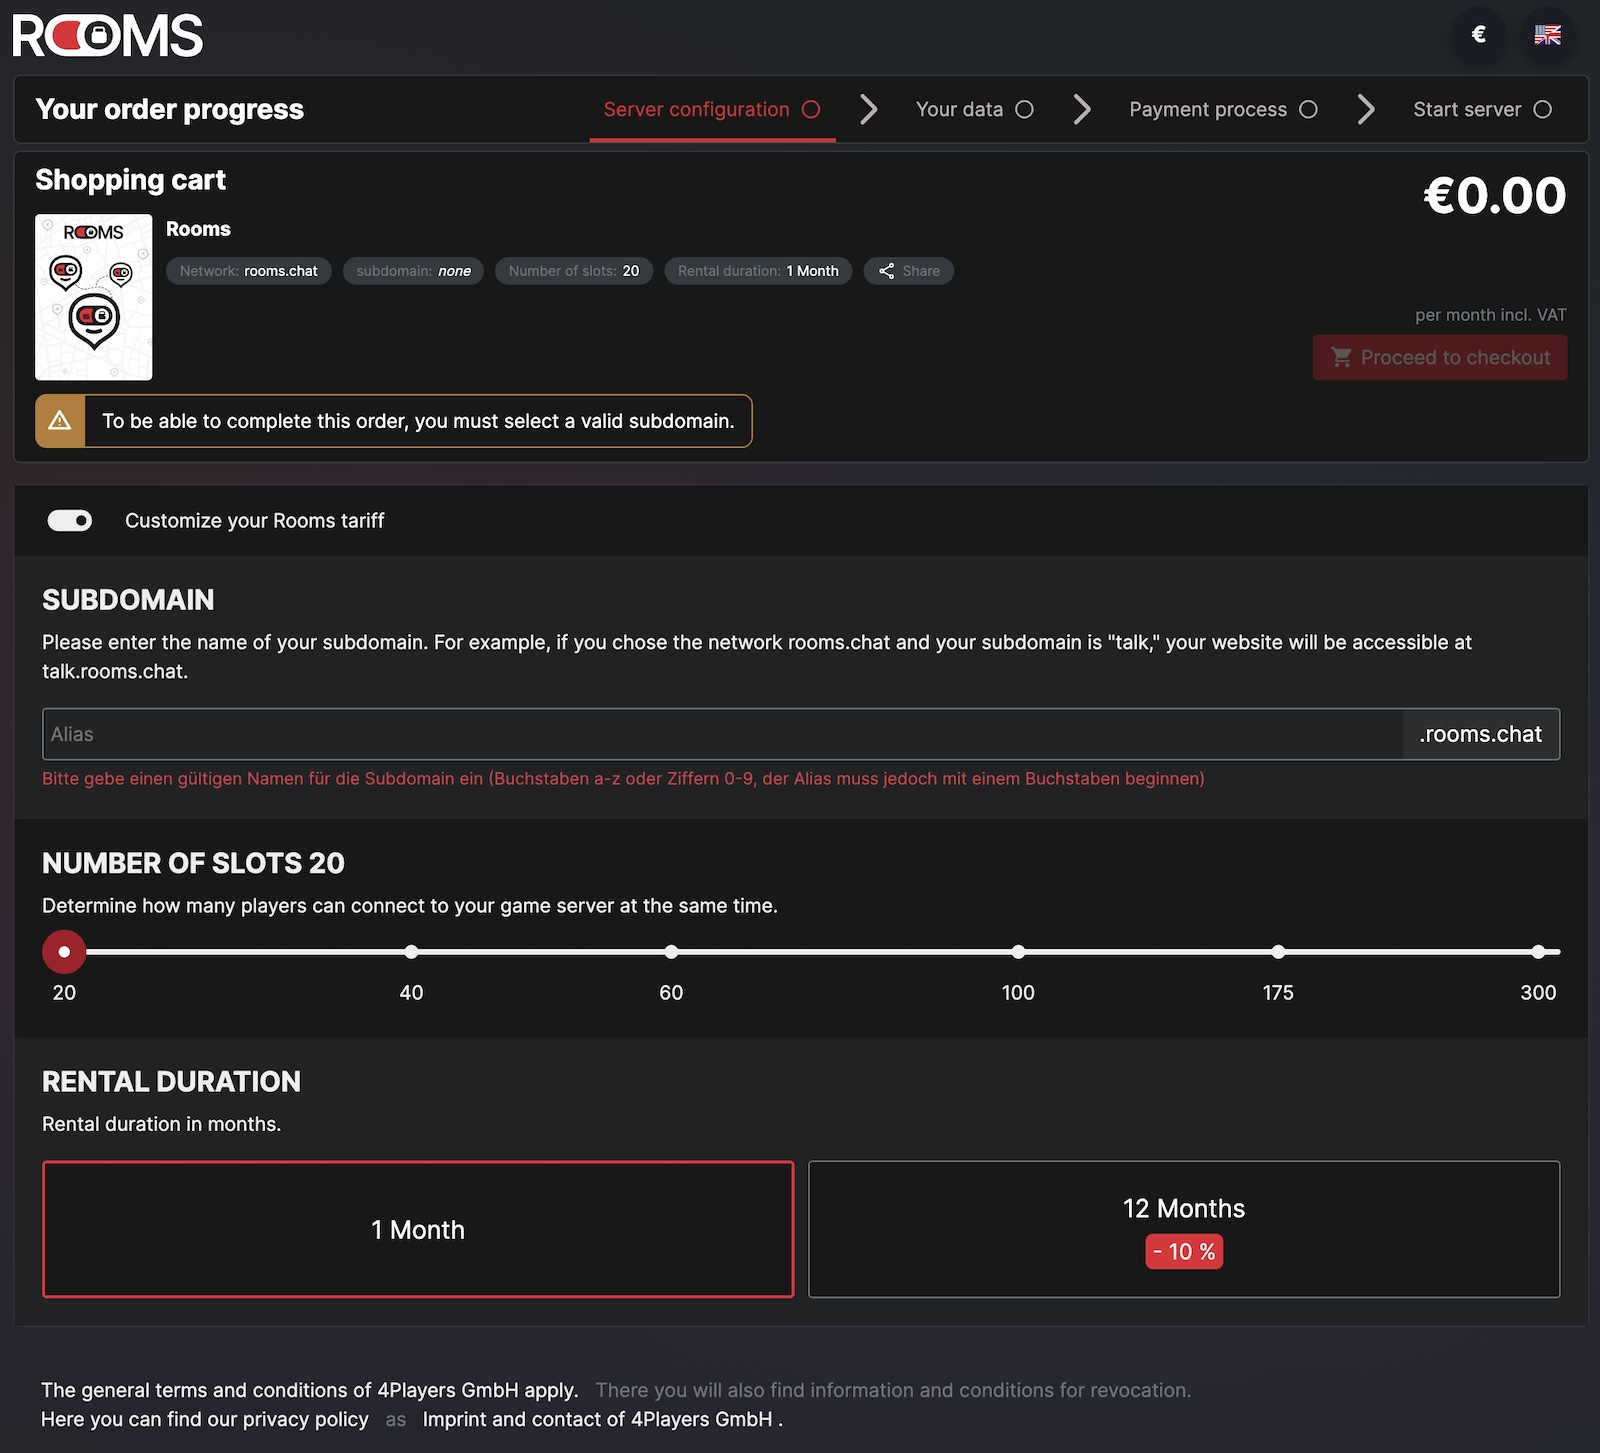
The first step is to configure your account. After choosing a tier on our landing page, you will be prompted to enter the following information:
Rooms Configuration
Subdomain
You will be prompted to enter a subdomain. This subdomain is the unique web address where your
video conferencing service will be accessible. For example, if you choose “talk” as your subdomain, your ODIN Room will
be available at talk.rooms.chat.
- Your subdomain must be a combination of letters and numbers (starting with a letter).
- This is how participants will access your meetings, so choose a name that reflects your use.
Number of Slots
By default, you can host up to 20 participants simultaneously in as many rooms as you like. This option is perfect for small businesses and personal use. You can scale up by adjusting the number of slots as needed.
For up to 20 participants, Rooms is completely free of charge. This plan is ideal for small businesses, NGOs, educational institutions, and personal use.
Rental Duration
Choose the rental duration that best fits your needs. The default option is 1 month, but you can save 10% by selecting a 12-month plan.
Once you have completed these steps, proceed to checkout to finalize your account and start using Rooms!
Create Your Account
Pressing Next will take you to the account creation page. Here, you will be prompted to enter your email address and create a password. You will also need to enter your address and payment information if you have chosen a paid plan.
Setting Up Your Rooms
It may take a couple of minutes for your account and Rooms instance to be set up. Once it is ready, you will receive an email with a link to your Rooms instance. Click the link to access your Rooms and start collaborating securely!
If you entered talk as the subdomain during sign-up your Rooms instance will be available at talk.rooms.chat. Once
you received the email that your Rooms instance is ready, enter your domain into your browsers address
bar. In our example it would be https://talk.rooms.chat.
If you open your Rooms instance for the first time, you will be prompted to setup some basic settings. Pressing the (i) icon in the middle of the screen will reveal some details about Rooms, including the version number and the terms. You’ll also notice a sun (or moon) icon. This is the light/dark mode switch. You can toggle between light and dark mode by clicking on it.
The first step is to setup your Rooms Title and the Server Location.
App Title and Server Location

Rooms Initial Setup
- App Title
- This is the name of your Rooms instance. It will be displayed in the browser tab and will be the name if someone bookmarks your Rooms instance.
- Server Region
- Choose the region where your Rooms instance is hosted. This will ensure the best performance for your participants.
Click “Continue” to proceed to the next step.
Branding
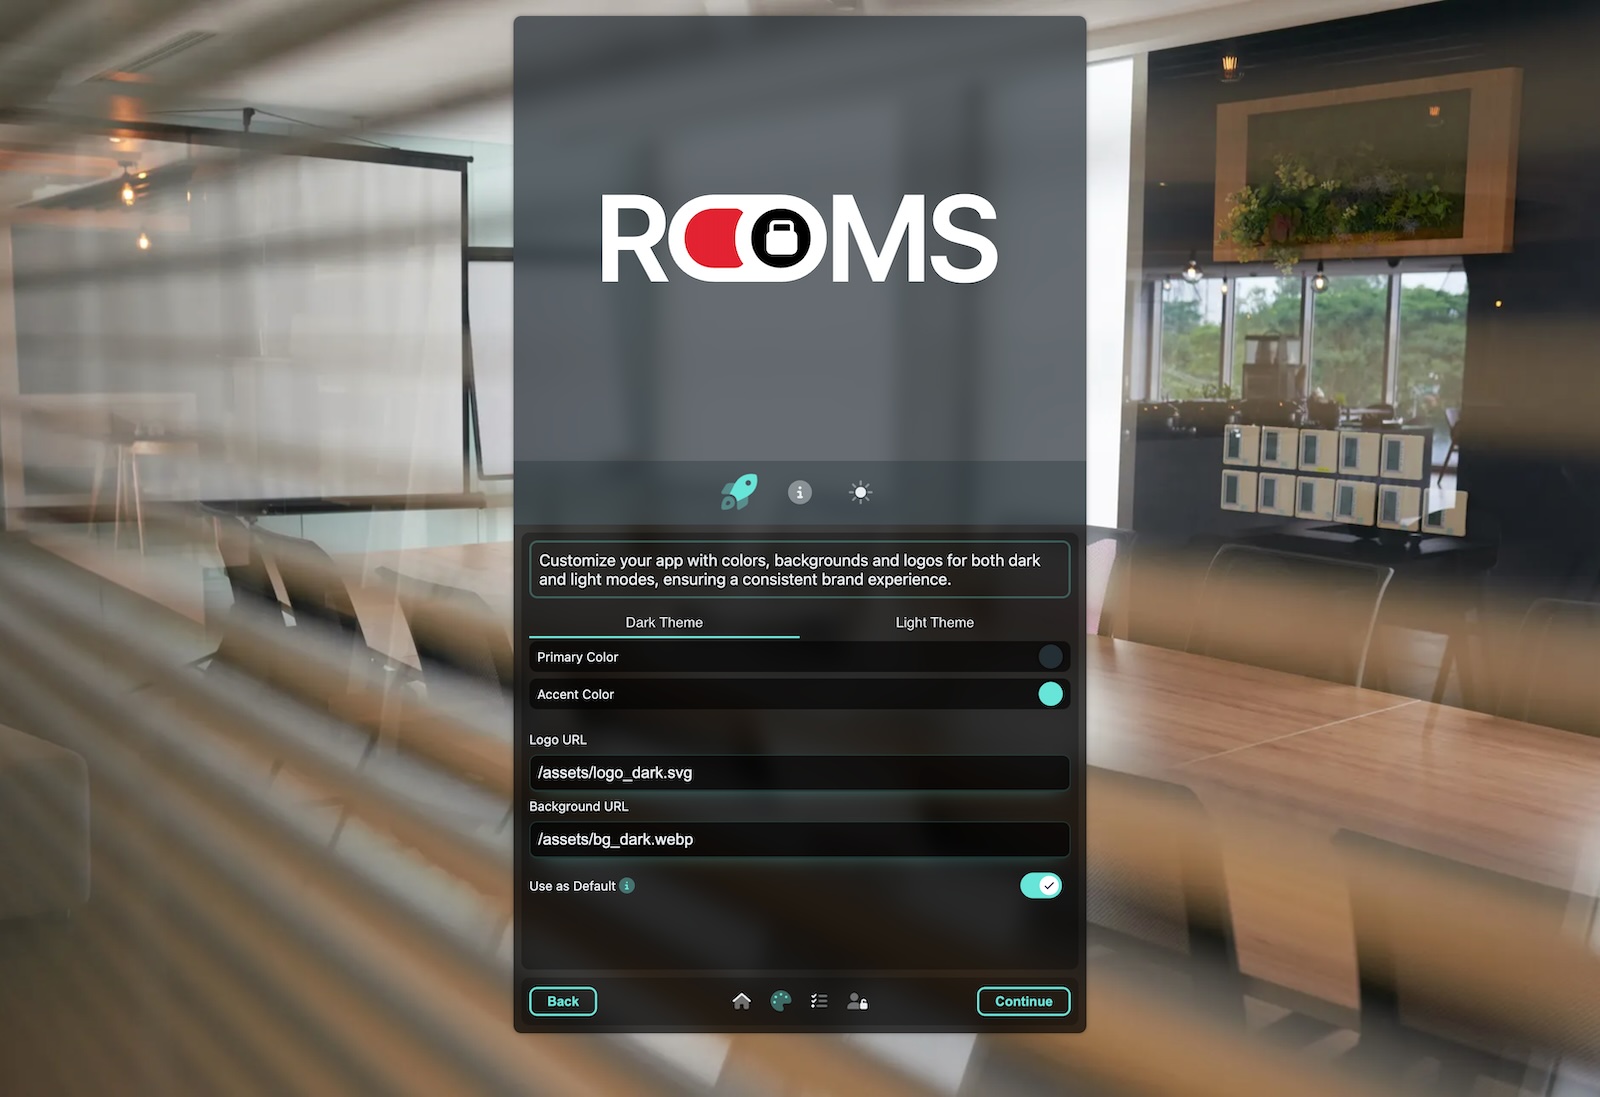
In this step, you can setup logos and backgrounds for your Rooms instance. You can also setup colors. You will need to setup for both light and dark mode.
Rooms Branding
- Primary Color
- This is the main color of your Rooms instance. It will be used for buttons and other elements.
- Secondary Color
- This color will be used for secondary elements.
- Logo
- Provide a URL to your logo. It will be displayed in the top left corner of your Rooms instance.
- Background
- Provide a URL to a background image. It will be displayed in the background of your Rooms instance.
- Use as default
- Activate this button to set the light or dark mode as default. I.e. if you activate this toggle when in the light mode settings, the light mode will be the default mode.
The logo and background image must be hosted on a server that supports HTTPS. The image URLs must start with https://.
We are working on allowing uploads of logos and backgrounds directly in the Rooms instance. This feature will be
available in one of the next updates this fall (2024).
Click “Continue” to proceed to the next step.
Guest Permissions
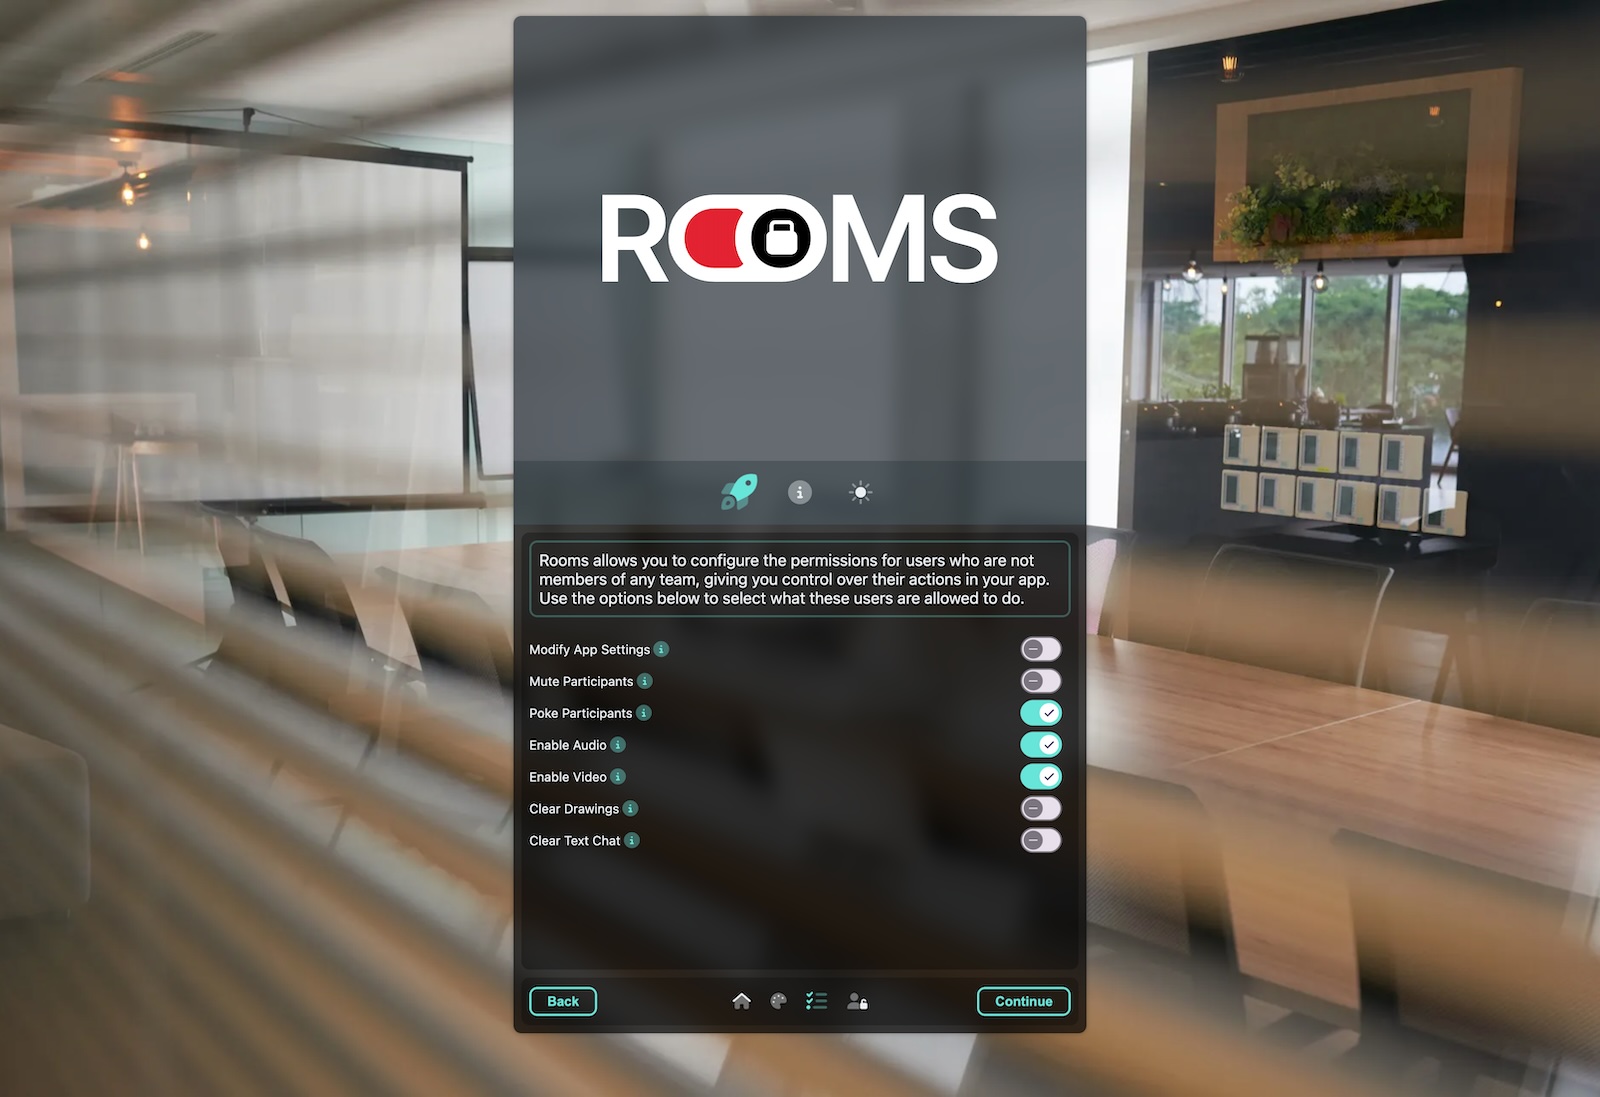
In this step, you can setup permissions of guests for your Rooms instance. You can choose to allow or disallow certain features for guests.
Rooms Permissions
- Modify App Settings
- Allow guests to modify the app settings (like changing the logo or background).
- Mute Participants
- Allow guests to mute other participants.
- Poke Participants
- Allow guests to poke other participants. Poking means that the participant will receive a notification which is useful if they are not paying attention or have muted their audio.
- Enable Audio
- Allow guests to enable or disable their microphone. Disabling that feature will mute the microphone of the guest.
- Enable Video
- Allow guests to enable or disable their camera. Disabling that feature will turn off the camera of the guest.
- Clear Drawings
- Allows guests to clear the whiteboard.
- Clear Text Chat
- Allows guests to clear the text chat.
You can change these settings at any time in the settings of your Rooms instance (if you have the necessary permissions).
Click “Continue” to proceed to the next step.
Owners Password
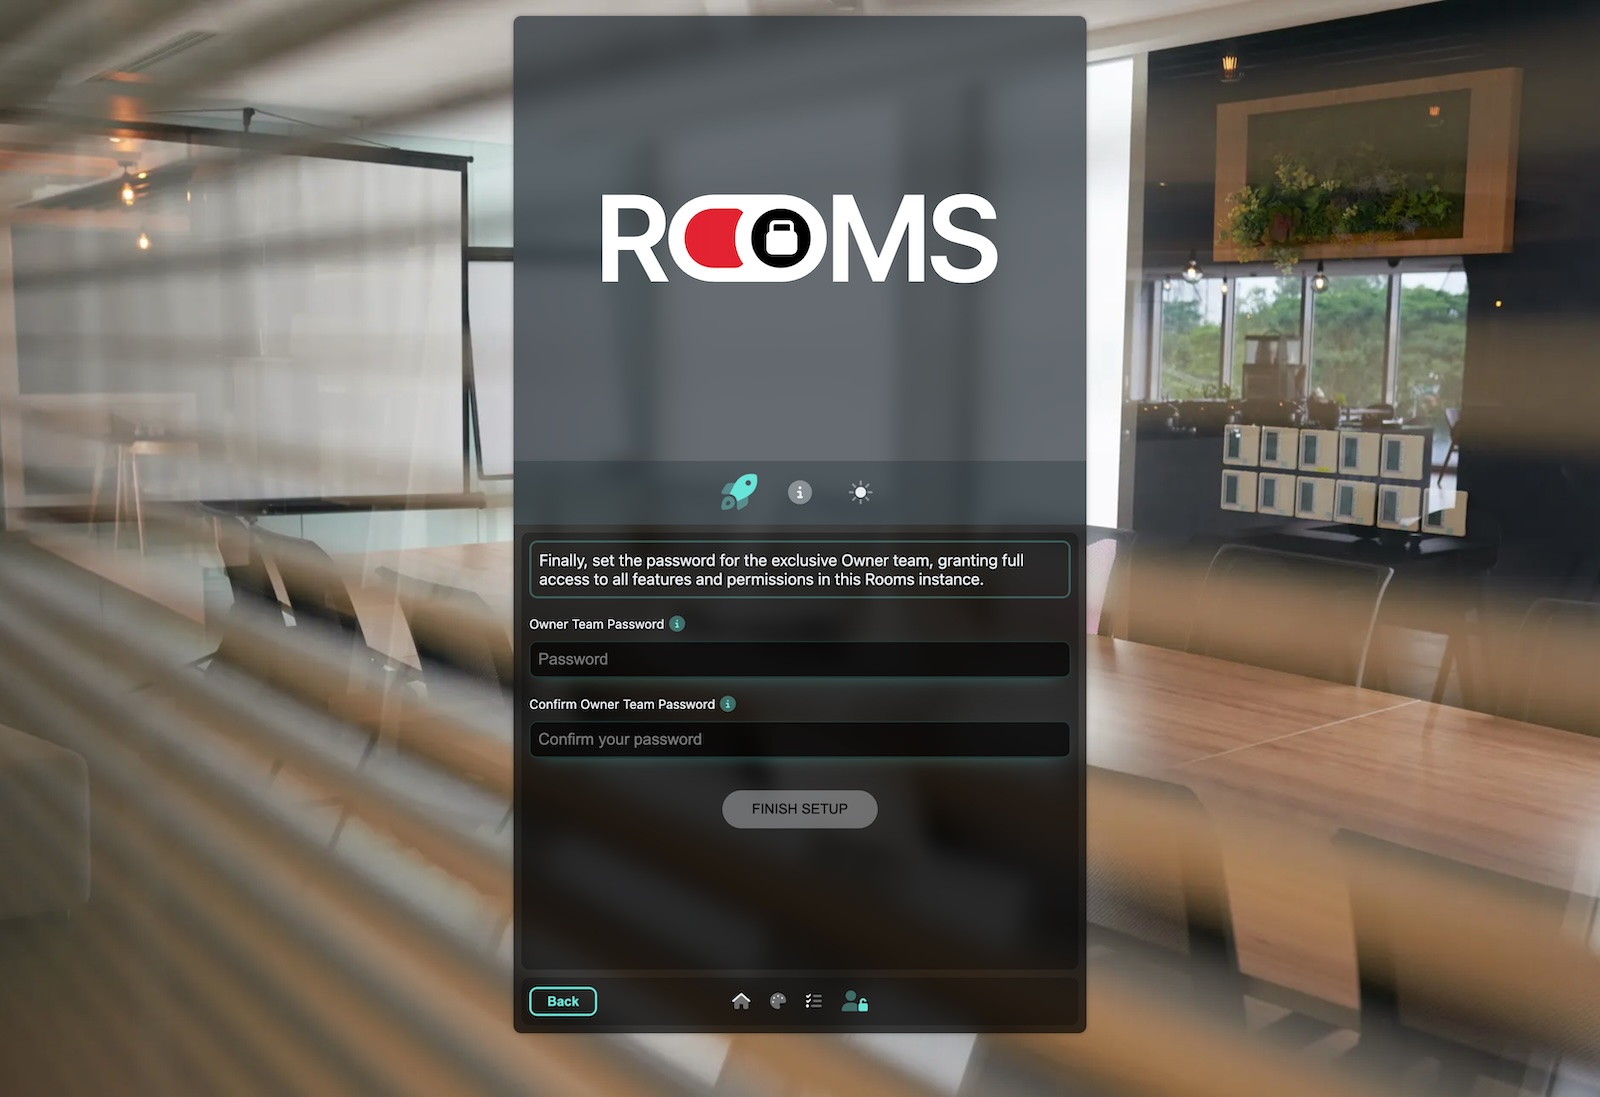
In the last step, you can setup a password for the owner of the Rooms instance. This password is needed to access the settings of the Rooms instance.
Rooms Owner Password
- Owner Team Password
- Enter a password for the owner of the Rooms instance. This password is needed to access the settings of the Rooms instance.
- Owner Team Password (Repeat)
- Repeat the password to ensure it is correct.
As we want to have full GDPR compliance, we do not store any user data. As such, we don’t want to and cannot store user accounts and assign permissions to them. The owner password is the only way to access the settings of the Rooms instance and must be kept safe. If you lose the password, you need to reach out to our support team to reset your instance.
Click “Finish Setup” to complete the setup of your Rooms instance.
Next Steps
Now that you have set up your Rooms instance, you can start inviting participants to your meetings. Before that, we recommend checking out our Basic Concepts guide to learn more about the unique features of Rooms and how to use them effectively.