Your first call
In this guide we’ll asume that you have setup your own Rooms instance and that you have a basic understanding of how Rooms works. If you haven’t done this yet, please follow the Getting Started Guide first.
The first time you join a room, or you open Audio and Video Settings (that’s equally true for all your guests), your browser will ask you for permission to access your microphone and camera. You need to allow this to use audio and video in Rooms. Not doing so will not allow you to use audio and video in Rooms. If you accidentally denied access, you can change this in the settings of your browser.
Before we join the room, let’s make sure that Audio and Video-Settings are correct.
Audio and Video Settings
Before you join a room, you should check your audio and video settings. You can do this by clicking on the sliders icon above the room name input field (see screenshot below).
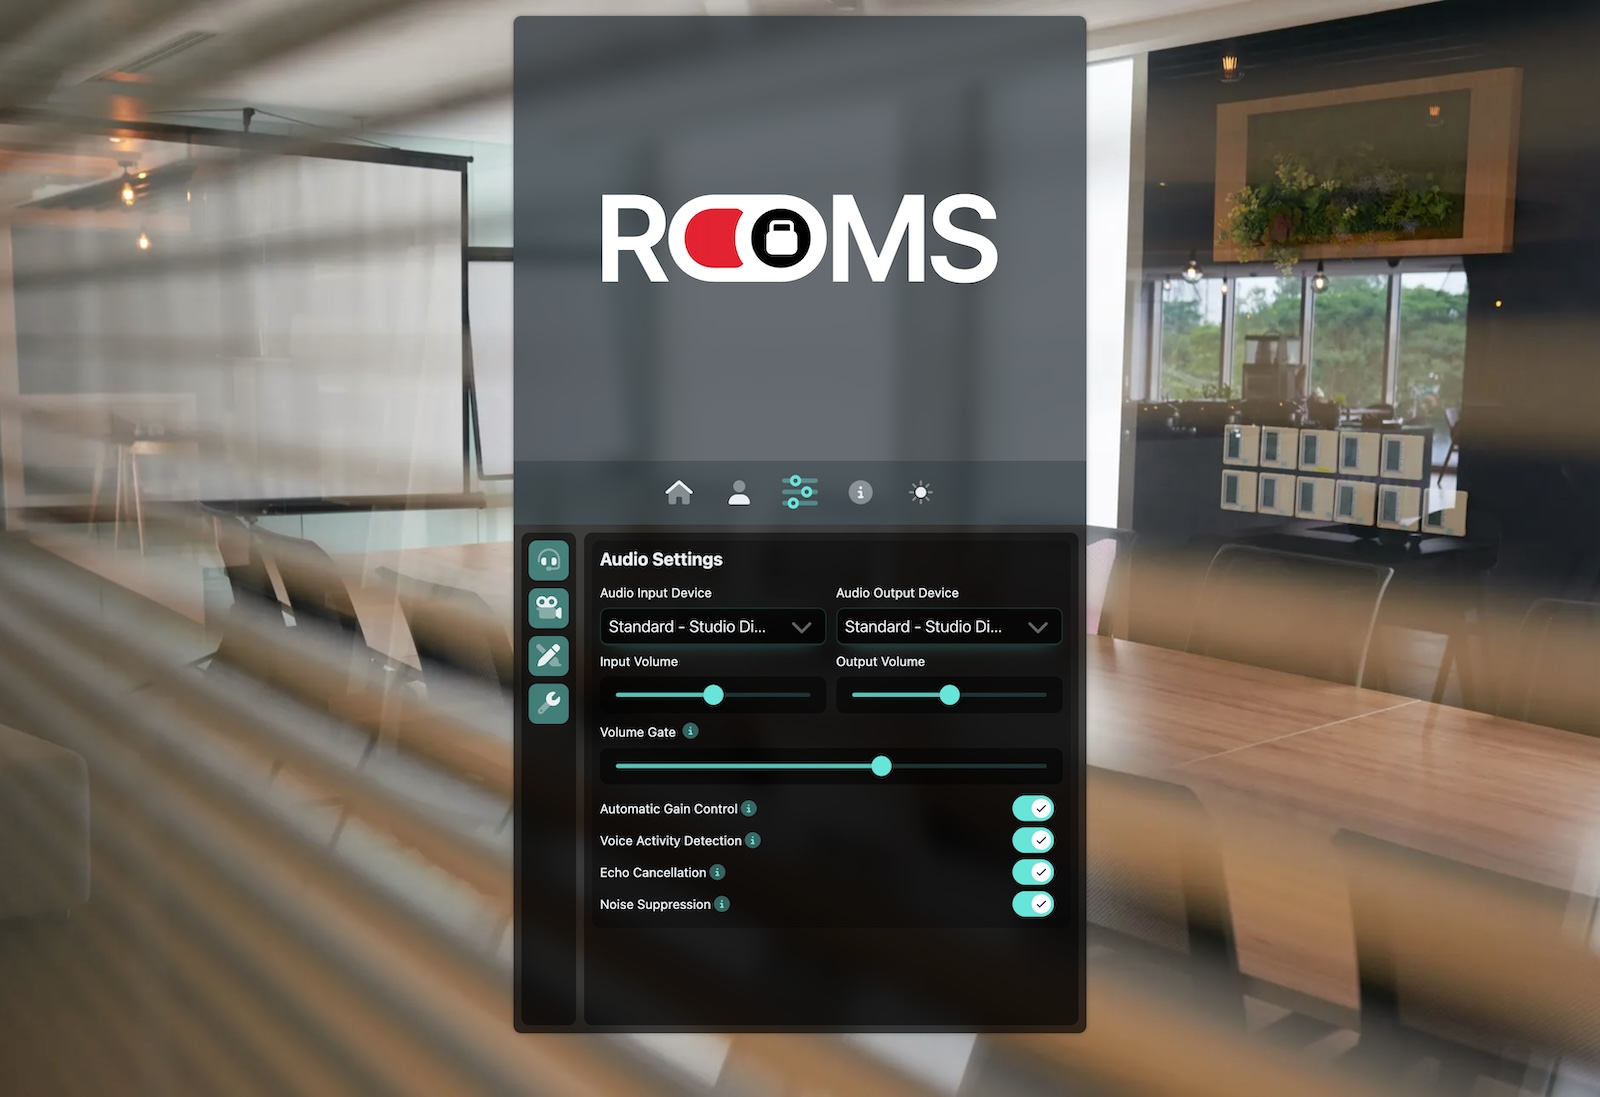
Settings
On the left side of the settings dialog, you can switch between Audio and Video settings. Depending on your permissions (i.e. if you are the owner or as a guest have the permissions) you also see additional settings there.
Audio Settings
Let’s focus on the audio settings first. You should see something like this if you have the audio tap selected:
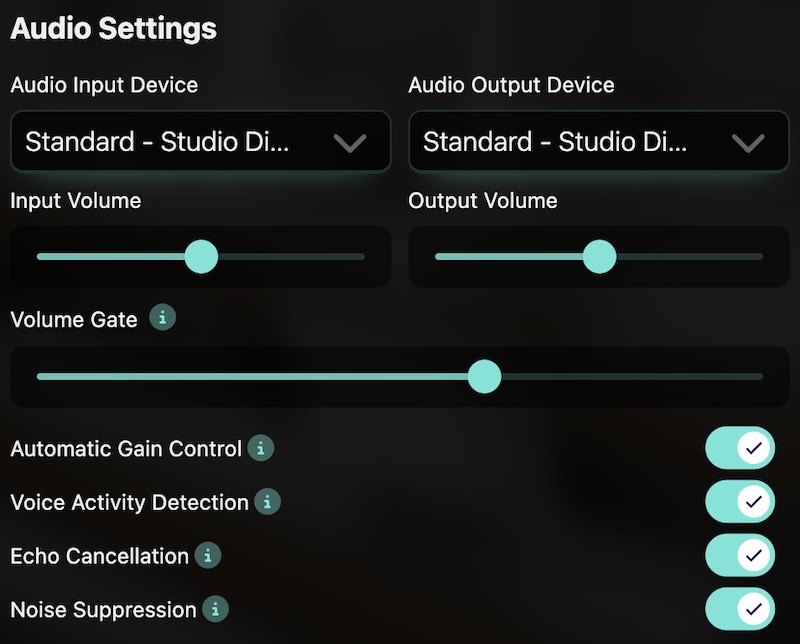
Audio Settings
- Audio Input Device
- Select the audio input device you want to use. This is usually your microphone. The drop down list contains all available audio input devices. On Windows, this is usually something like “Microphone (Realtek Audio)” or “Microphone (Logitech Webcam)”. On Mac, this is usually something like “Internal Microphone” or “Airpods …”.
- Audio Output Device
- Select the audio output device you want to use. This is usually your speakers or headphones. The drop down list contains all available audio output devices. On Windows, this is usually something like “Speakers (Realtek Audio)” or " Headphones (Logitech Webcam)". On Mac, this is usually something like “Internal Speakers” or “Airpods …”.
- Input Volume
- Adjust the input volume of your microphone. This is useful if your microphone is too loud or too quiet. You can adjust the volume by moving the slider to the left or right.
- Output Volume
- Adjust the output volume of your speakers or headphones. This is useful if the sound is too loud or too quiet. You can adjust the volume by moving the slider to the left or right.
- Volume Gate
- Rooms automatically tries to avoid that noise from your environment or cheap microphones is transmitted to the other participants. The volume gate is the threshold at which the microphone is activated. If the volume is below the gate, the microphone is muted. If the volume is above the gate, the microphone is activated. You can adjust the volume gate by moving the slider to the left or right.
- Automatic Gain Control
- If you activate this toggle, Rooms will automatically adjust the volume of your microphone to avoid that you are too loud or too quiet. This is useful if you move around or if you have a cheap microphone that is not very stable in terms of volume.
- Voice Activity Detection
- If you activate this toggle, Rooms will use AI to identify if you are speaking or not. If you are not speaking, the microphone is muted. This is useful if you have a lot of background noise or if you are in a noisy environment.
- Echo Cancellation
- If you activate this toggle, Rooms will try to avoid that the sound from your speakers is transmitted back to the microphone. This is useful if you have a cheap microphone or if you have your speakers very loud.
- Noise Suppression
- If you activate this toggle, Rooms will try to suppress background noise. This is useful if you are in a noisy environment or if you have a cheap microphone.
Video Settings
The next tab are the video settings. Here you can setup the webcam you want to use for video. You should see something like this:
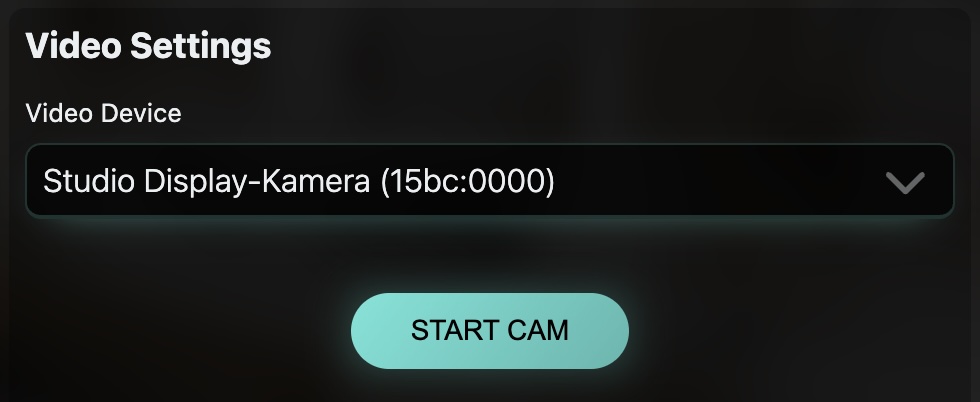
Video Settings
- Video Device
- Select the video device you want to use. This is usually your webcam. The drop down list contains all available video devices. On Windows, this is usually something like “Logitech Webcam” or “Integrated Webcam”. On Mac, this is usually something like “FaceTime HD Camera” or “Logitech Webcam”.
- Start Cam
- Click this button to start the selected webcam to verify that it is working correctly.
If you use the video settings for the first time, you might only see a “Start Cam” button. Click on that button to initiate the camera. This will trigger the browser to request permission that Rooms is allowed to access your camera. After you gave access, a list will popup with all available cameras.
Creating/Joining a Room
If you have read the Basic Concepts guide, you know that Rooms is organized in rooms. While in other video conferencing tools the primary dimension is time and date, in Rooms it is the room. You can create a room for a specific purpose, like a meeting, a brainstorming session, a game or just to hang out as long as you like.
If your Rooms instance is setup, opening the URL to your Rooms instance (e.g. https://talk.rooms.chat) will show
you something like this (depending on weather you have customized your Rooms instance):

Join Room
In Rooms, we don’t actually create a room, we just join it. If the room does not exist, it will be created automatically by the server, and you will be the first person in the room. If the room already exists, you will join the room and see the other people that are in the room.
Enter a name of the Room you want to join or create and press the “Join Room” button. Some example of room names
that we use are coffee-break, we-hate-to-eat-alone, lets-play-a-game, devs, marketing or whatever comes into
your mind.
Room names are case sensitive and contain any character except for /. So, it’s different if you enter Coffee Breakor coffee break. If you want to have a private conversation, just use a name that is hard to guess, like
FE12-GH23-AB45.
For this guide, I have chosen Coffee Break. After joining the room, you will see the user interface of Rooms.
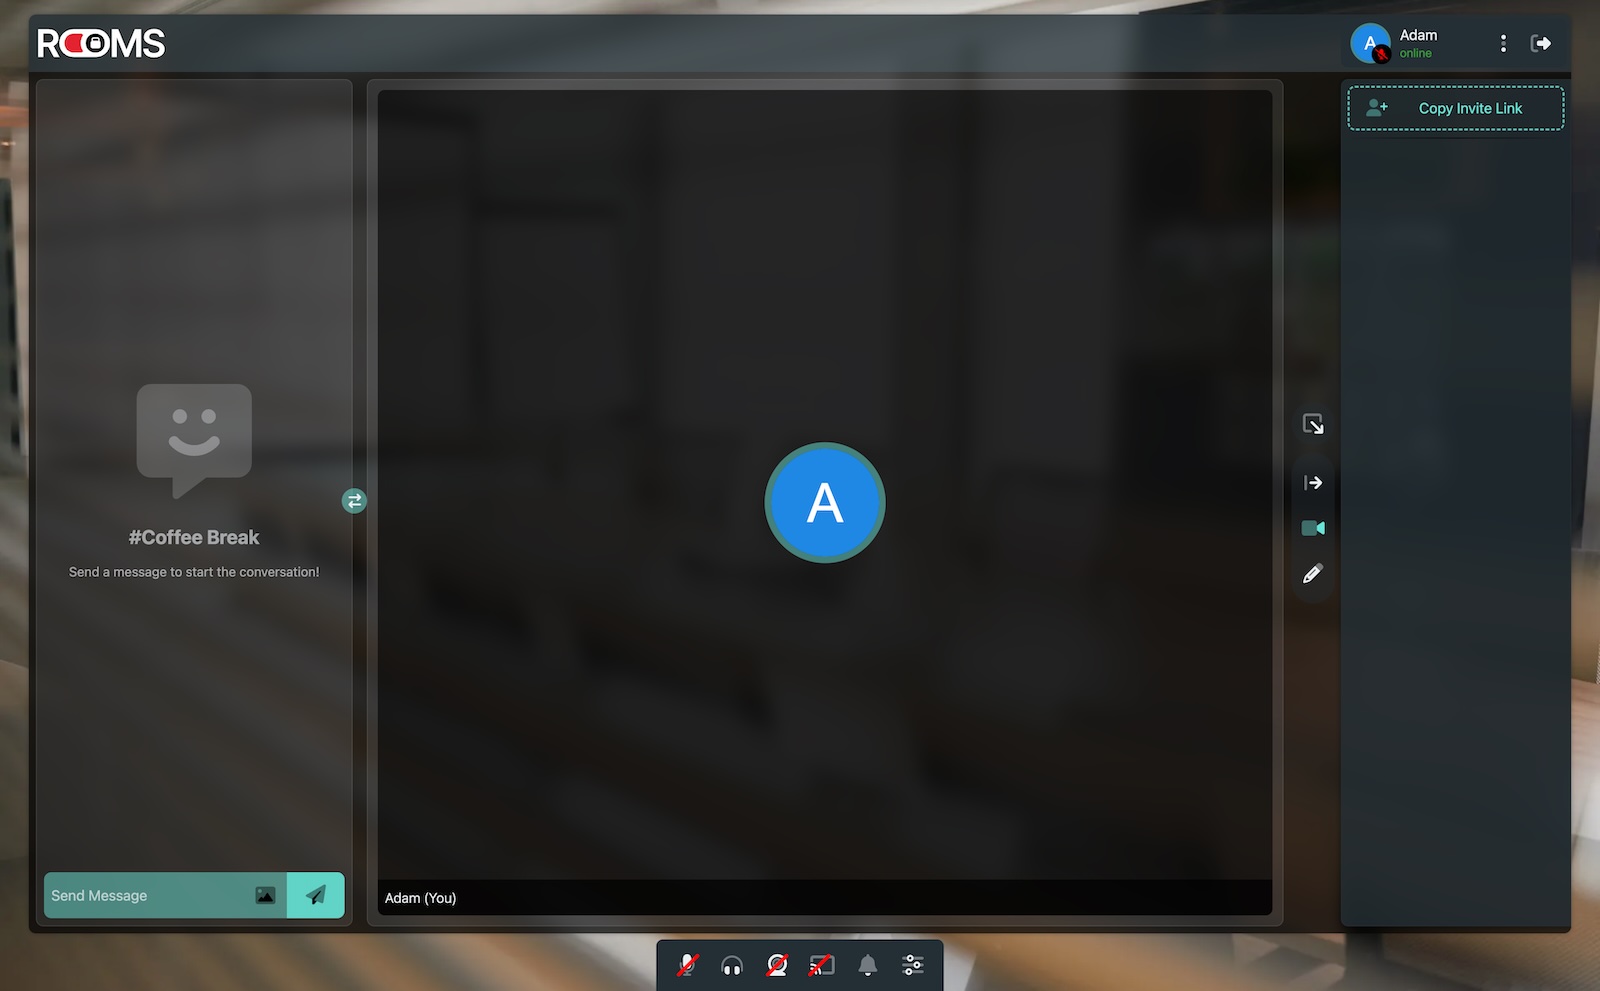
Rooms UI after joining an empty room
Inviting Others
Once you are in the room, you can invite others to join you. You can do this by sharing the room name with them. You can
also create a link to the room and share this link with others. Click on the Copy Invite Link button to copy the
link to the clipboard. The link is basically just this format: https://{subdomain}.rooms.chat/{room-name}, so if your
instance is talk.rooms.chat and your room is coffee-break, the link would be https://talk.rooms.chat/coffee-break.
Use whatever way you prefer to share the link with others. They just open the link in their Browser, optionally enter their name and join the room.
Users don’t need to create an account to use ODIN Rooms. Users also don’t need to download any software. They just open the URL in their Browser and they are in the room.
Next Steps
That’s it, you have successfully joined your first room in Rooms. You can now start using the room for a quick chat, a brainstorming session, a meeting or just to hang out.
Rooms has many more features, like a whiteboard, a chat, screen sharing and many more. Navigate to our manual to learn more about the features of Rooms.