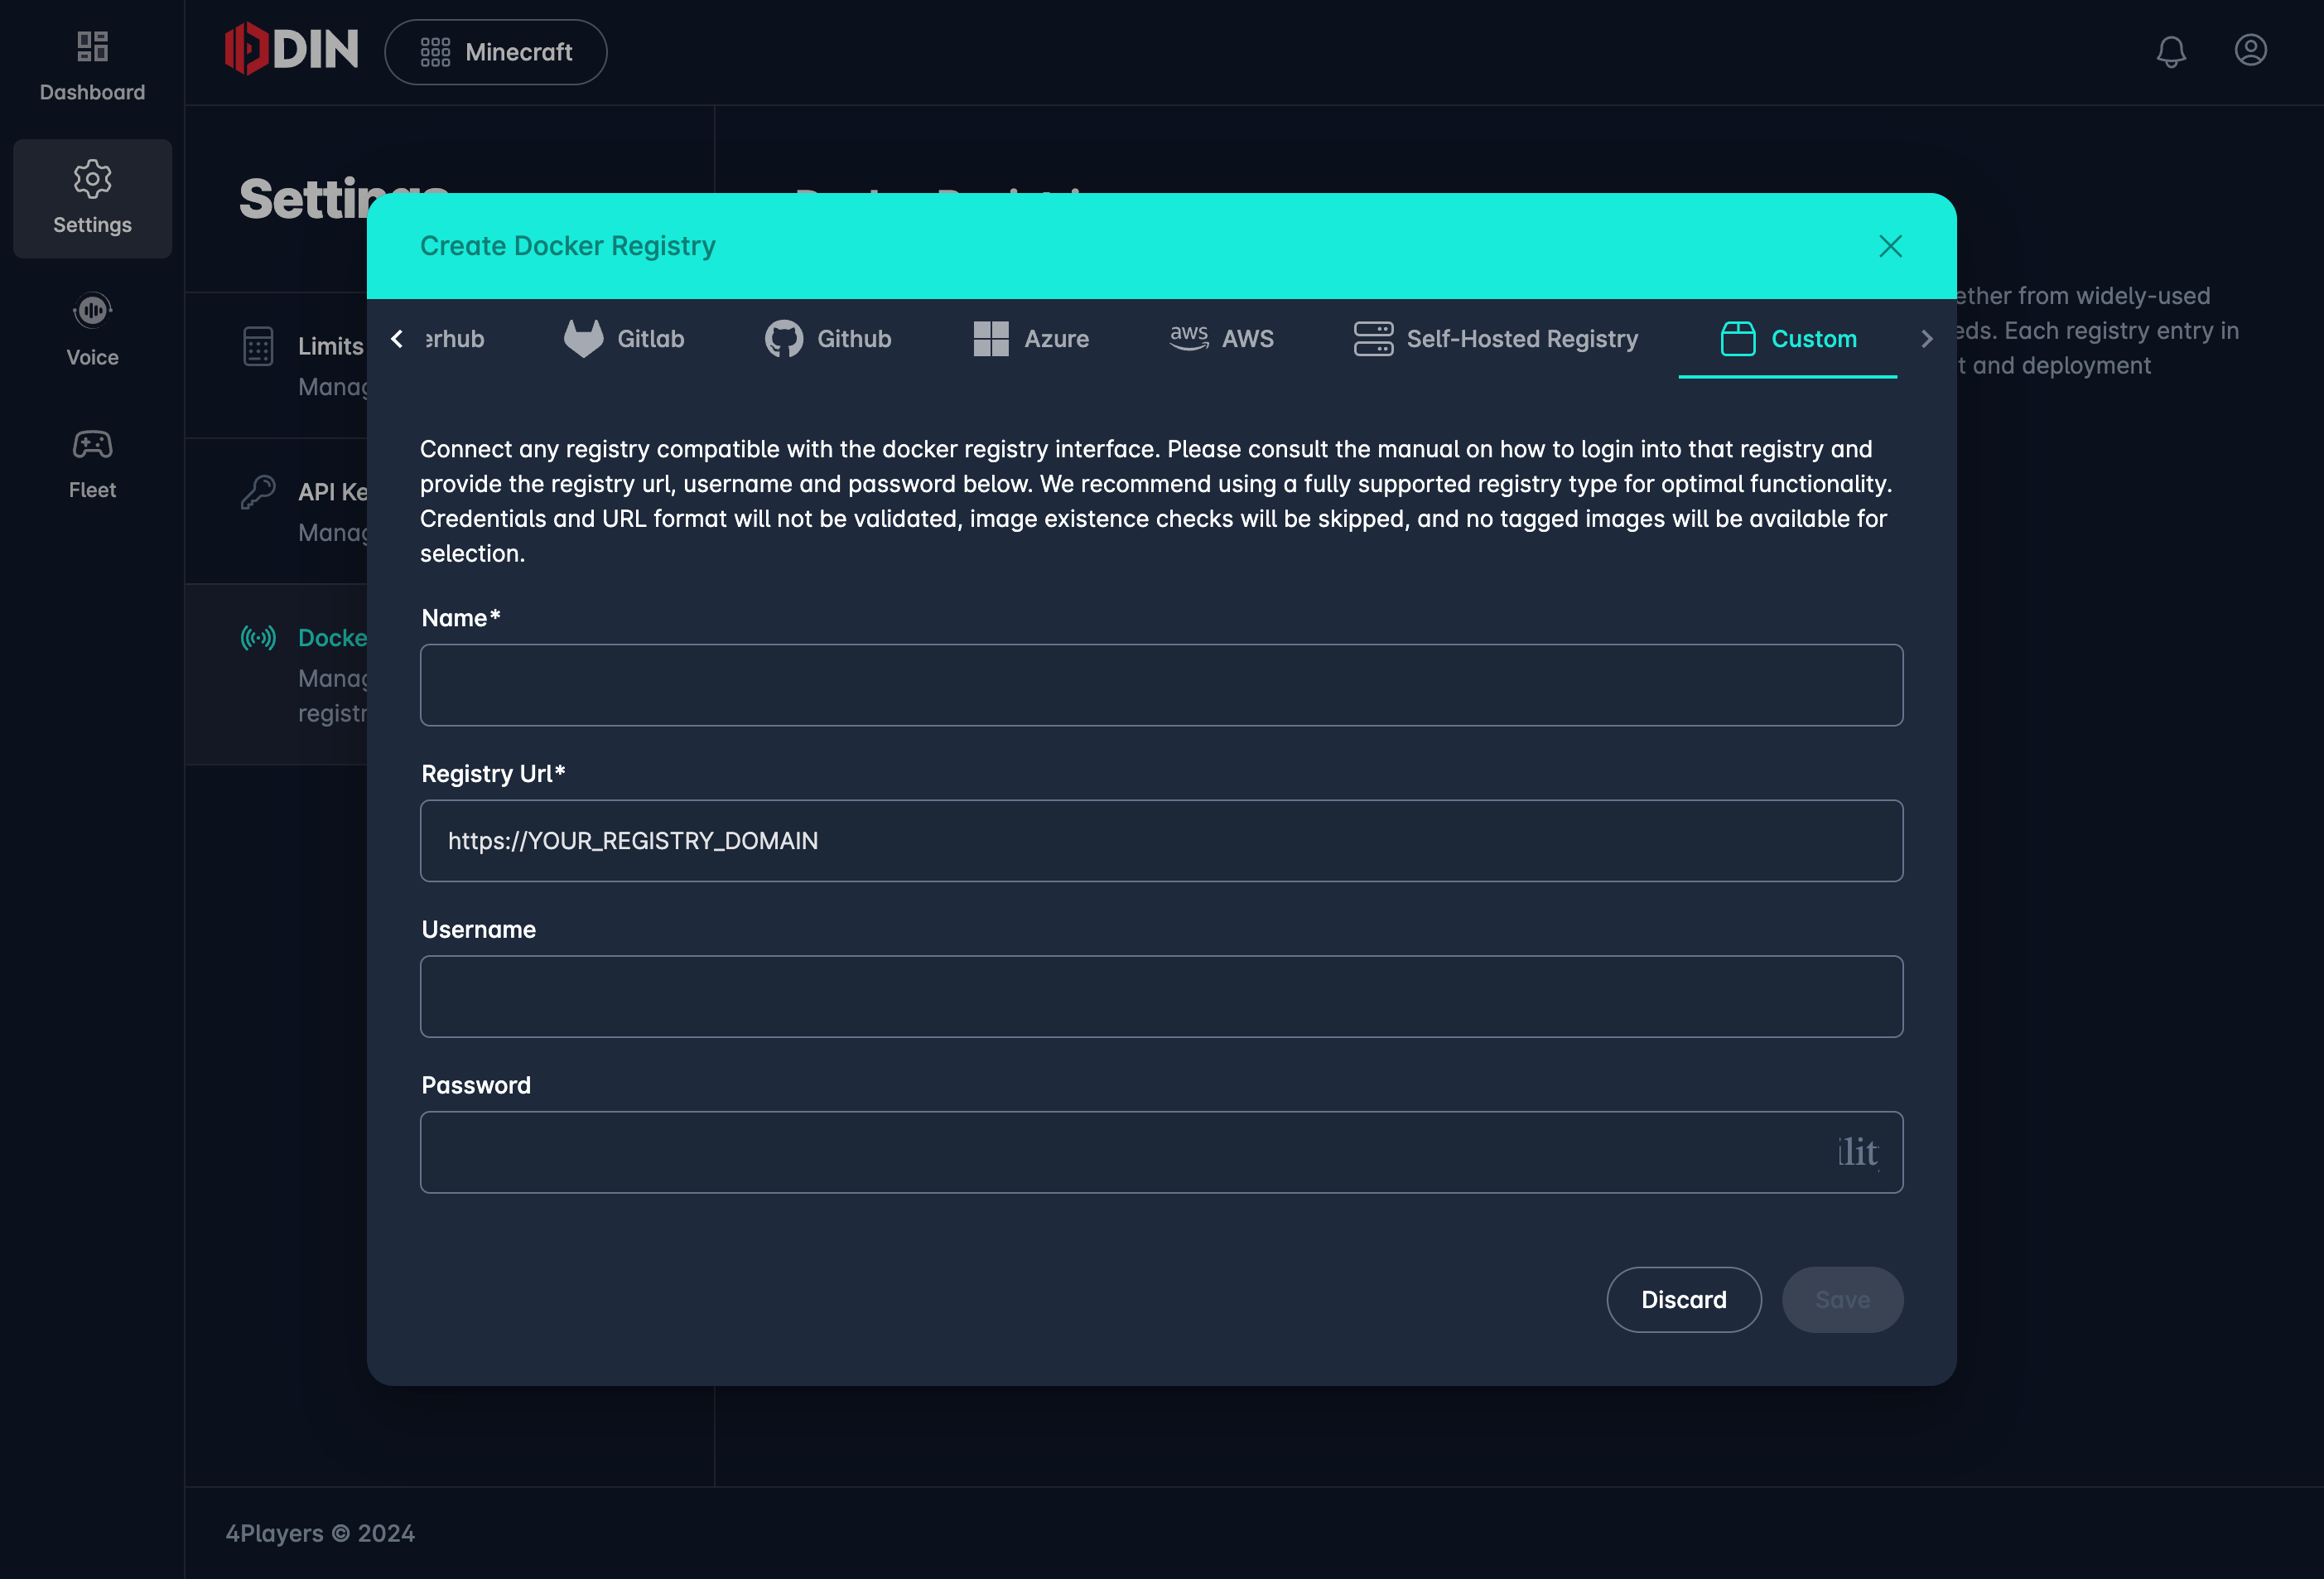
Adding a Custom Docker Registry
To link a Docker-compatible registry using the Custom option, follow these steps:
1. Access the Docker Registries Section
Navigate to “Settings” in the ODIN Fleet dashboard after selecting/creating your app. In Settings, navigate to the “Docker Registries” tab.
2. Add a New Registry
Click the “Add Registry” button and select “Custom” from the options.
3. Provide Required Information

Add Custom Docker Registry
Enter the following details to establish a connection with your Docker-compatible registry:
- Name: Enter a name for this registry connection.
- Registry URL: Provide the URL of the registry (e.g.,
https://YOUR_REGISTRY_DOMAIN). - Username: Enter the username required to access your registry.
- Password: Provide the password for the username above.
Limitations and Warnings
The Custom (Other) registry type is intended as a fallback option when no other options are available. It comes with significant limitations:
- No URL Validation: The provided URL will not be checked for validity or corrected.
- No Image Verification: Image existence checks are skipped, meaning ODIN Fleet will not verify if the images exist in the registry.
- No Image Browsing: Tagged images will not be retrieved, resulting in an empty list of available images for selection.
- Error Handling: If an image cannot be pulled, it will be marked with a status error, but further details may not be provided.
Use Case
This option is best used for registries that ODIN Fleet does not fully support, such as certain third-party or custom-built Docker registries. It provides a basic level of integration by allowing you to use Docker login credentials but lacks the advanced features available for fully supported registries.
4. Save the Configuration
After entering the necessary details, click “Save” to complete the integration.
Please proceed with caution, as the Custom option provides minimal feedback and functionality compared to fully supported registry types.