Create Configs
A server configuration configures your image. Many Docker images are flexible and can be configured with environment variables, externally mounted configuration files, or both. This guide will show you how to create a server configuration for your game or application.
You can have many configuration, for example for different game modes, maps, or other settings like debug and production.
Basic Configuration
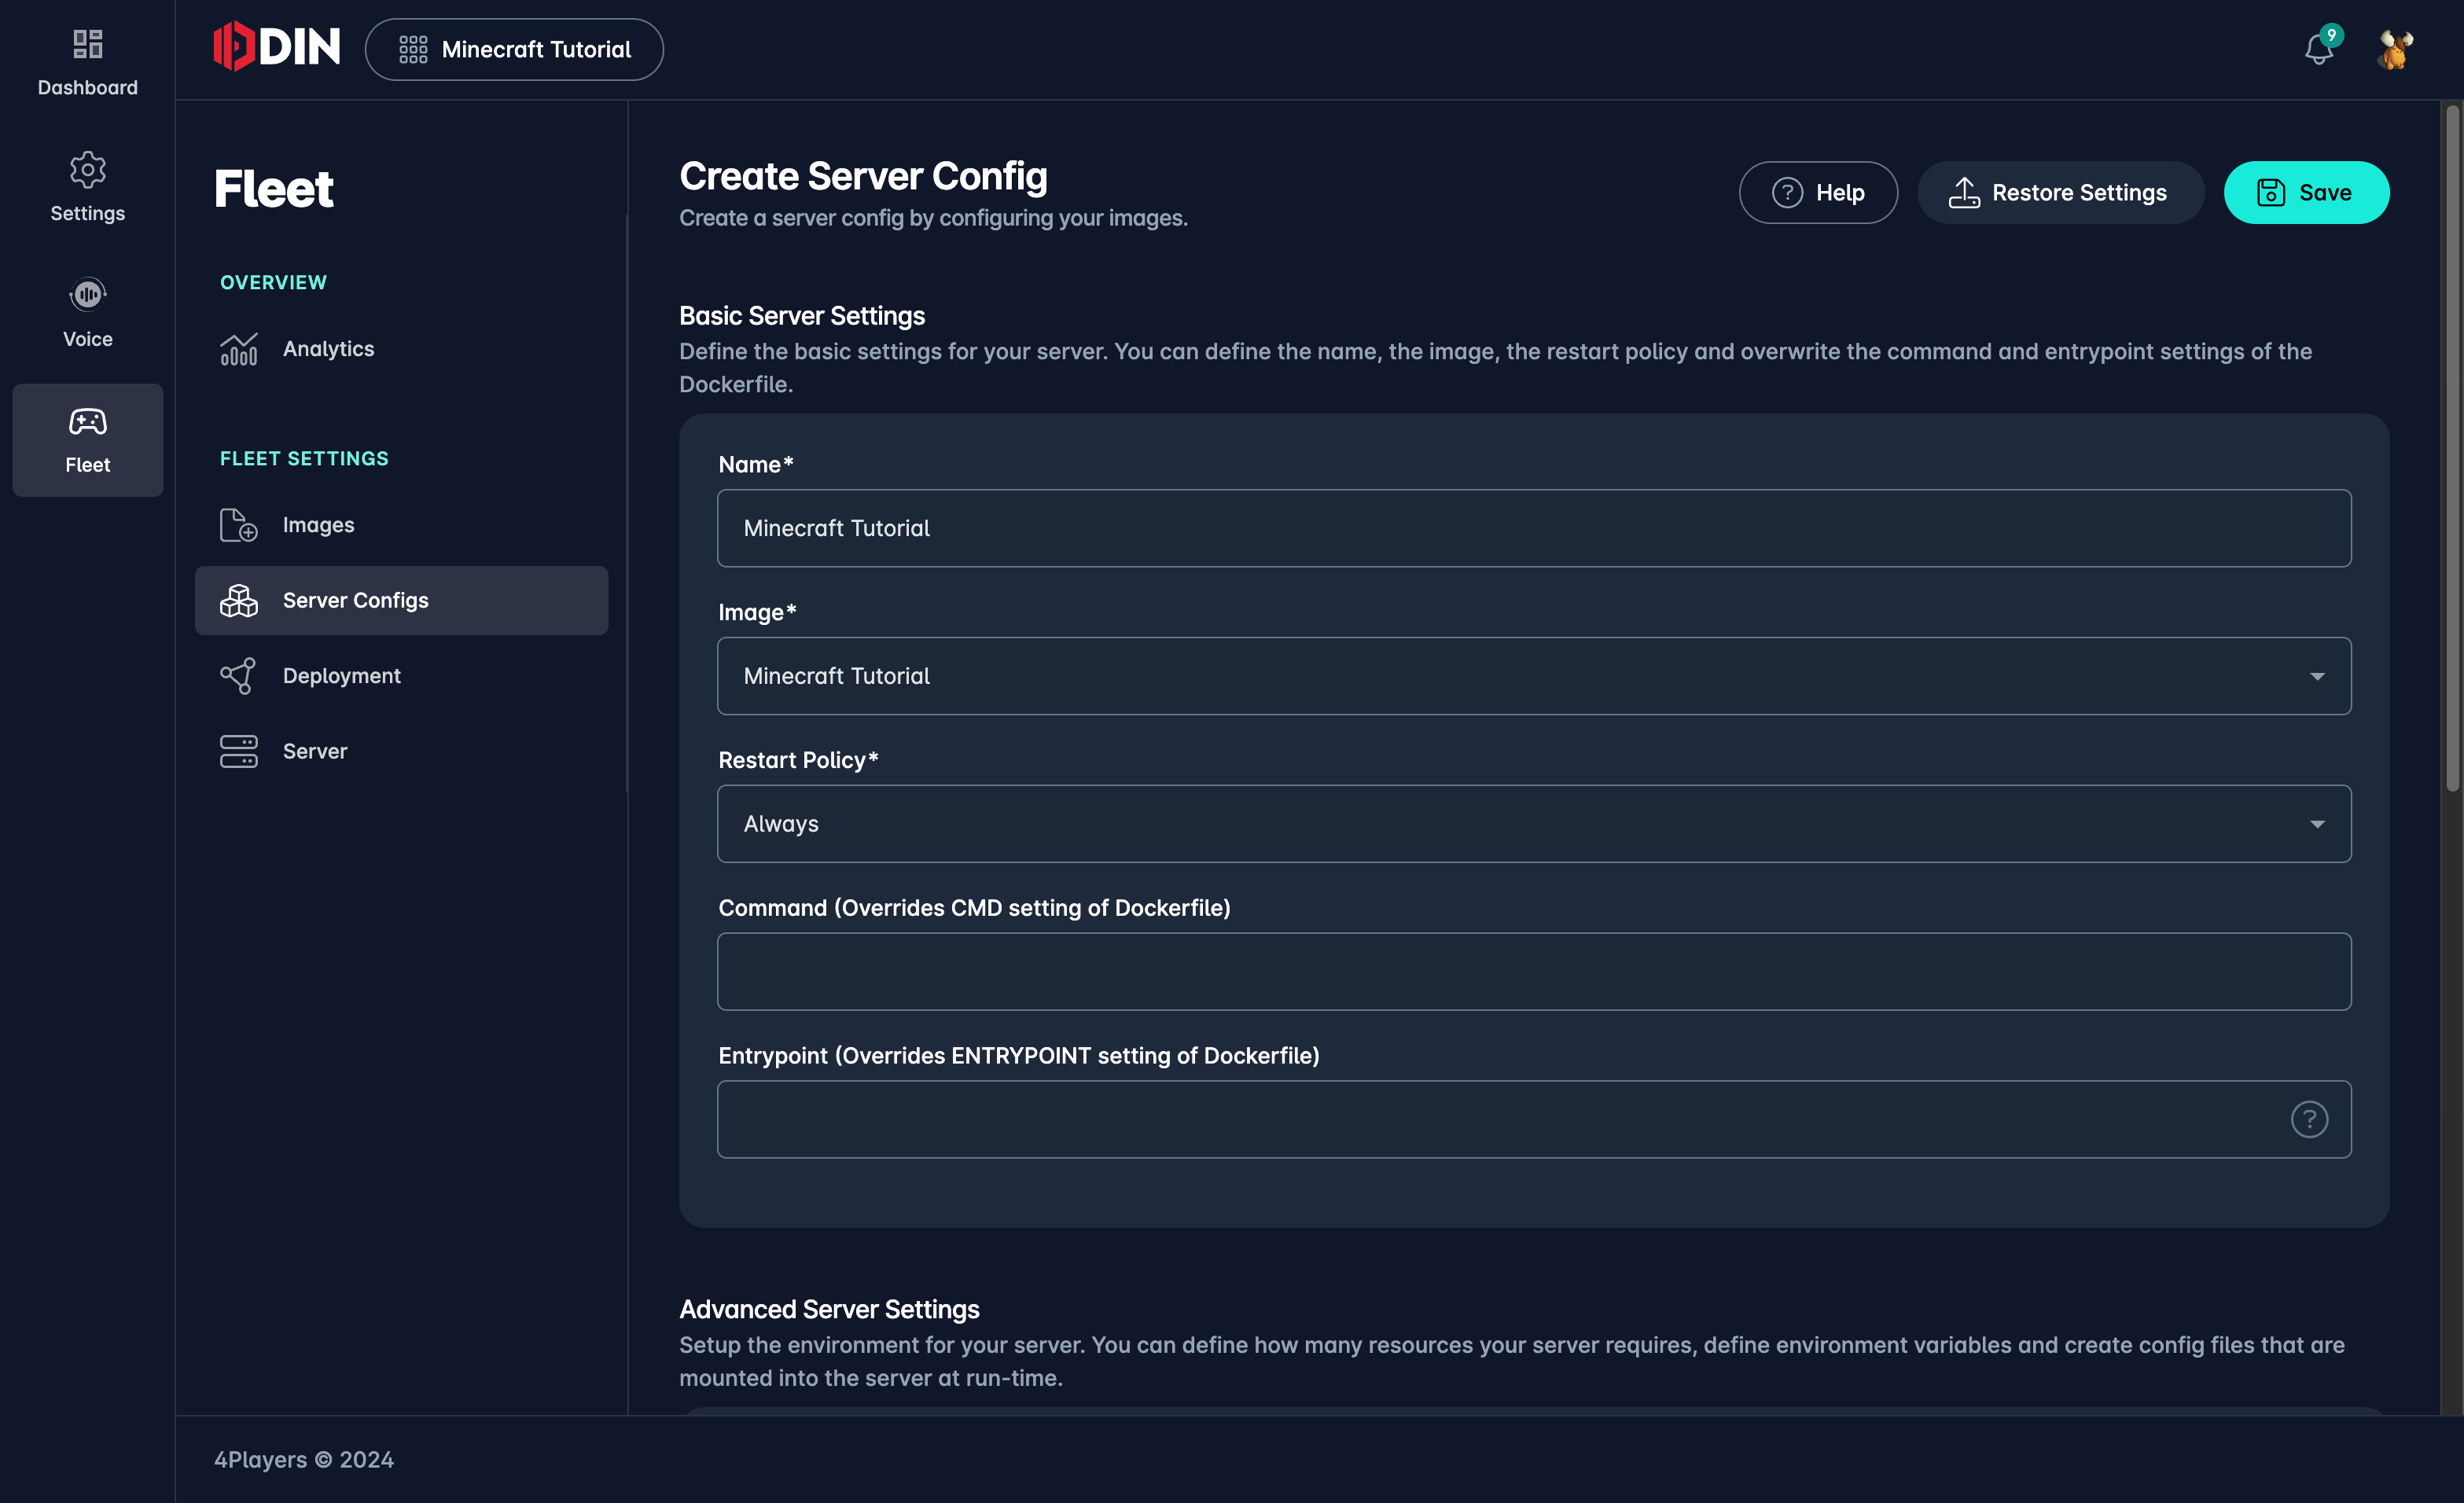
In the first have of the editor you’ll find the basic configuration settings:
- Name: The name of the configuration. This is used to identify the configuration in the list of configurations.
- Image: The Docker image to use for the server. Select the image that will be used to start the server and that you registered before in the Images section. Learn more about images.
- Restart Policy: The restart policy for the server. This policy determines what happens when the server stops.
You can choose between
Never,On Failure,Always. Learn more about restart policies. - Command: Using this setting you can override the default command (
CMD) of the image. This is useful if you want to start the server with different parameters or if you want to use a different entry point. More information about command. - Entrypoint: Using this setting you can override the default entrypoint (
ENTRYPOINT) of the image. This is useful if you want to start the server with different parameters or if you want to use a different entry point. More information about entrypoint.
Advanced Configuration
This section provides a lot of flexibility to configure your server. You can use environment variables, mount volumes, and configure the network settings.
Port Settings
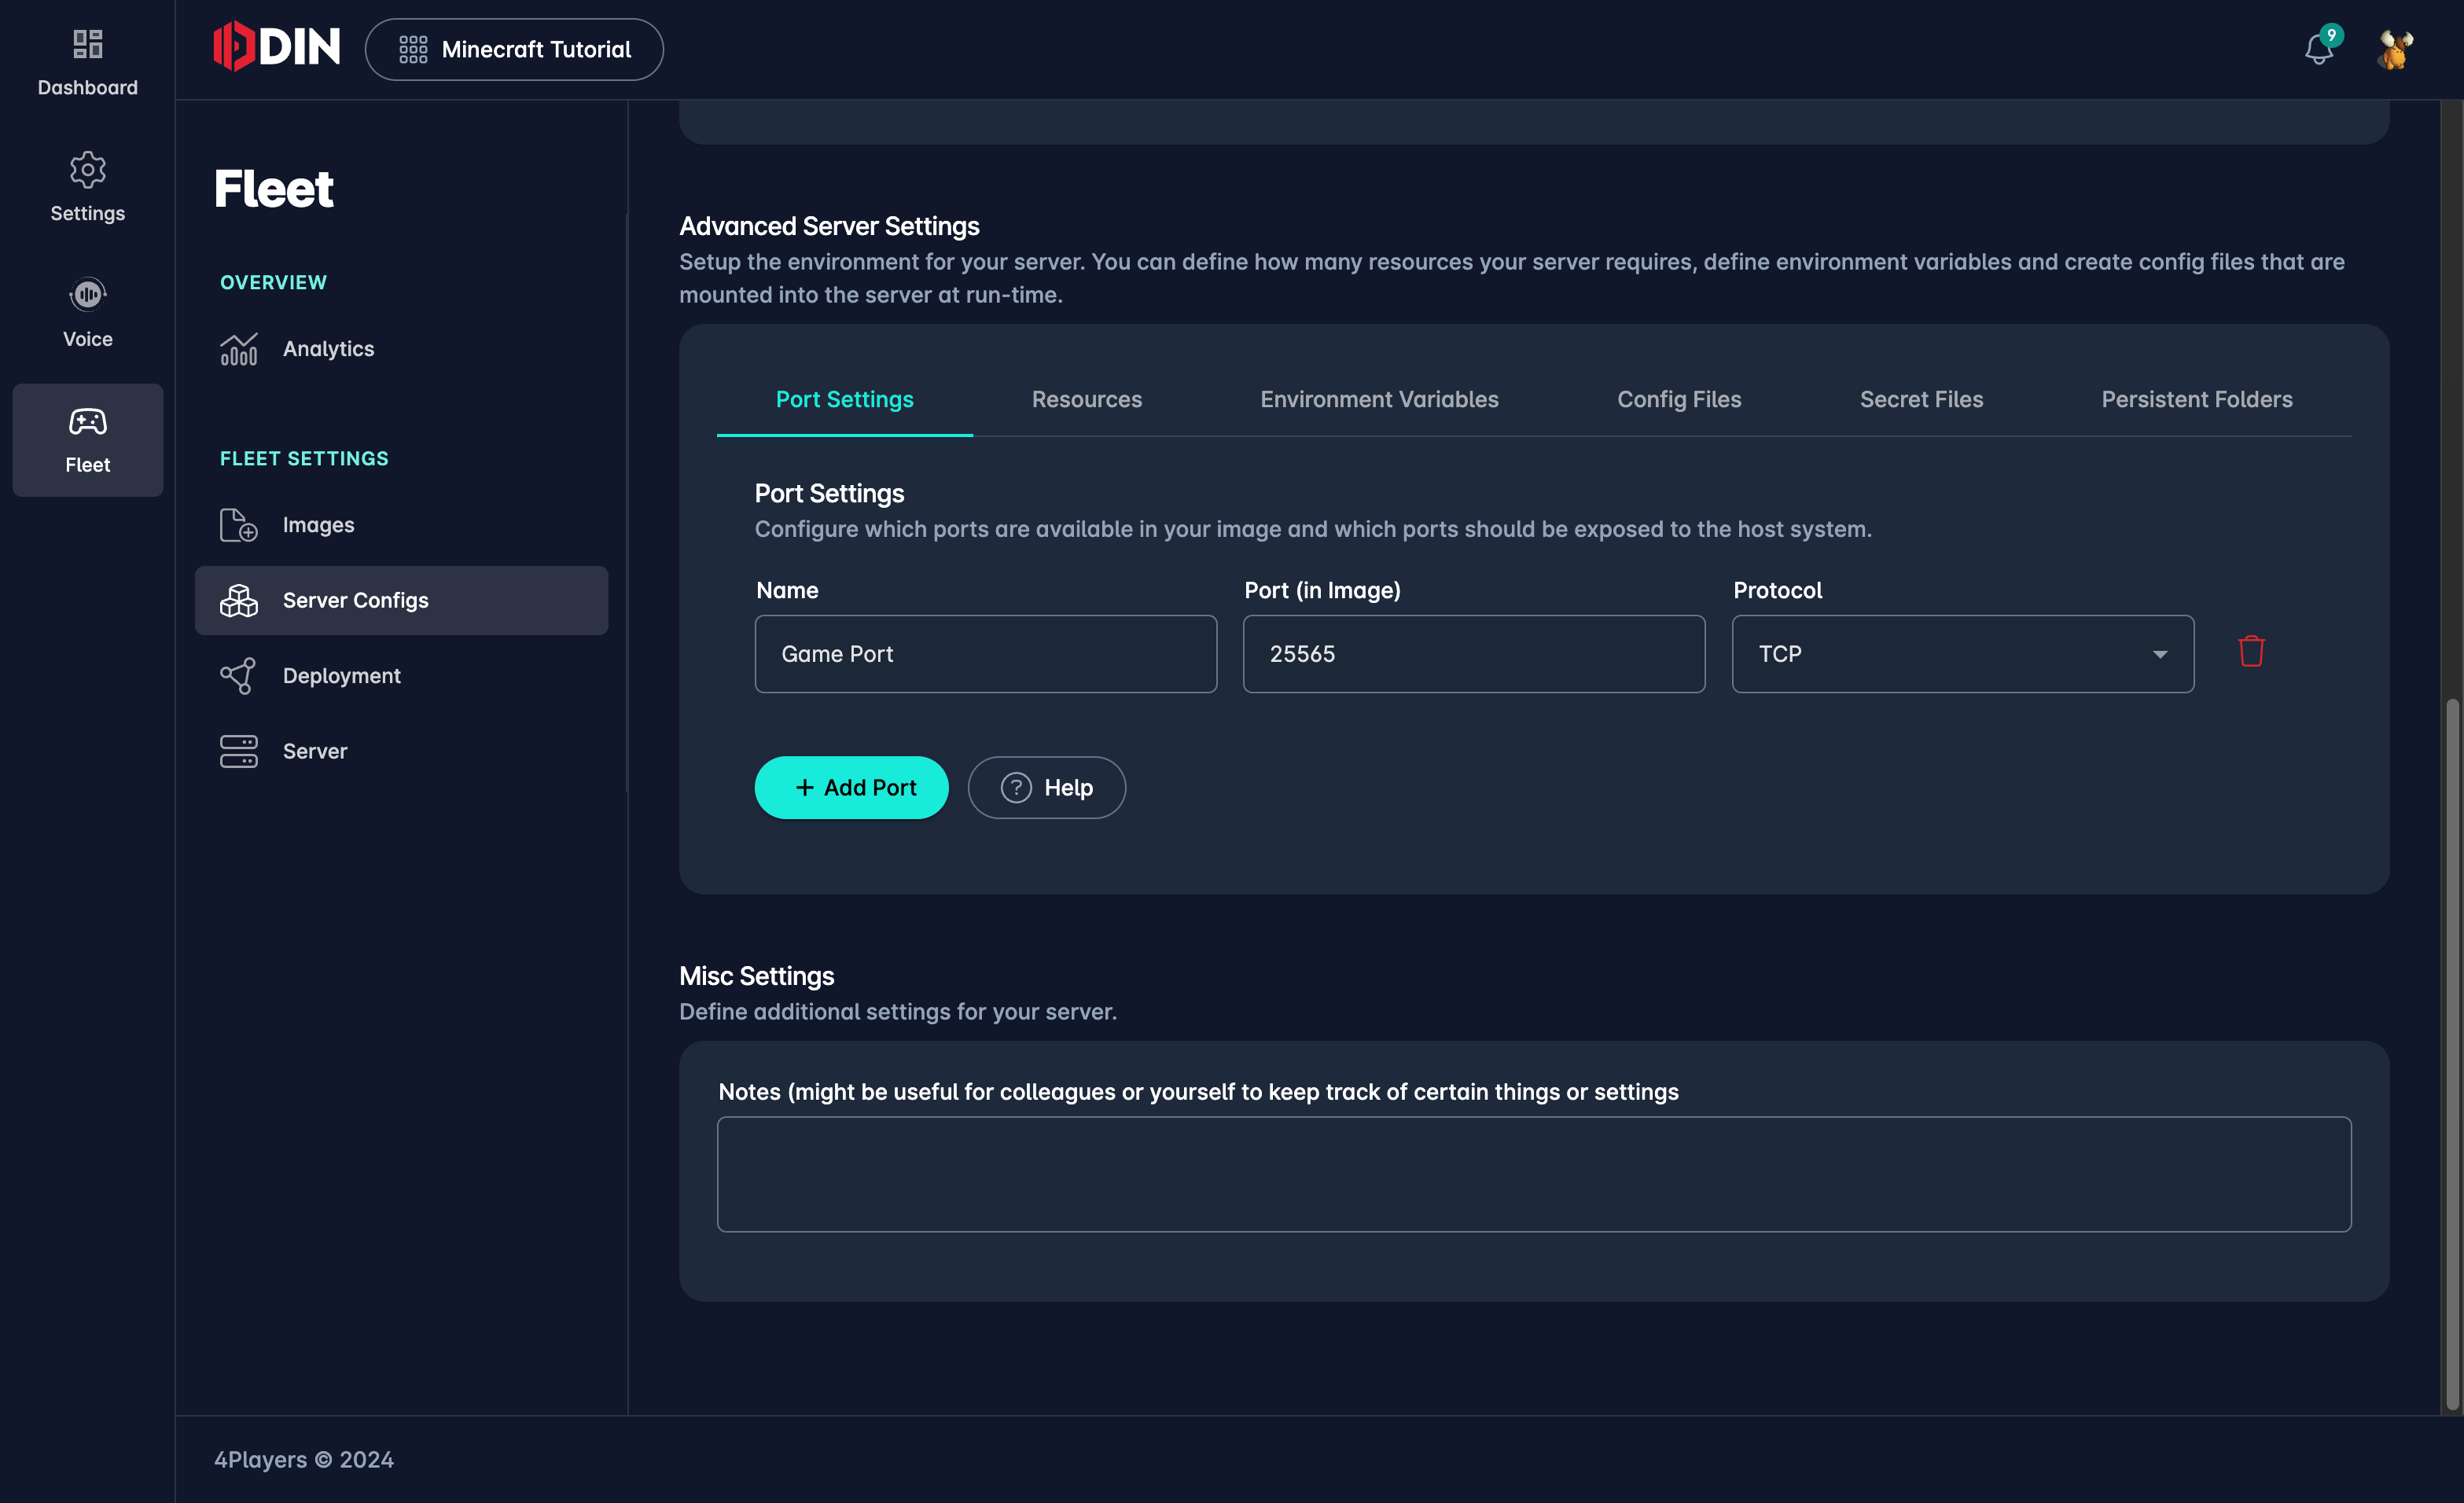
This is a very important setting. Most servers need to expose ports to the outside world so that clients can connect to the server. In this section you can configure the ports that should be exposed by the server.
Click on the Add Port button to add a new port that your server exposes and that should be connected to the hosts network from our backend when the server is started. You can configure the following settings for each port:
- Name: The name of the port. This is used to identify the port in the list of ports
- Port: This is the port number that the server exposes within the container, i.e. if you run a web server in the
container and it listens on port 3000, you would enter
3000here. - Protocol: The protocol of the port. You can choose between
TCPandUDPand both.
Note: It’s important to know is that the port number that you enter here is not necessarily the port number that the server will be accessible from the outside. This is the port number that the server listens on within the container. Our backend finds a free port on the host and maps the container port to the host port. If you need to know the port number that the server is accessible from the outside you can use a Dynamic Environment Variable in the Environment Variables section.
If you are not familiar with ports and the basic concept of exposing ports and dyn, you can learn more about ports here.
Resources
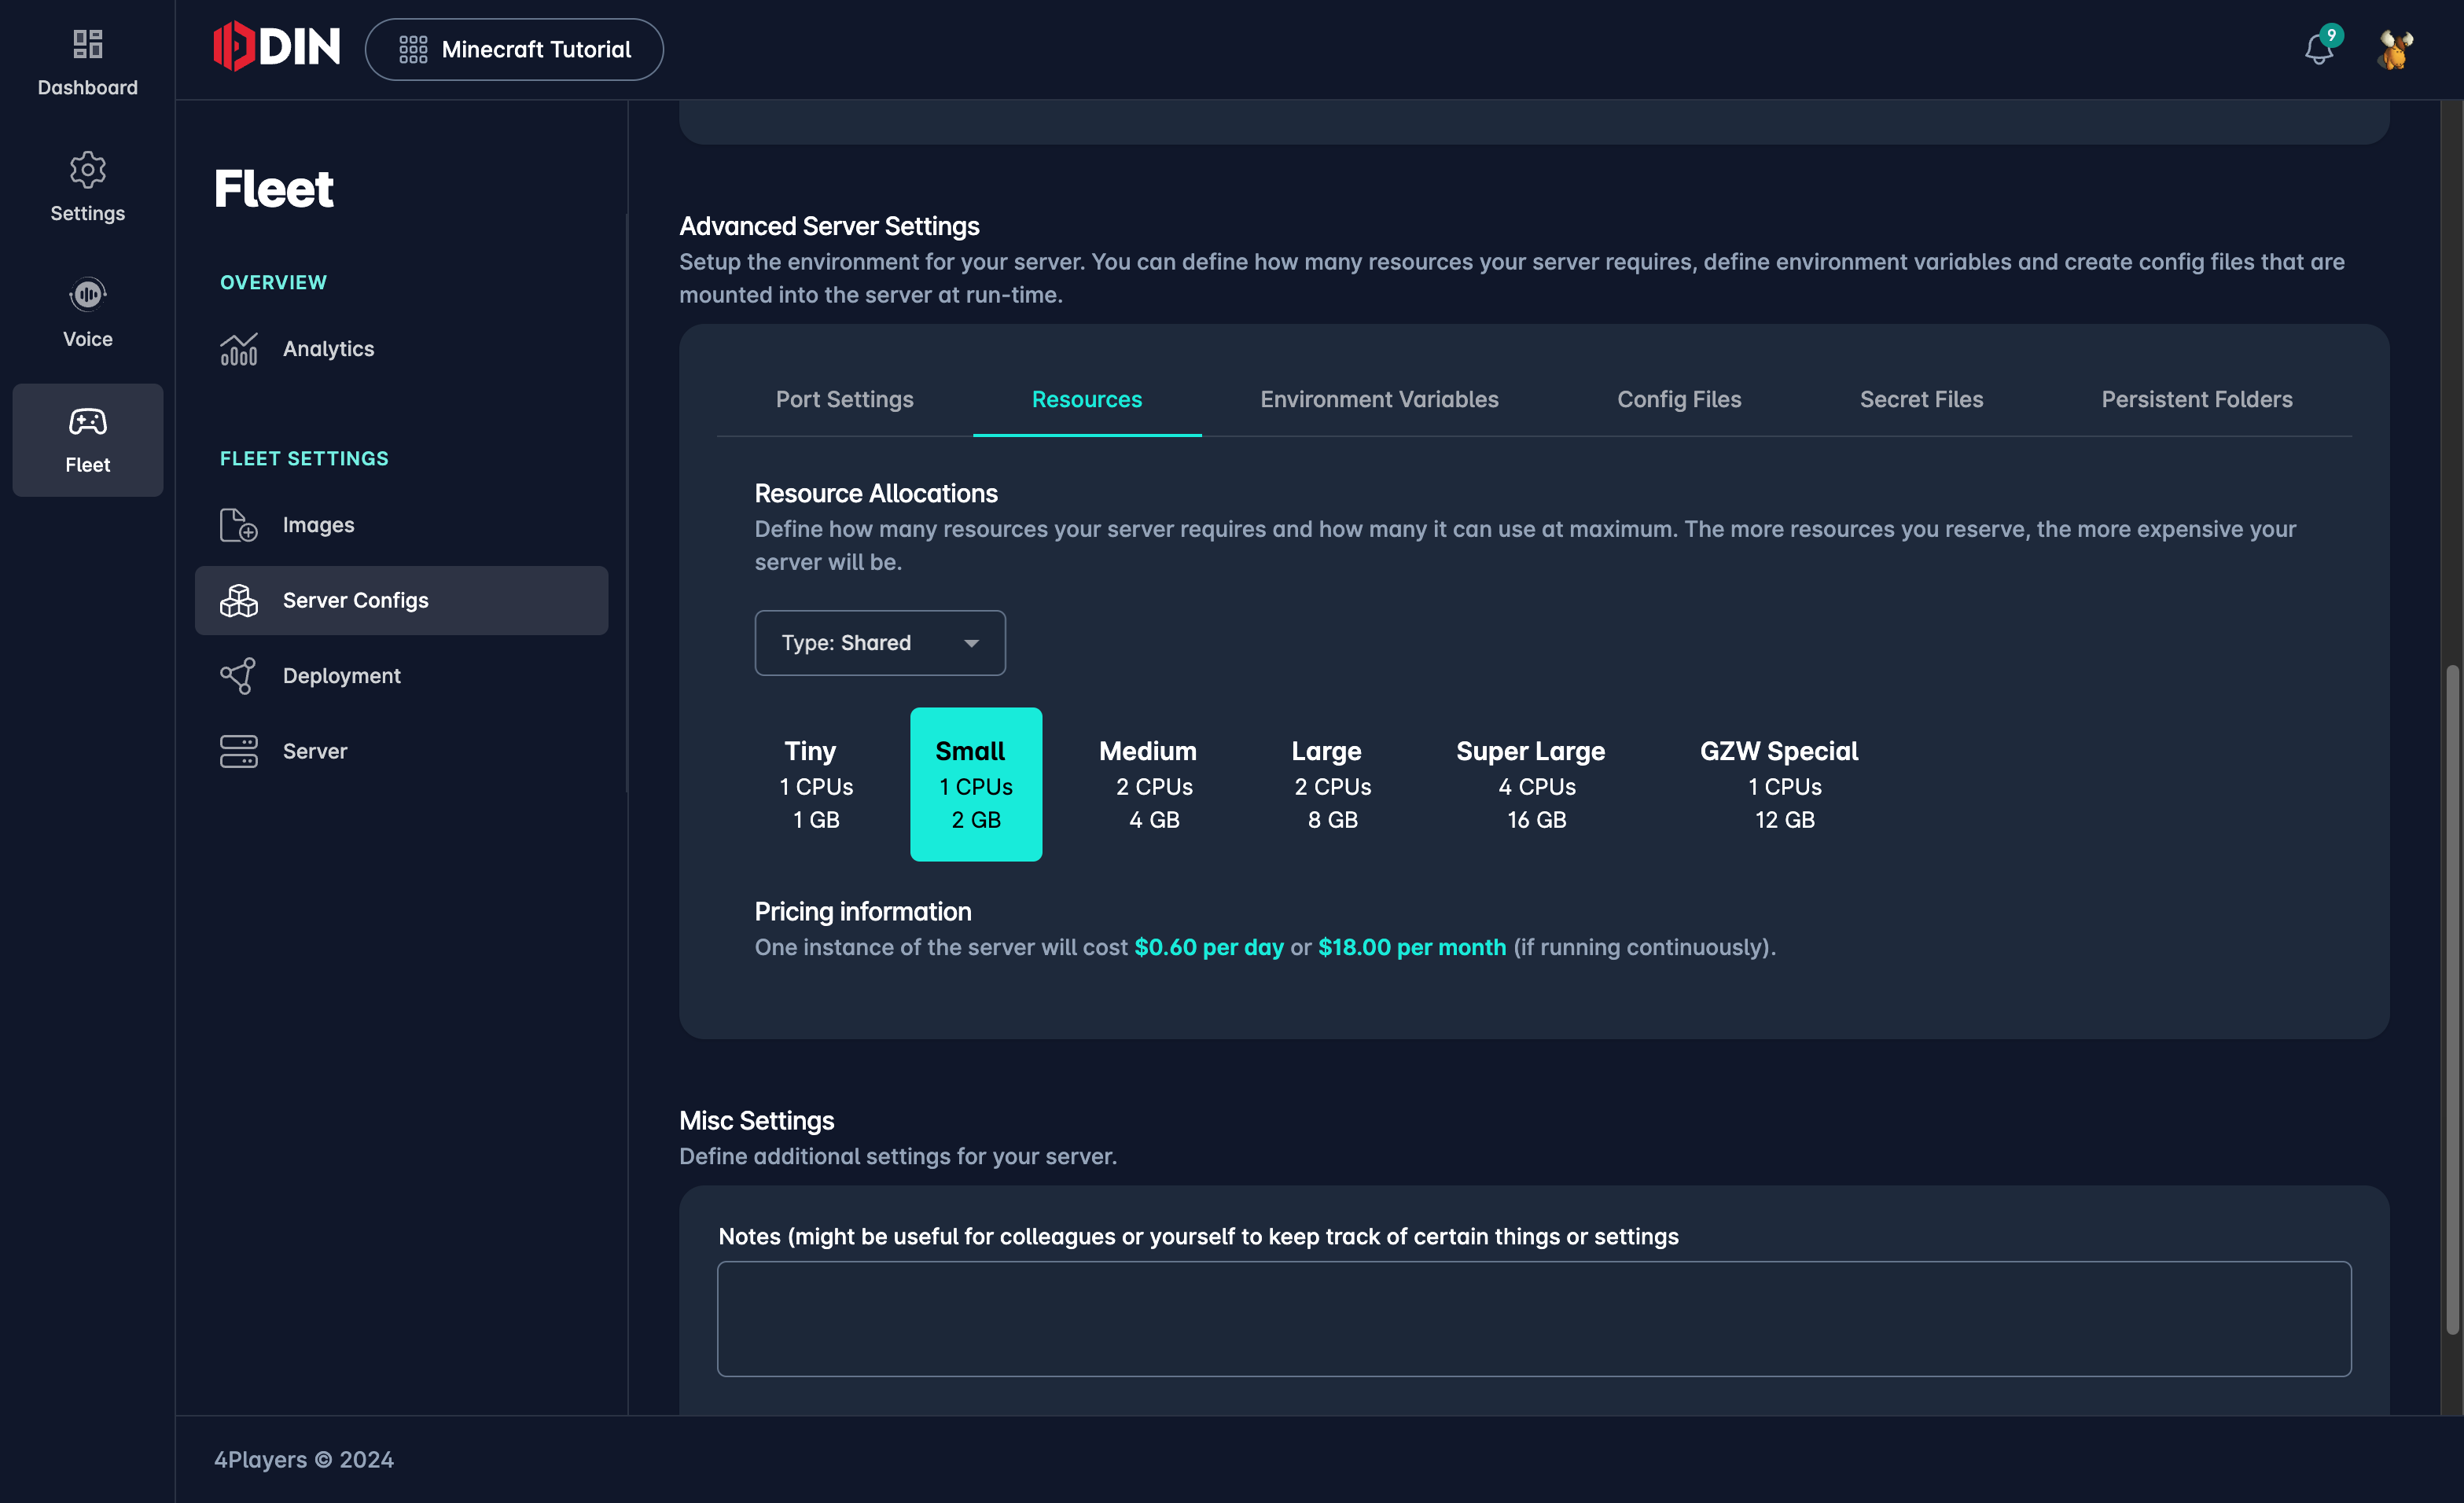
In this section you can configure the resources that the server needs to run and can use as a limit. The settings available are subject to your subscription plan. You can configure the following settings:
- CPU: The amount of CPU cores that the server at least requires to run and that it can use at most.
- Memory: Set the memory reservation and limit for the server. A limit is useful to prevent the server from using too much memory and to prevent the server from being killed by the system.
Environment Variables
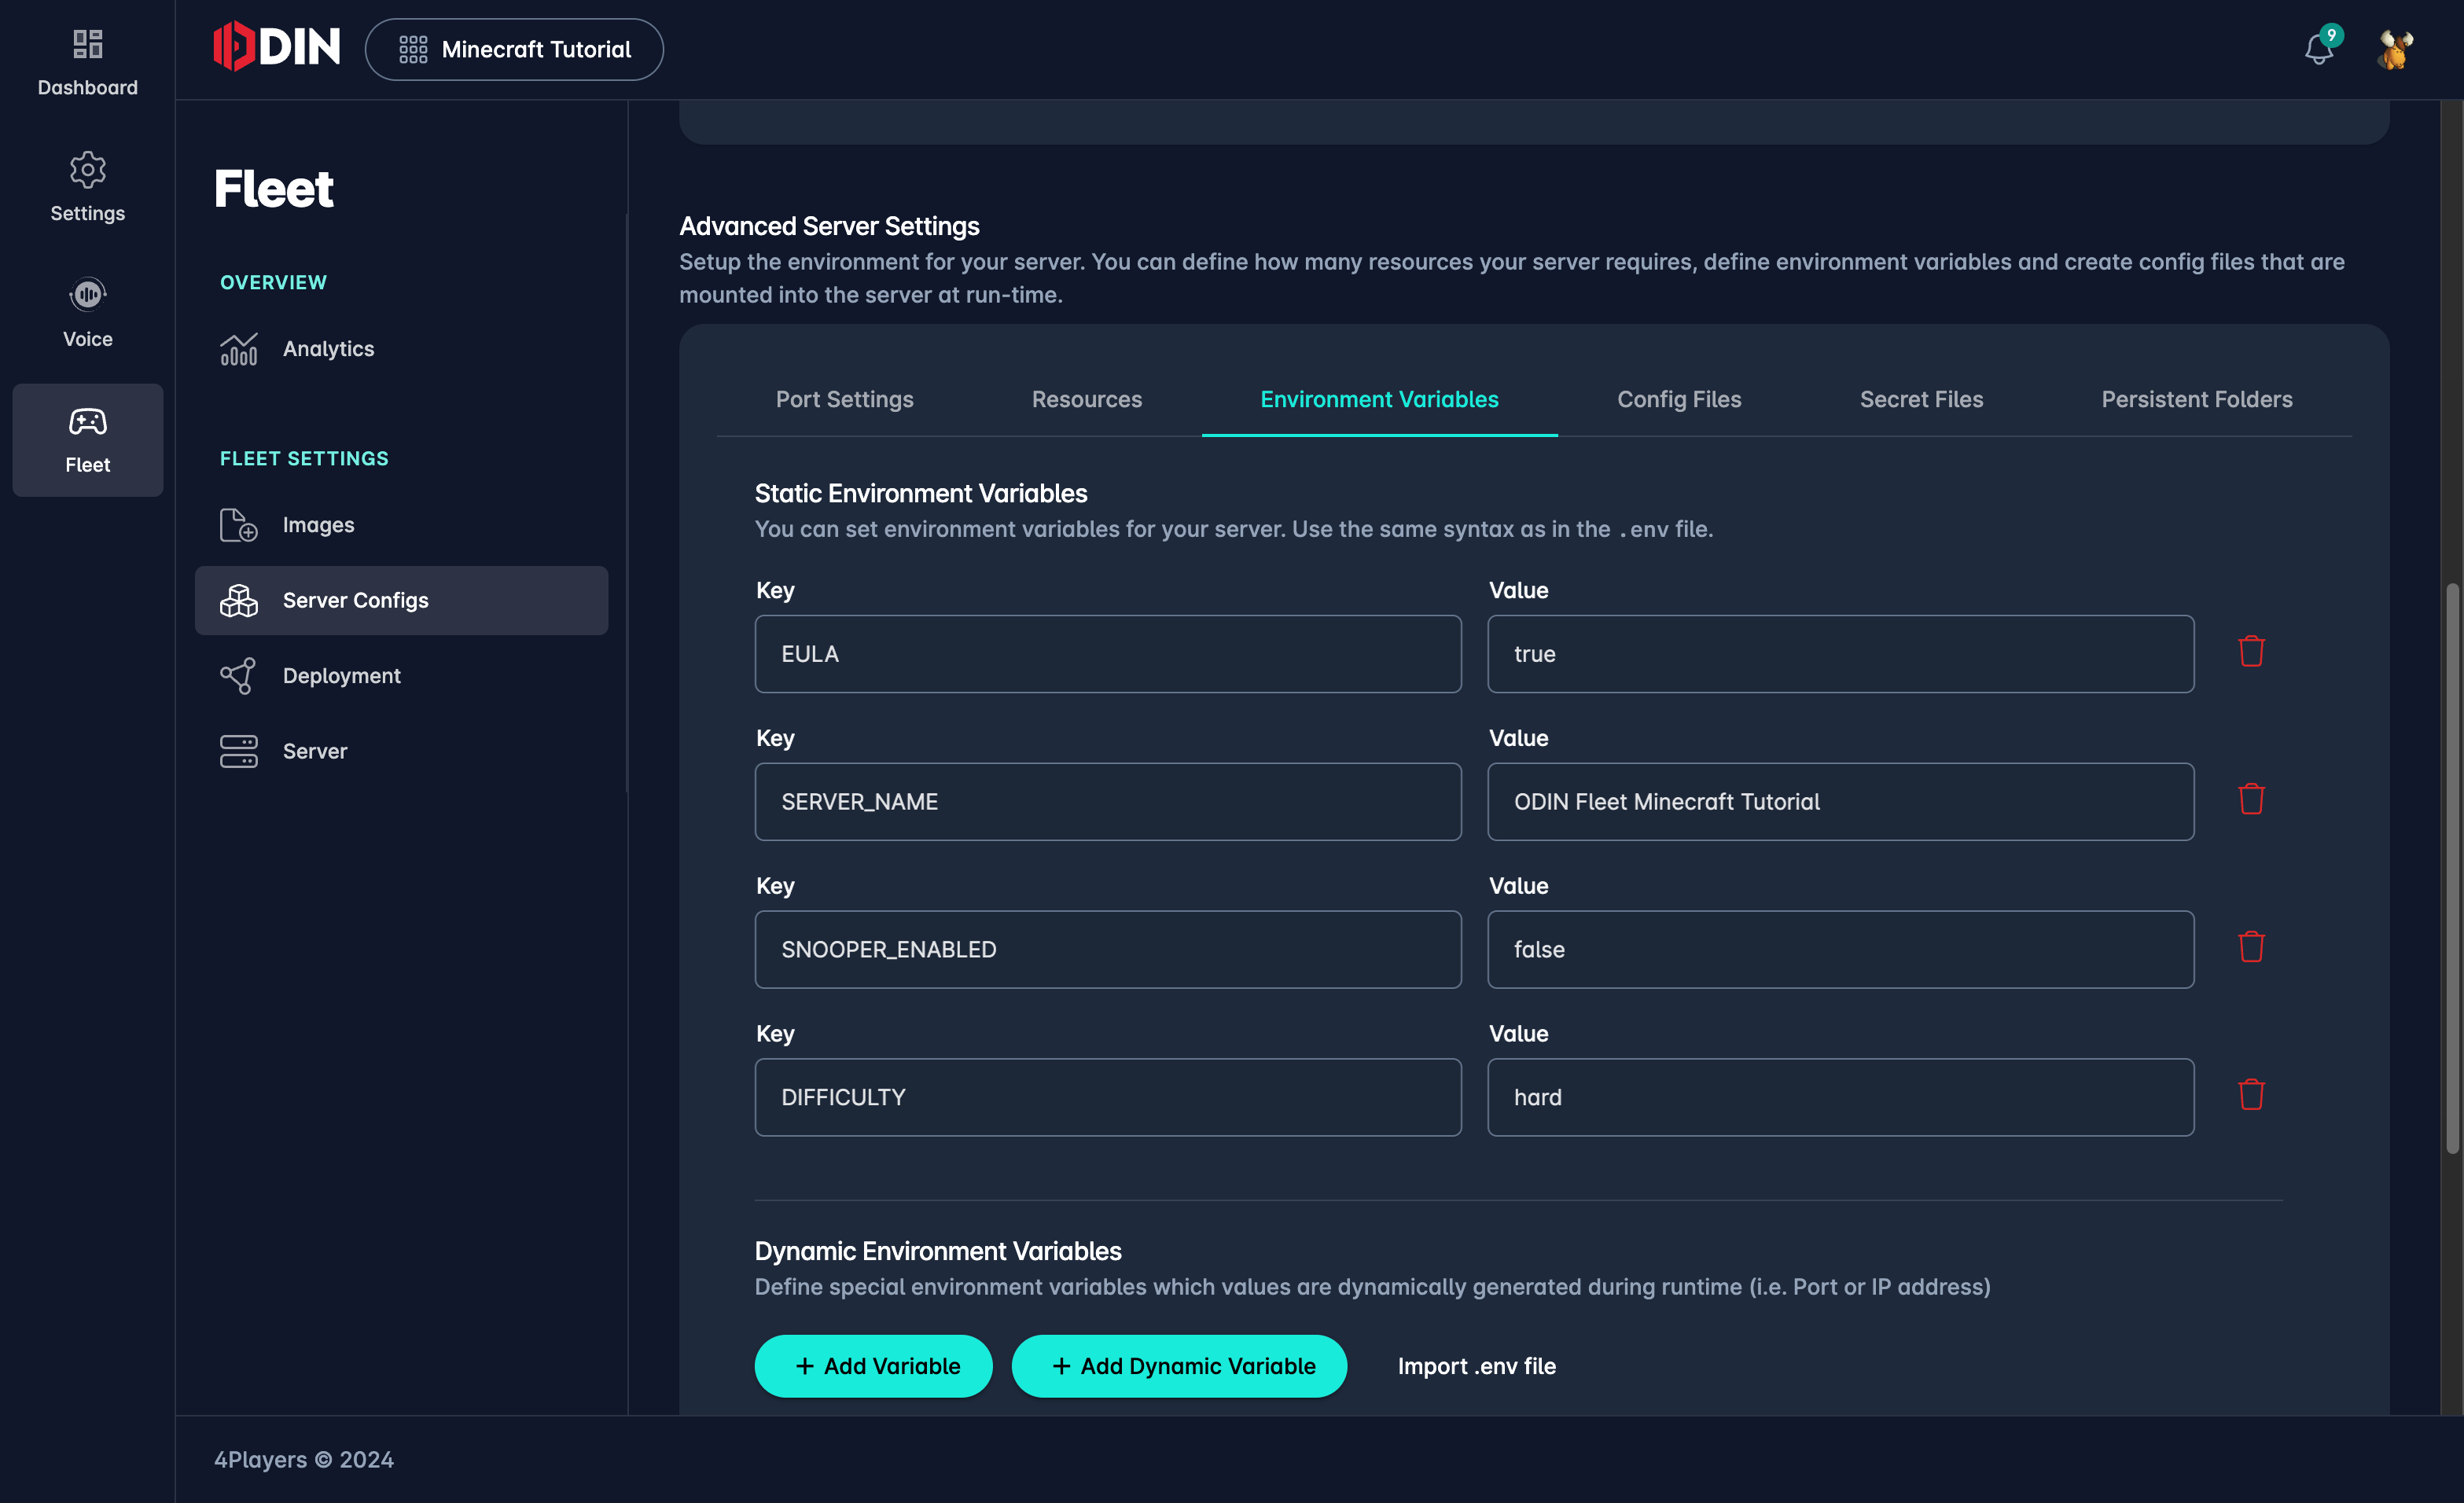
Environment variables are a powerful way to configure your server. We support three types of environment variables:
- Static: These are static environment variables that are always set with the value you set in this configuration
when the server is started. You can use these to set configuration values that are always the same, for example the server’s name, the game mode, or the map. - System: These are environment variables that are set by the system. The actual value is dynamically set by the system when the server is started.
- Port: These are environment variables that are set by the system at runtime and contain the actual port number that the server is accessible from the outside.
Static Environment Variables
Click on the Add Variable button to add a new static environment variable. You set the name/key of the variable and the value.
System Environment Variables
Click on the Add Dynamic Variable button to add a new dynamic environment variable. Give it a name/key and select
System as the type. Under Value you can select from a list of system environment variables that are available, for
example the actual ip address of the host.
Available System Environment Variables:
IP-Address: The actual IP address of the host that the server is running on.Instance-ID: The index as a number of the instance of the server. This is useful if you run multiple instances of the same server configuration and allows you to differentiate between the instances. I.e. in your Entrypoint script you could adjust the server name based on the instance id.
Port Environment Variables
Click on the Add Dynamic Variable button to add a new dynamic environment variable. Give it a name/key and select
Port Mapping as the type. Under Value you can select from a list of ports that are available and that you have
configured previously in the Port Settings section.
What happens is that when the server starts our backend iterates over all the ports that you have configured, finds a free port on the host, and maps the container port to the host port. Then this port is set as an environment variable with the name that you have configured here.
Config Files
In this section you can mount configuration files into the server. This is another way to configure your server along with environment variables.
Click on the Add Config File button to add a new configuration file. You can configure the following settings for each configuration file:
- Name: The name of the configuration file. This is used to identify the configuration file in the list of configuration files.
- Path in Container: The file path and name of the configuration file within the container. This is the path that
the server expects the configuration file to be at. For example, if you want to mount a configuration file into the
container at
/etc/mygame/config.iniyou would enter/etc/mygame/config.inihere. - Content: The content of the configuration file. You can enter the content of the configuration file here.
Persistent Folders
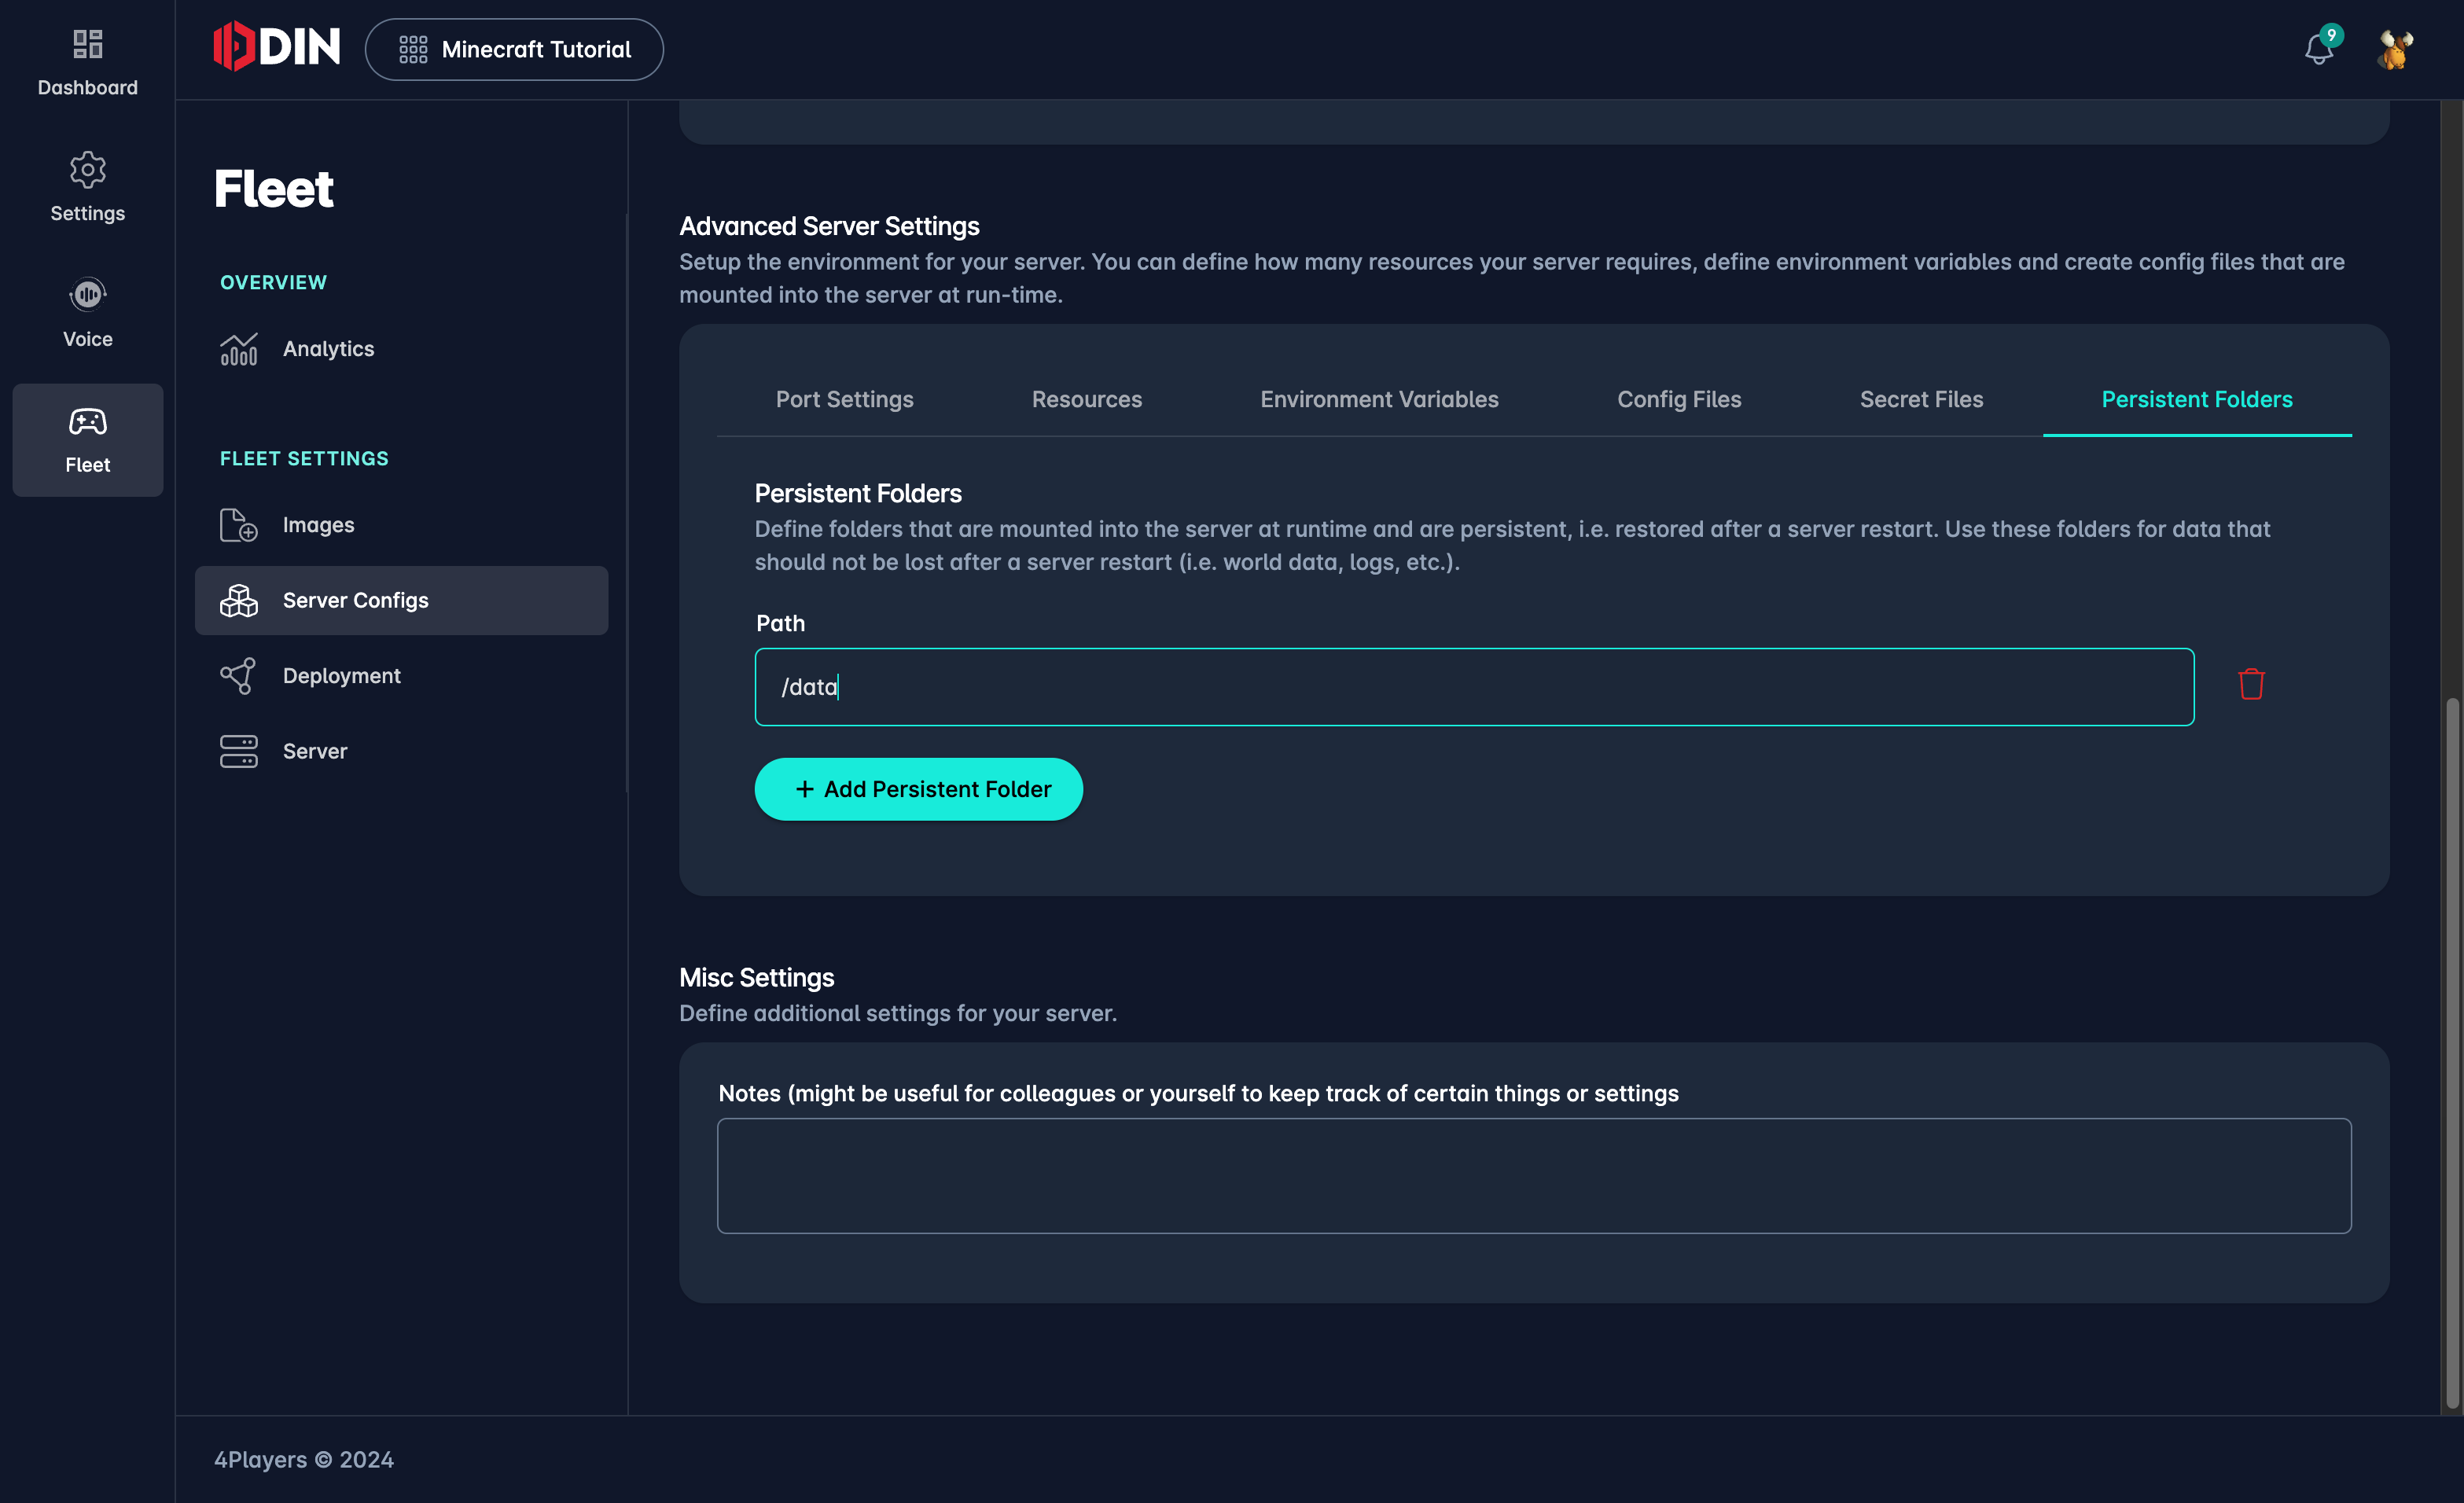
Files written by the server are lost when the server stops. If you want to persist files between server restarts you can setup folders that will be backed up and restored when the server restarts. Examples for this are databases or log files.
Click on the Add Folder button to add a new folder that should be persisted. You can configure the following settings for each folder:
- Path in Container: The path of the folder within the container. This is the path that the server expects the
folder
to be at. For example, if you want to persist the folder
/var/log/mygameyou would enter/var/log/mygamehere.
Misc Settings
In this section you can configure the following settings:
- Notes: You can enter notes for the configuration here. This is useful to document the configuration and to give other users of the configuration an idea of what the configuration is for and how to use it.
Commands
In a Dockerfile, the CMD instruction specifies the default command that should be executed when a container starts.
However, you may want to override this default command for various reasons, such as customizing the behavior of the
container or specifying different start-up parameters. This can be done using the Command setting.
Using the Command Setting
The Command setting allows you to override the default command (CMD) specified in the Dockerfile when you run the
container. This is useful if you need to run a different command or use different arguments than those specified in the
Dockerfile.
Example Usage
For example, you may have a Docker image designed to run a web server with a default command of gameserver.exe.
However, in some cases, you might want to start the server in a different mode or run a different script altogether. You
can specify this alternative command using the Command setting.
Configuring the Command
To set the Command for your server, follow these steps:
Navigate to the Basic Configuration section: In the server configuration editor, locate the Command setting in the Basic Configuration section.
Specify the Desired Command: Enter the command you want to run when the container starts. This command will override the default
CMDspecified in the Dockerfile.Save Your Configuration: After specifying the command, ensure you save your configuration to apply the changes.
Example Scenarios
Running in Development Mode: If you need to start your server in development mode, you might override the default command with something like
gameserver.exe --debug=false.Running a Different Script: If you need to run a different script for a specific task, you might specify
sh run-server.shto execute a test script instead of the main application.
Notes
Combination with Entrypoint: If your Dockerfile also specifies an
ENTRYPOINT, the command you specify here will be passed as arguments to theENTRYPOINTcommand. For example, if theENTRYPOINTis set to["gameserver"]and you set the command to--debug=false, the container will executegameserver.exe --debug=false.Flexibility: Using the Command setting provides flexibility without the need to modify the Dockerfile, allowing you to adjust the container behavior based on the environment or specific requirements.
By configuring the Command setting appropriately, you can tailor the behavior of your server containers to meet your specific needs and operational requirements.
Entrypoint
In a Dockerfile, you use the ENTRYPOINT instruction to specify the command that should be executed when the container
is
started. The ENTRYPOINT instruction can be specified with or without an array. If you specify the ENTRYPOINT
instruction
with an array, the first element of the array is the command and the rest of the elements are the arguments to the
command.
With this setting you can override the ENTRYPOINT instruction when you run the container. This allows you to customize
the behavior of the container without modifying the Dockerfile depending on the environment.
Example usage
For example, you could have two shell scripts that do upfront work before running the main command. One script could be
used for development and the other for production. You can then use the ENTRYPOINT instruction to specify which
script to run.
Restart Policy
The Restart Policy option allows you to define the behavior of your server when it stops or crashes. This setting is crucial for maintaining high availability and reliability of your services. You can choose from the following policies:
Never: The server will not restart automatically when it stops or crashes. This policy is useful if you want to manually manage server restarts or if you are performing debugging and need to control when the server restarts.
On Failure: The server will restart only if it exits with a non-zero exit code, which typically indicates an error. This policy is useful for ensuring that your server attempts to recover from unexpected crashes while not continuously restarting if the server is intentionally stopped.
Always: The server will always restart regardless of the exit status. This policy is ideal for production environments where continuous operation is critical, ensuring that your server attempts to restart even after intentional stops or failures.
Configuring Restart Policy
To set the Restart Policy for your server, follow these steps:
Navigate to the Basic Configuration section: In the server configuration editor, locate the Restart Policy setting in the Basic Configuration section.
Select the Desired Policy: Choose between
Never,On Failure, orAlwaysbased on your needs. Each option will ensure the server behaves according to the selected policy when it stops.Save Your Configuration: After selecting the appropriate restart policy, ensure you save your configuration to apply the changes.
Example Scenarios
Development Environment: If you are in a development environment and need to control server restarts manually for testing purposes, select the
Neverpolicy.Production Environment: For production servers where uptime is critical, the
Alwayspolicy ensures your server remains operational by automatically restarting after any stop.Error Recovery: If your server should only restart after encountering errors and not after a graceful stop, select the
On Failurepolicy.
Understanding and configuring the Restart Policy appropriately can significantly impact the reliability and management of your server fleet. Make sure to choose a policy that aligns with your operational requirements and environment.