Getting started
ODIN Fleet is designed to simplify the process of deploying and managing game servers across our global network. With ODIN Fleet, you can easily deploy and manage game servers for your games, regardless of the game engine or platform you are using. ODIN Fleet is optimized for real-time, stateful game server hosting, making it ideal for world-building games. It is also versatile enough to handle short-term, stateless server tasks typical in match-based games.
In most cases you’ll have your own gameserver, but for this example we’ll use an existing Minecraft Docker image to deploy a Minecraft server.
Background
You have two options to deploy a game server with ODIN Fleet:
- Docker Image: You can create your own Docker image and deploy it with ODIN Fleet.
- Steamworks: You can deploy a game server using Steamworks.
In this case, we’ll use the excellent itzg/minecraft-server Docker image to deploy a Minecraft server.
Let’s get started…
Sign in to the 4Players dashboard
Our dashboard is an easy way of managing your game servers and applications. It’s also a good way to see which items are created by the examples and how they are structured. Navigate to the dashboard at https://console.4players.io. All you need is a 4Players account which you can also create on the dashboard.
Once you have signed in, you need to create an application. An application is a space within ODIN Fleet that has its own resource limits and configurations. You can create multiple applications to separate different environments or projects.
Create an application
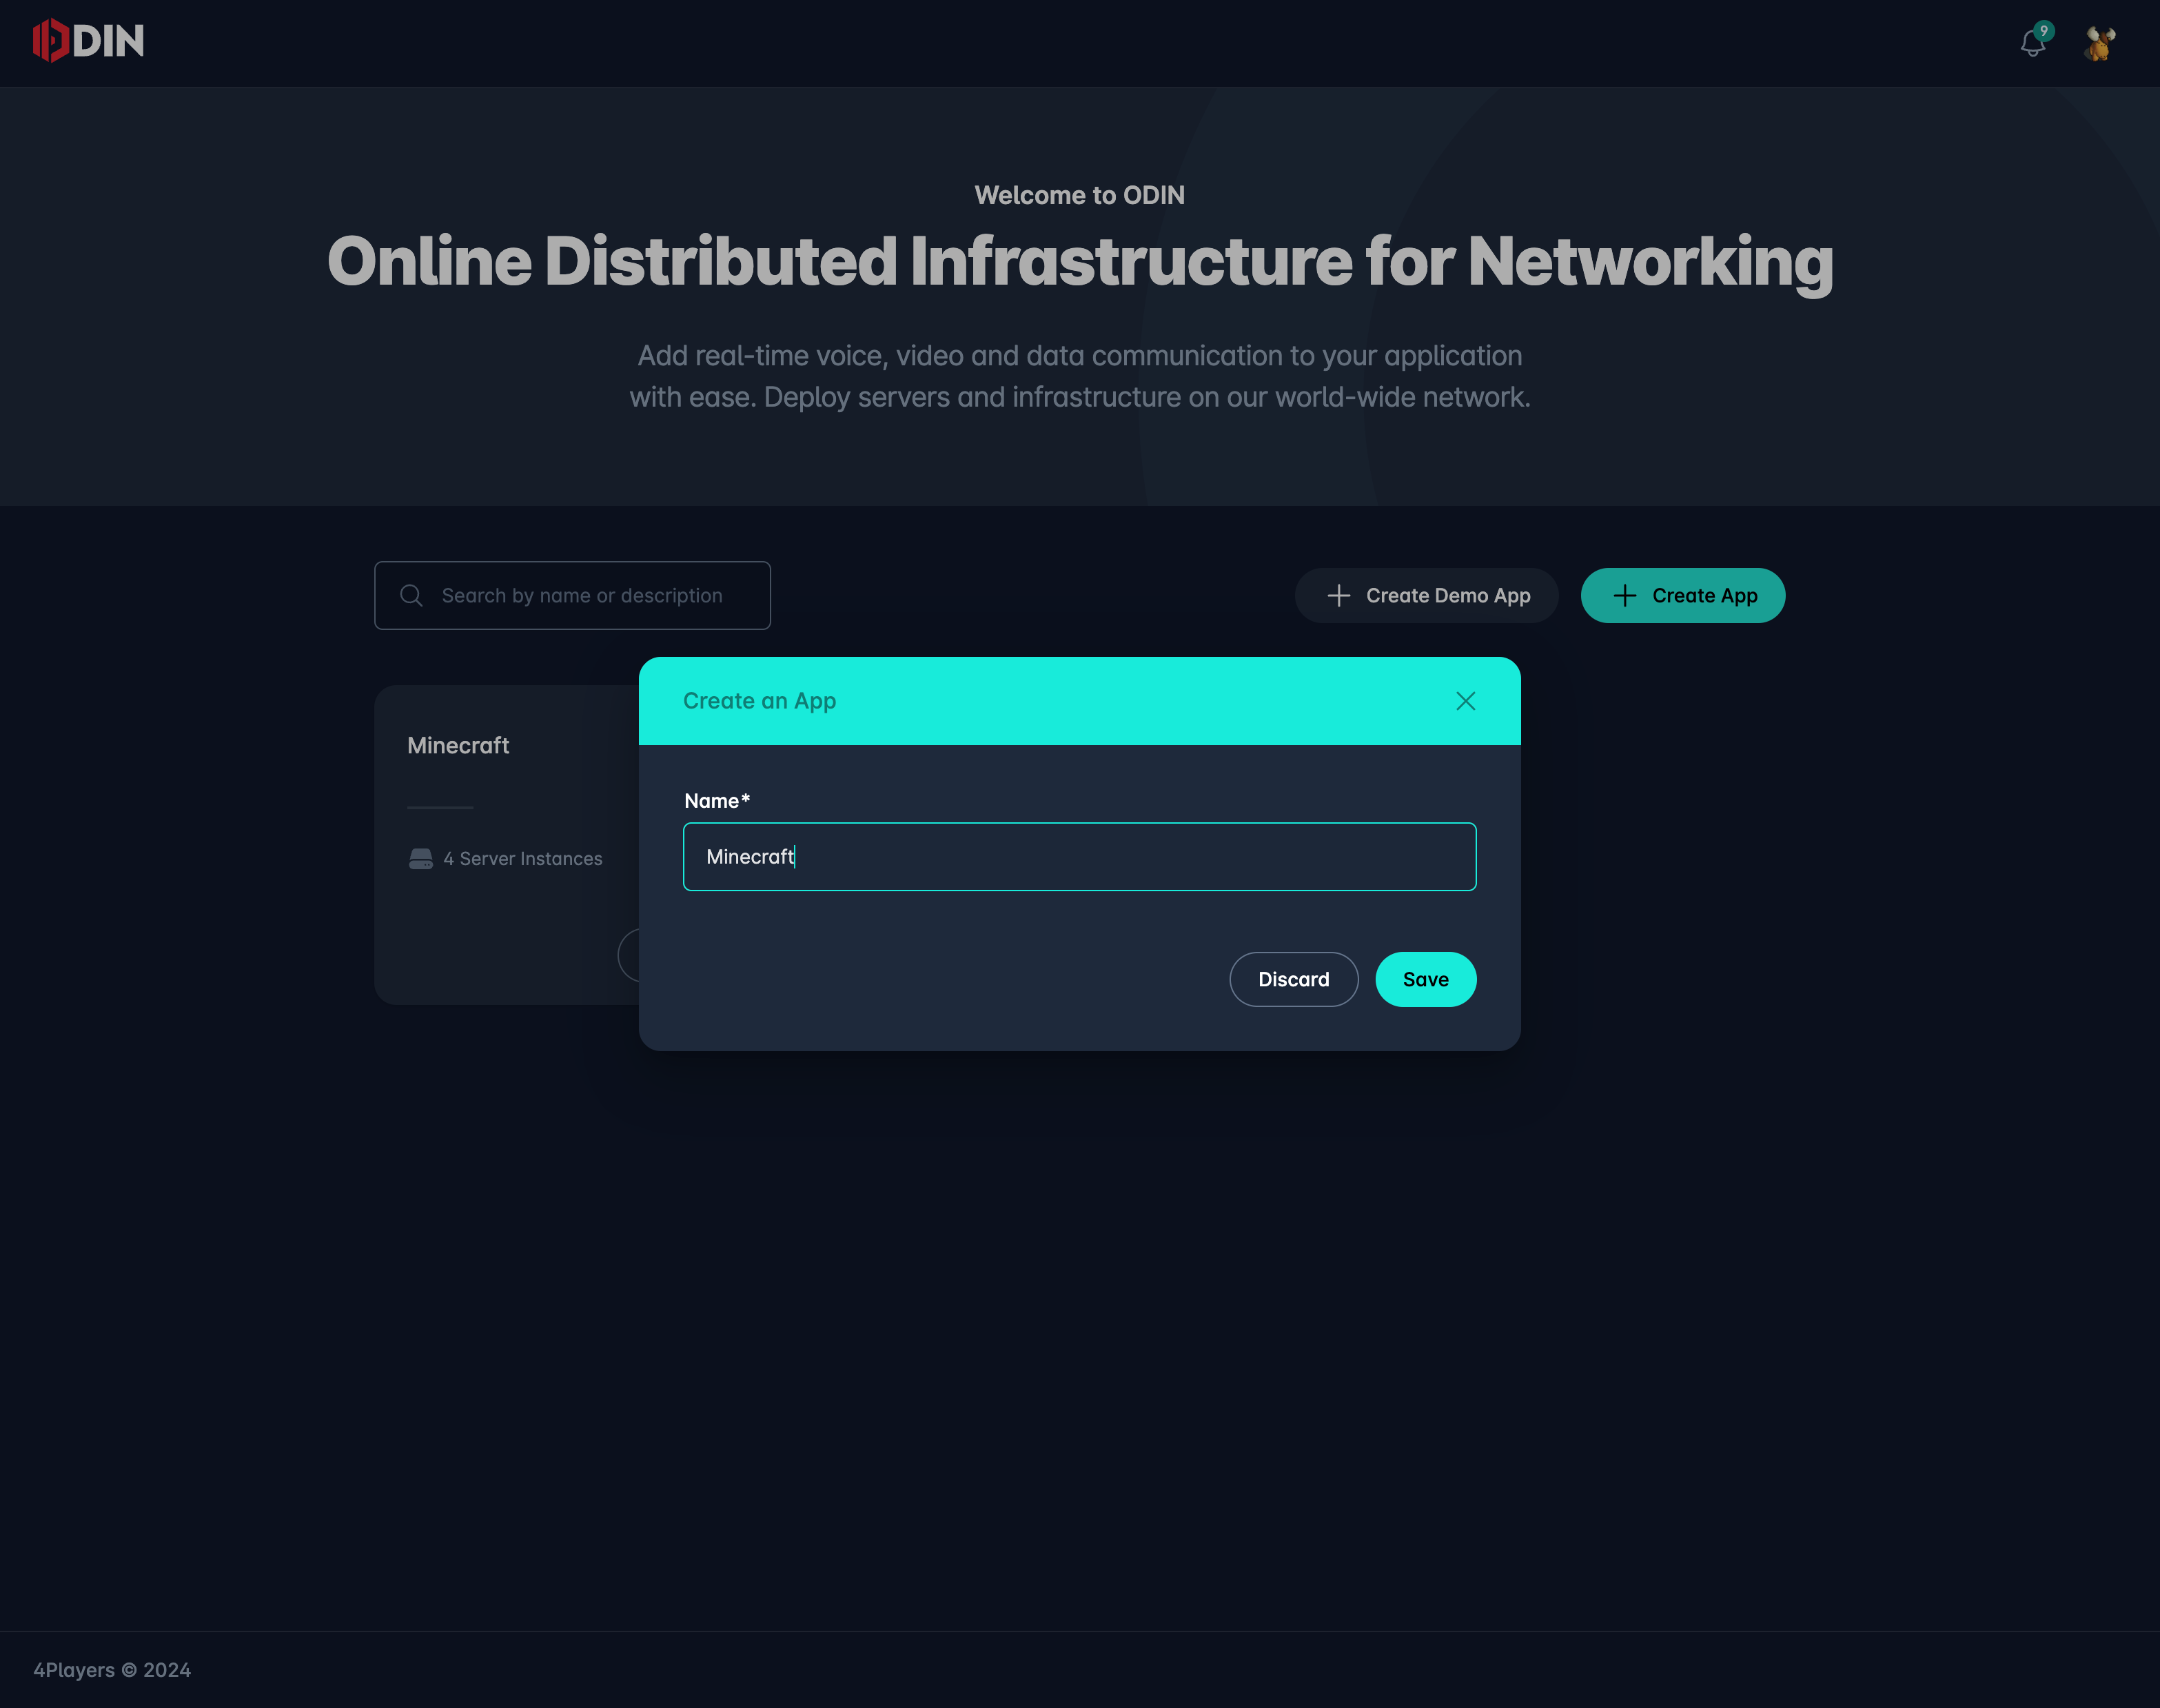
Once you have signed in into the dashboard you’ll be on the “Manage Apps” page. Click on the Create App button to create a new application. You can name it whatever you want, but for this example we’ll name it Minecraft.
If you don’t want to follow the tutorial step by step we have made a shortcut for you: You can also install a demo application
that will create all the necessary resources for you via script. Instead of clicking on the Create App button, click on the Create Demo App button. Choose Minecraft from the list, give it a name and click on Create.
Once you have created the application, you’ll be routed to the apps dashboard. Click on Fleet in the left sidebar to choose the Fleet product. In the sidebar you can also choose Voice which is our real-time voice-chat SDK with deep game engine integration to Unity and Unreal, but for now we’ll concentrate on gameserver deployment.
Create an image
Next step is to register an image. An image is a snapshot of your gameserver that can be deployed to a server. You can create an image from a Docker image or from a Steamworks app. As discussed earlier we’ll be using an existing docker image for Minecraft.
On the left side click on Images and then on Create Image. This is a three step process.
- Provide basic image details like it’s name, version and underlying operating system.
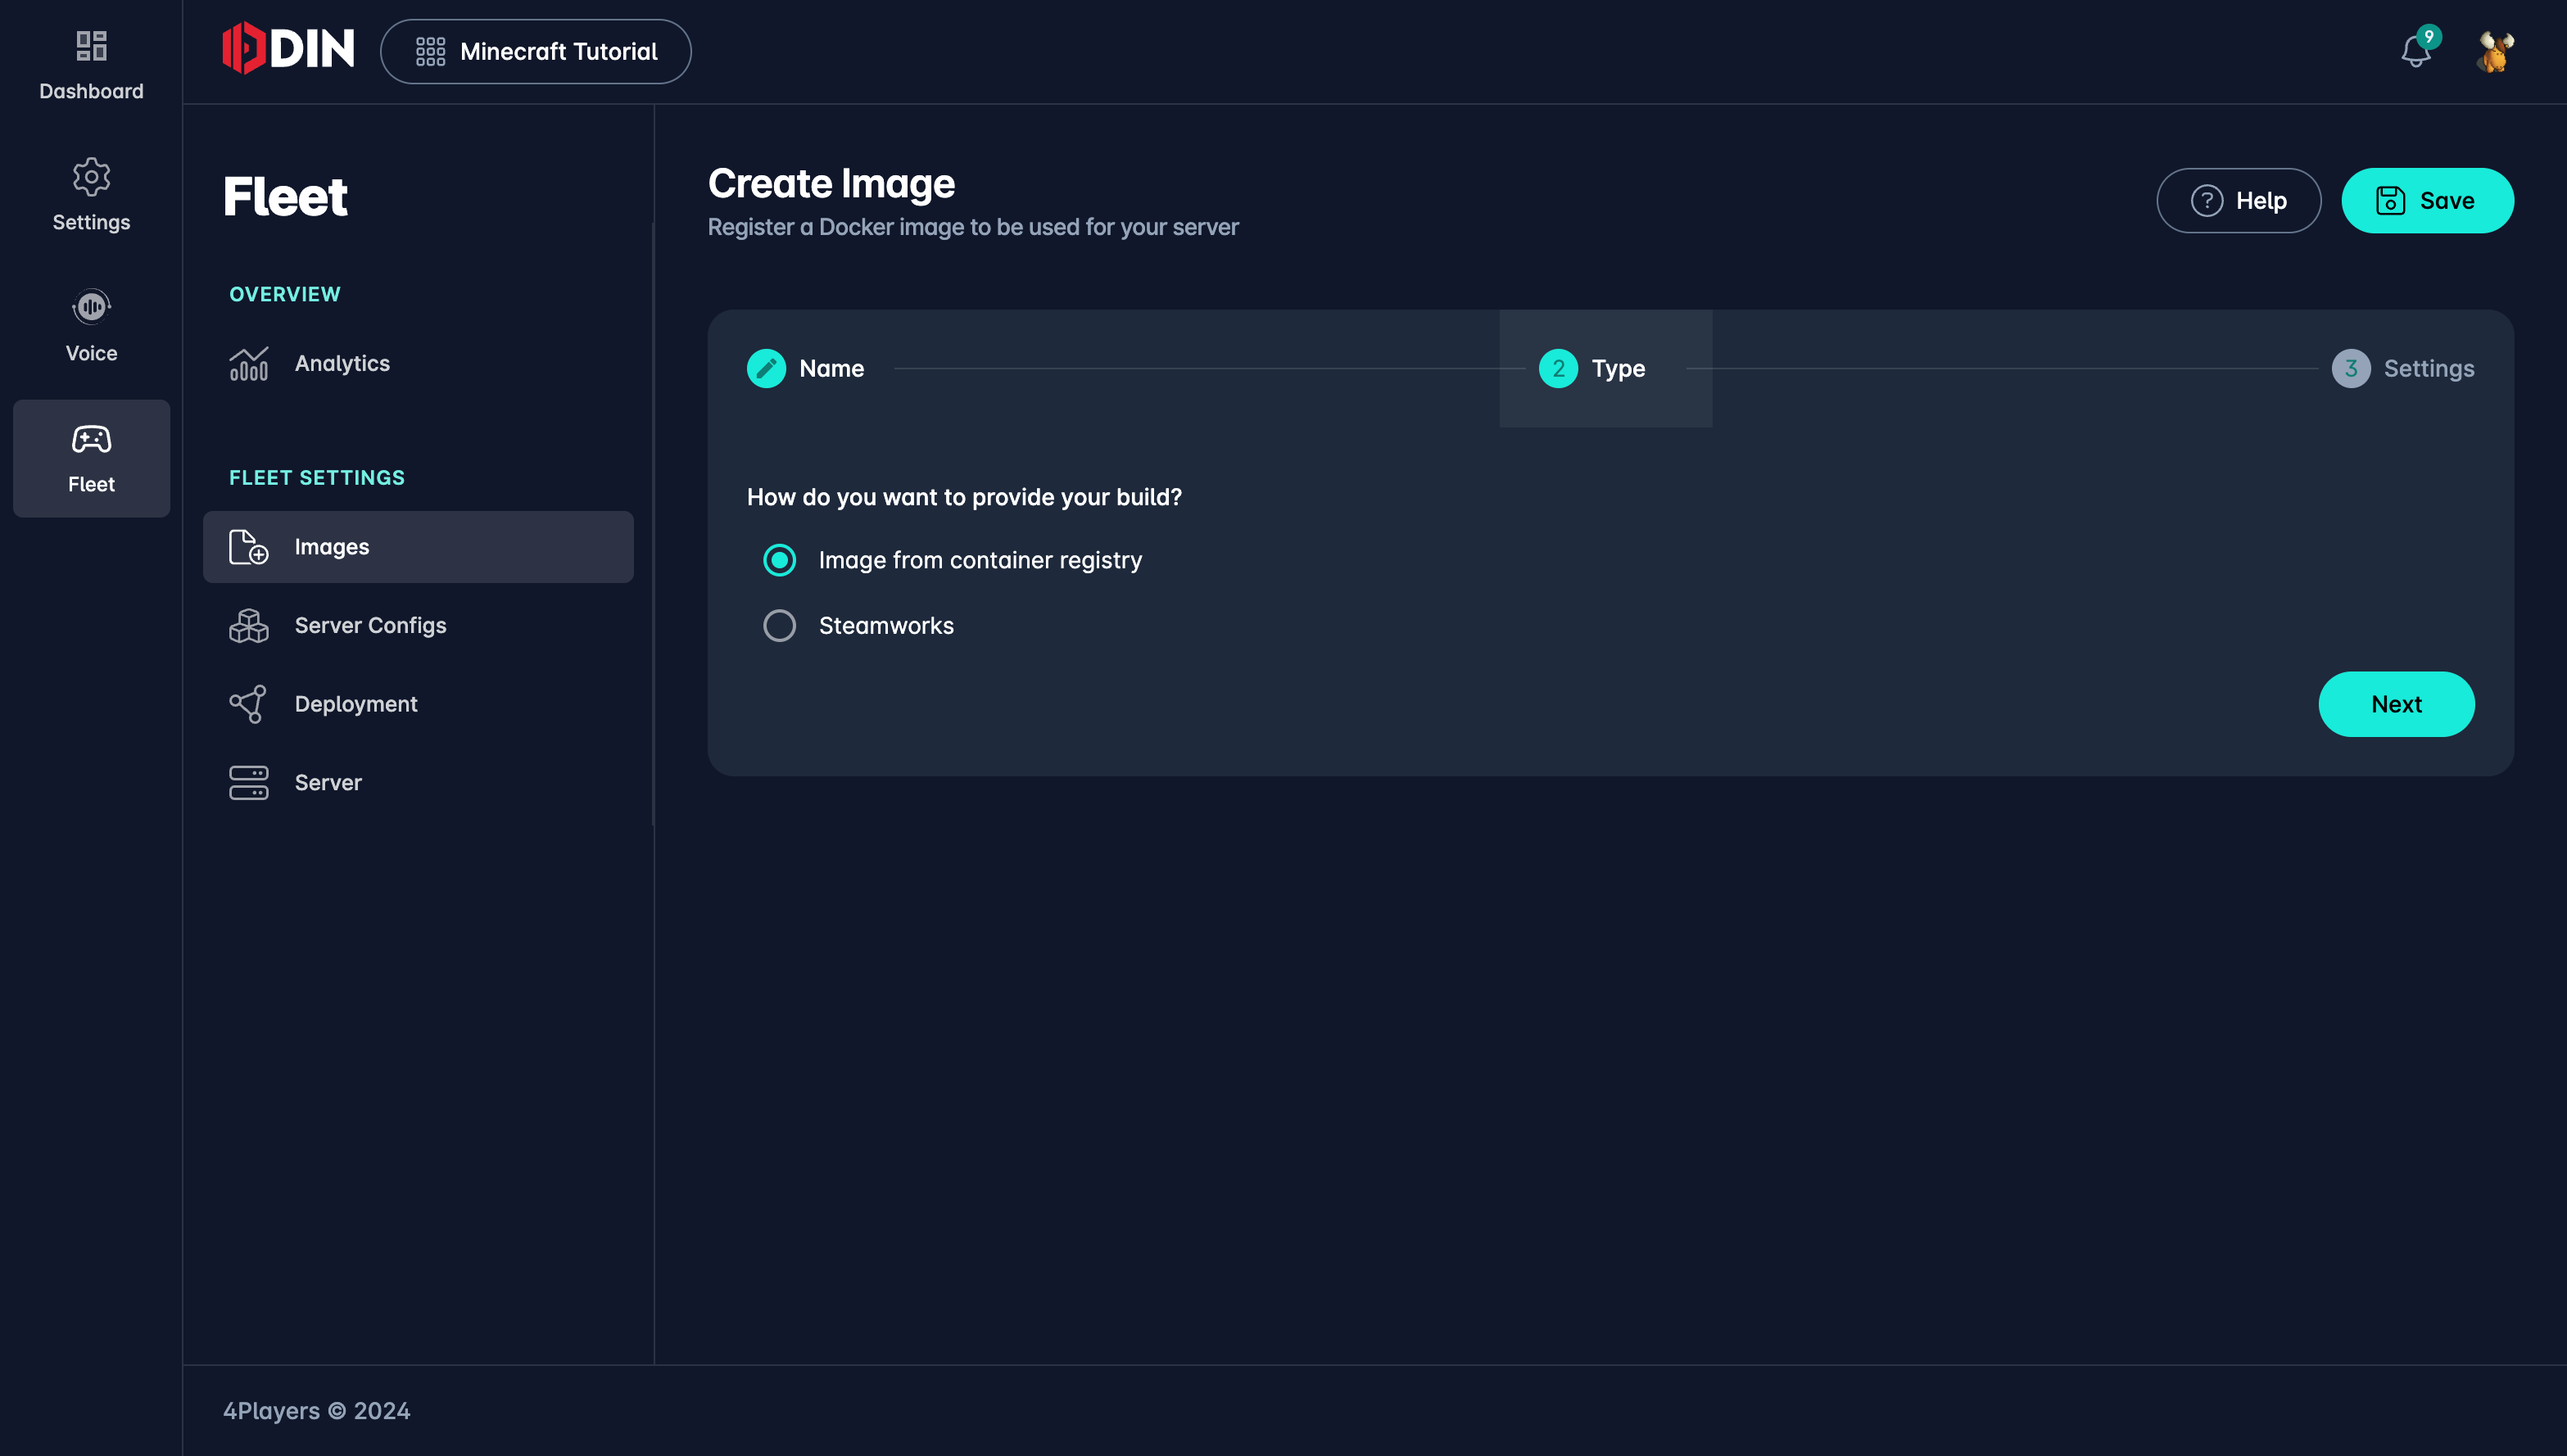
- Choose weather to provide a docker image or Steamworks credentials to create the image.
- Enter the necessary information for the chosen image type.
This gallery shows you which data to enter and in written so that you can easily Copy & Paste from here:
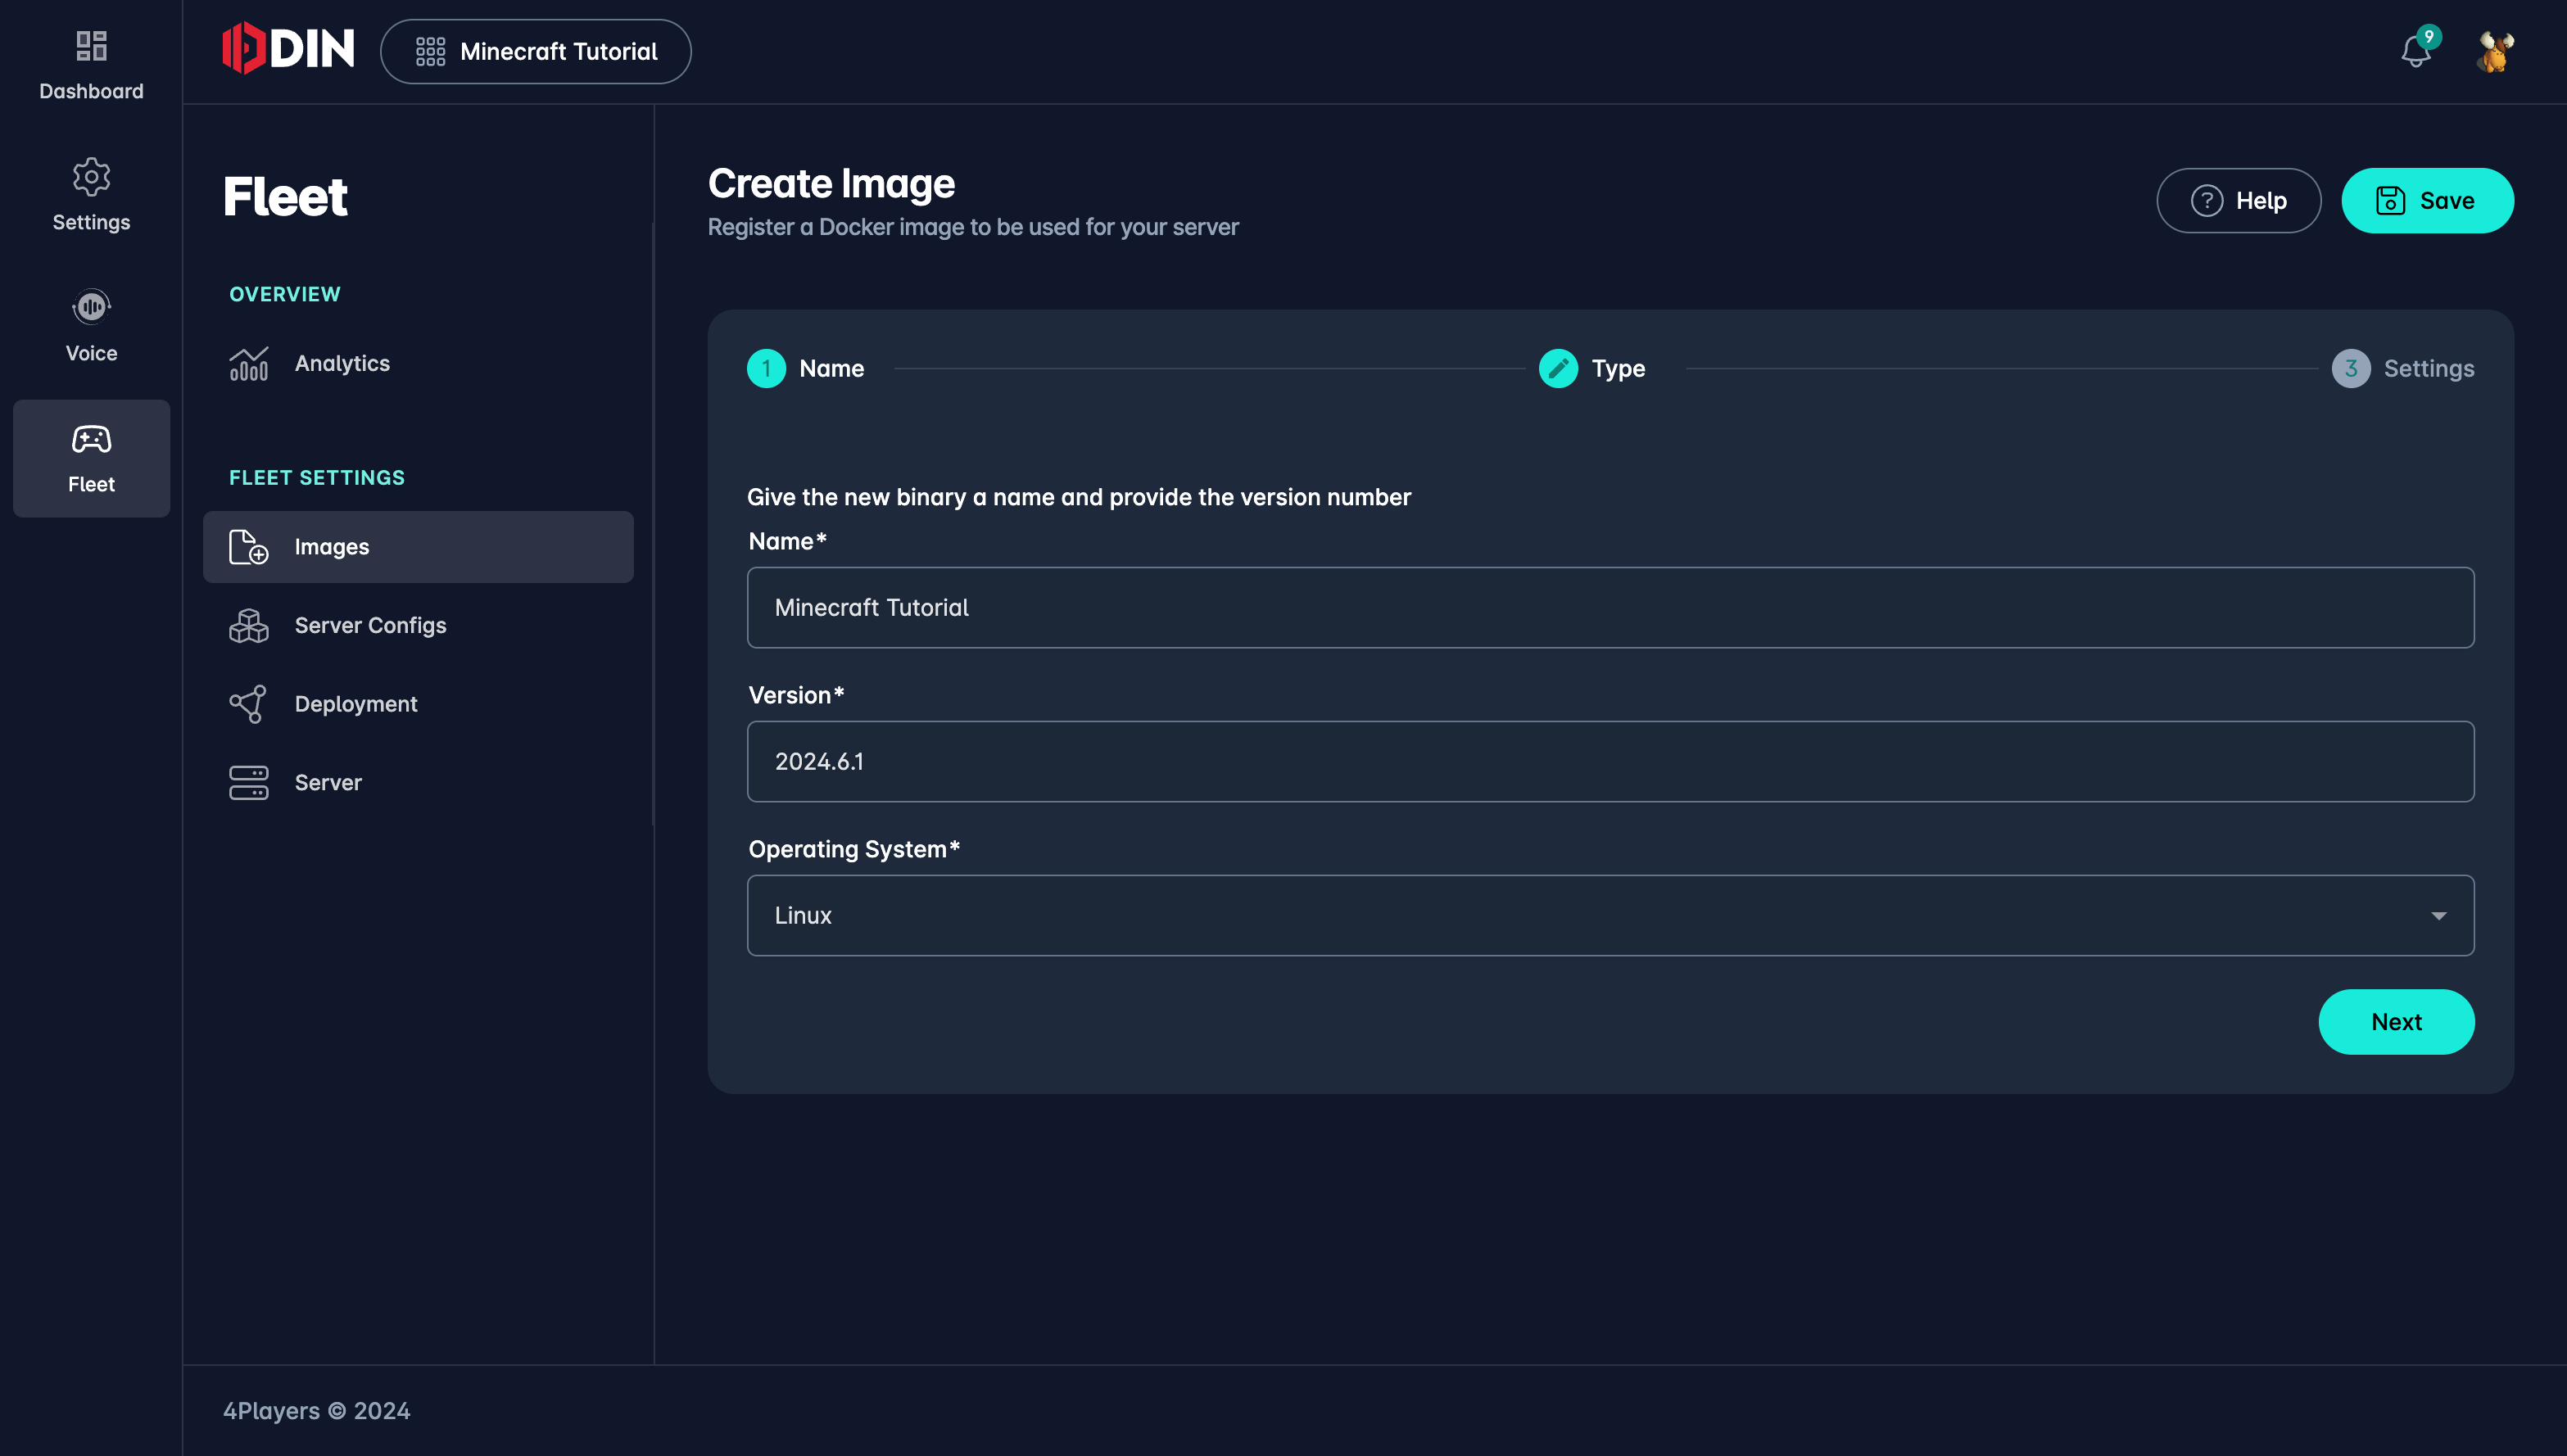
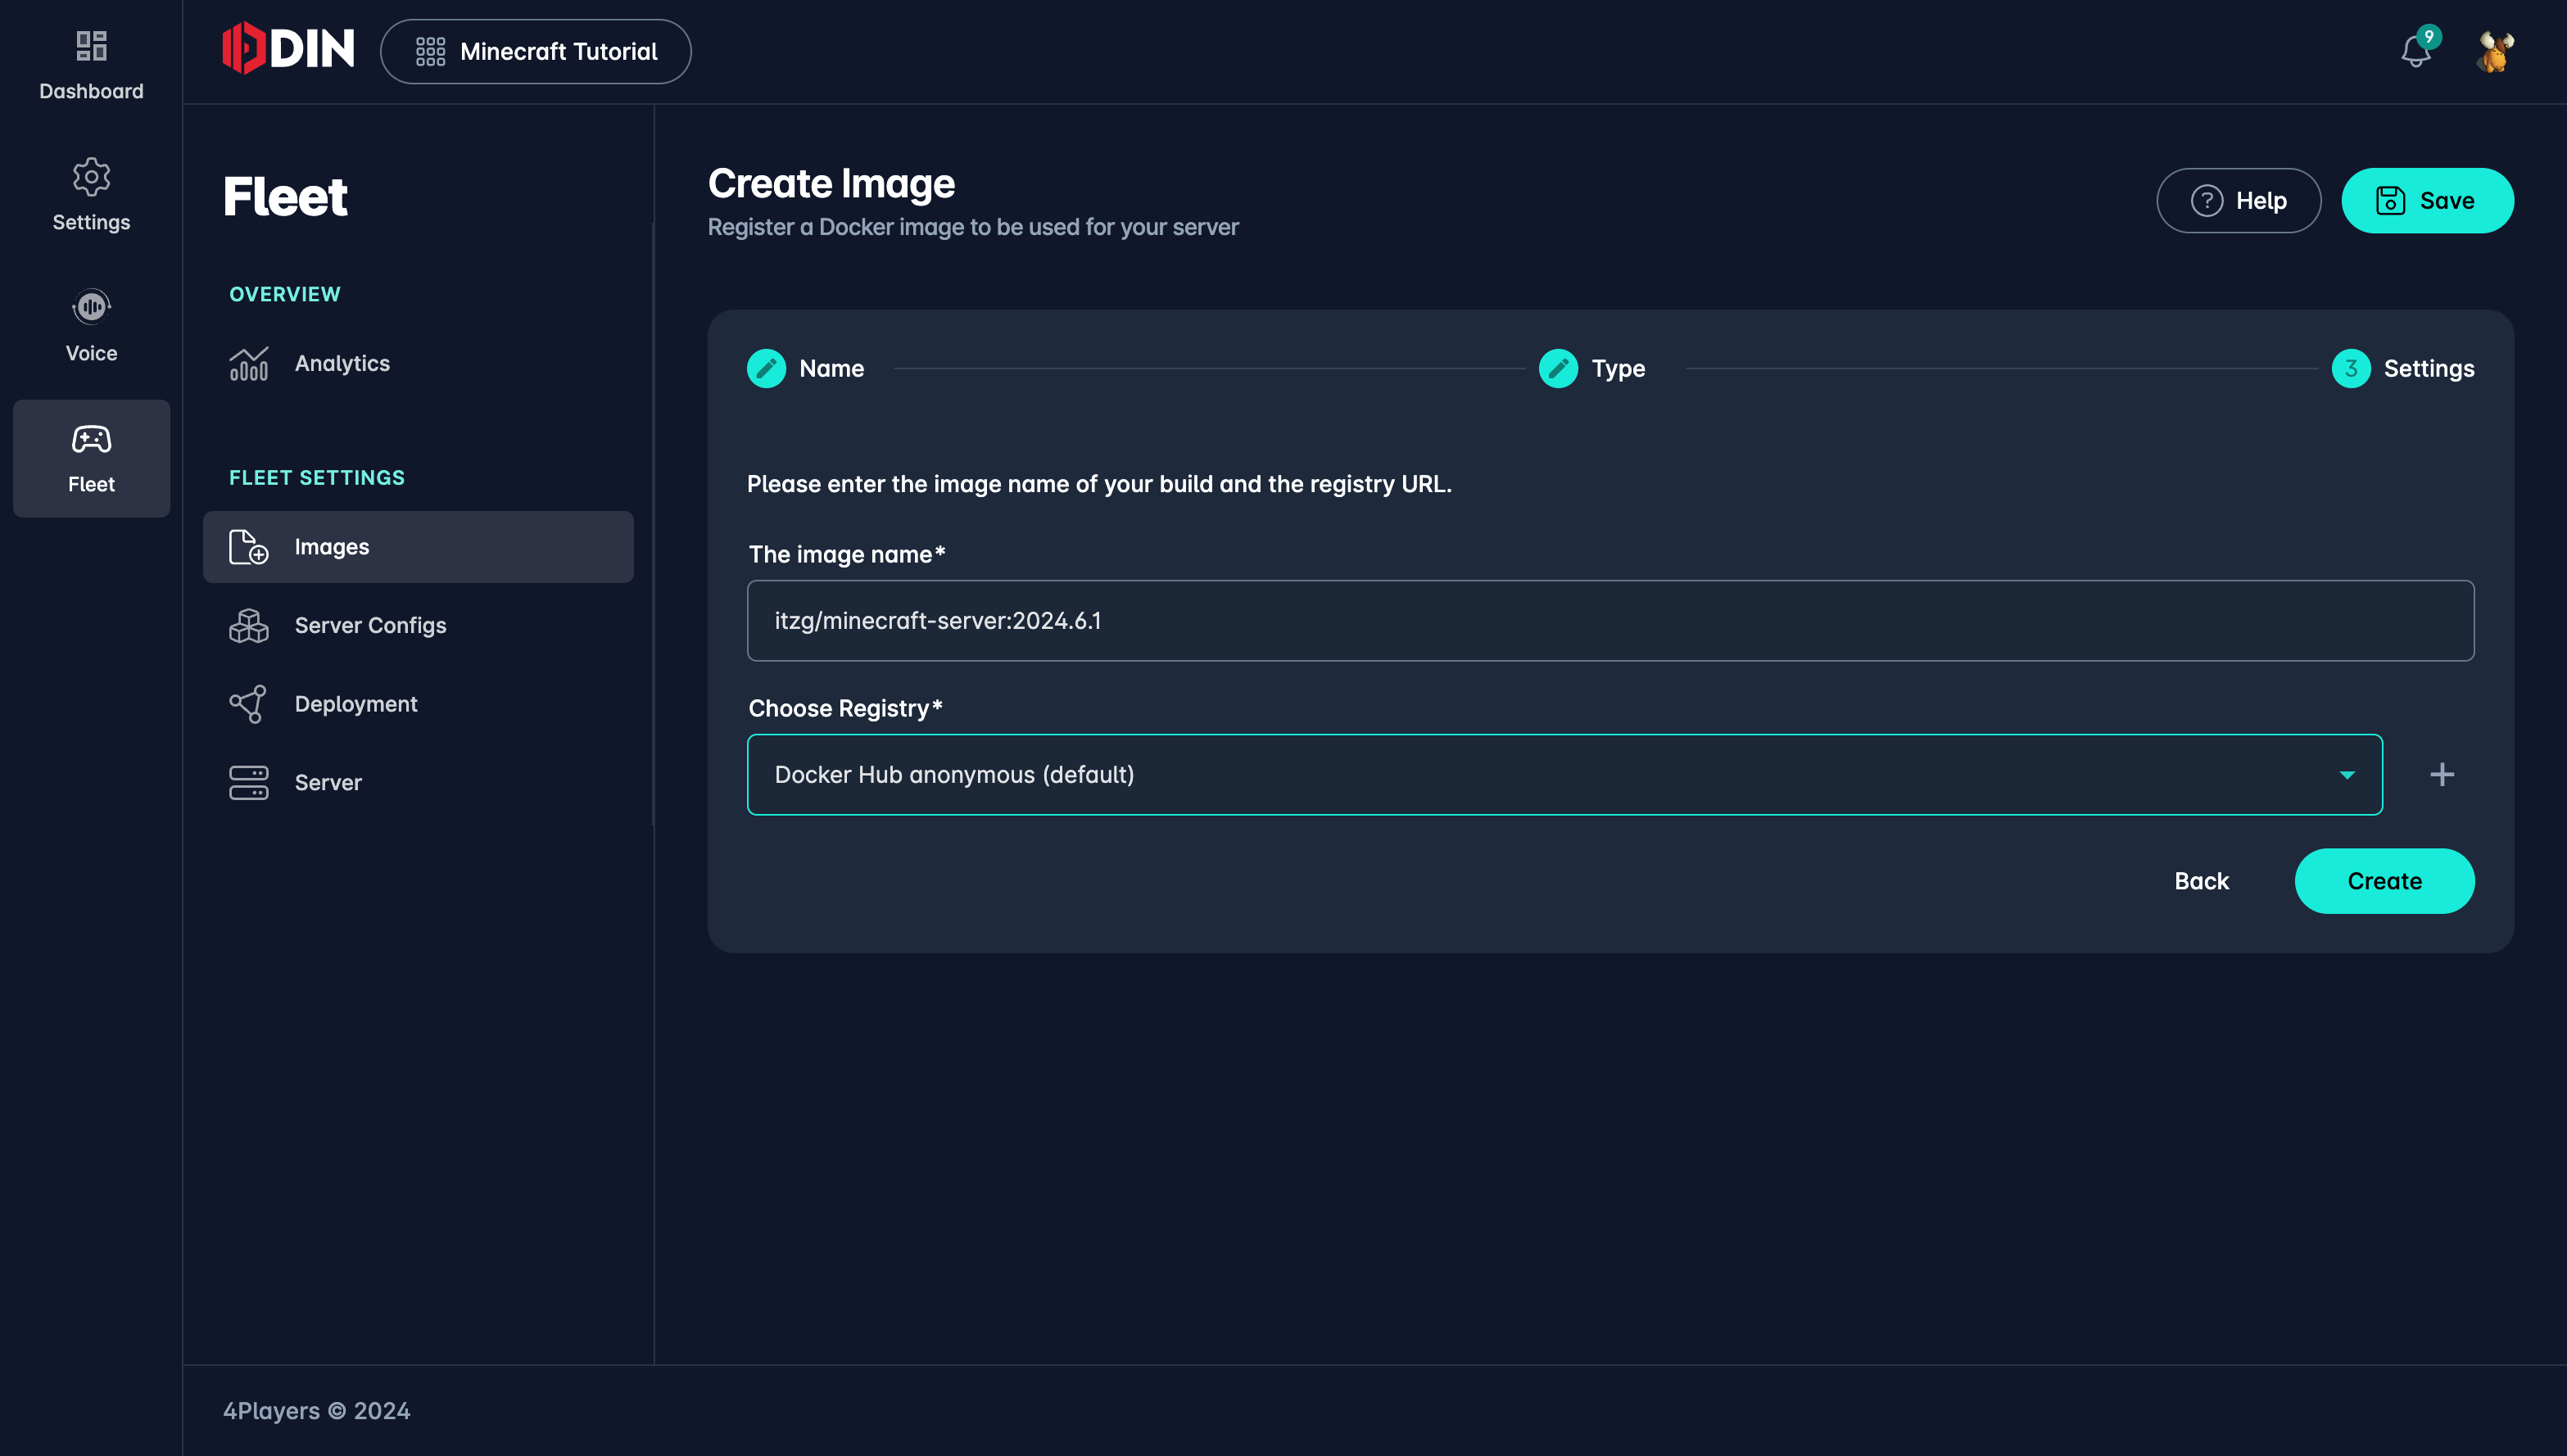
Data to enter:
- Name:
Minecraft Tutorial - Version:
2024.6.1 - Operating System:
Linux - Image Type:
Docker Image - Image Name:
itzg/minecraft-server:2024.6.1 - Registry:
Docker Hub anonymous (default)
The minecraft docker images are tagged with the version number. This way we make sure that we have a specific version of the image. I.e. if the server restarts or changes the underlying machine (i.e. in case of a defekt of the machine) the docker image is still the same and not changes implicitly by the docker registry.
You also need to choose a docker registry from the list. In this case we choose Docker Hub which is the public registry of docker images. If you have your own registry you can choose that one (of course creating it before).
Of course, we could also create an image that is always the latest version, but this is not recommended for production environments. It’s rather recommended to create new images within ODIN Fleet for each new version of your gameserver. This gives much better control. You’ll find more of these topics in the guides section.
Next, we’ll need to create the server config. This is the most complex part as in this step you define everything that defines your gameserver. Many games have different modes, maps, mods, etc. and you can define all of that here.
Creating a server configuration
Navigate to Server Configs in the left sidebar and click on Create Config. You’ll see a fairly complex editor but we’ll guide you through it.
As there are a lot of settings you might risk to loose your data if you don’t save it. We have implemented a feature that will constantly (on any change) store the current settings in your browsers local storage. If you accidentally close the browser or tab you can just open the tab again you’ll be notified that there are unsaved changes and you can restore them.
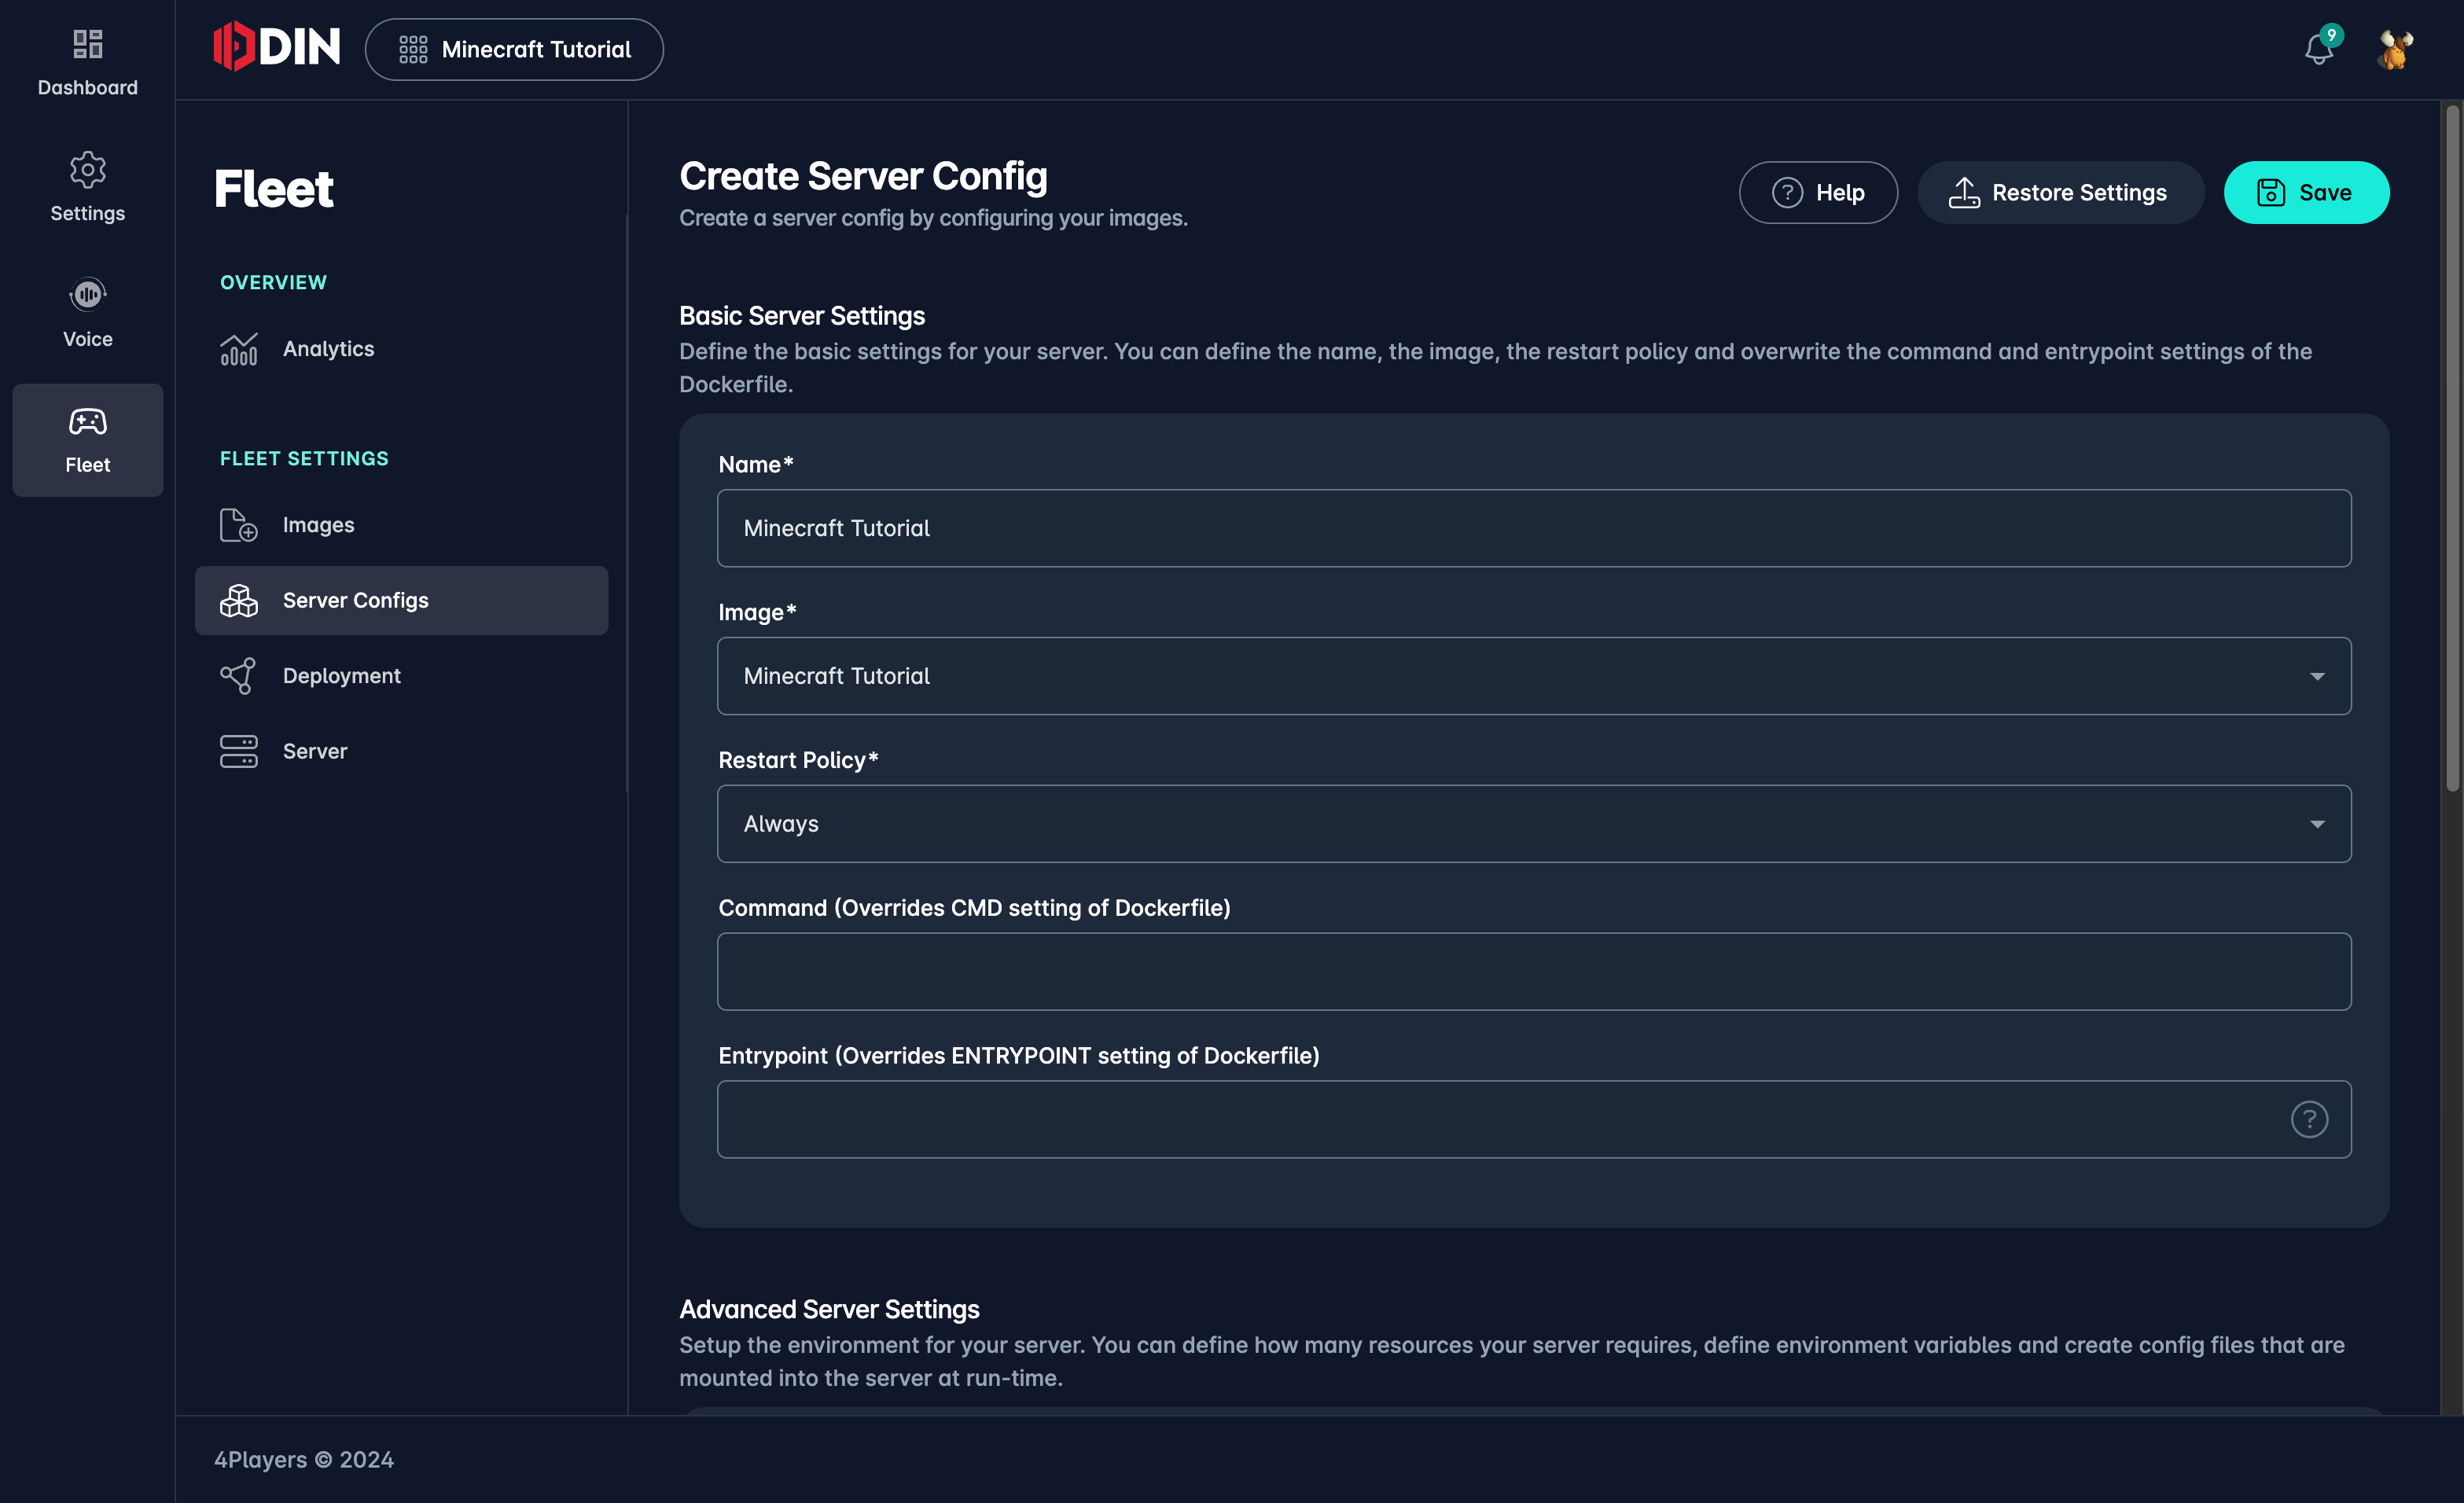
Basic information
In the first part of the editor, you can provide basic information about the image like it’s name and which image should be used in this server configuration. Later, when you want to deploy a new version of your gameserver, all you need to do is to change the image of the server configuration and then that image will be rolled out in all deployments using this server configuration. We’ll come to that later.
So, let’s enter this data into the first couple of fields:
- Name:
Minecraft Tutorial - Image:
Minecraft Tutorial(the image we have just created) - Restart:
Always
You can leave out CMD and Entrypoint empty. This allows you to override the fields from the docker image, i.e. if you want to start a different entrypoint script than defined in the docker container. This can be very useful for development but is typically not used in production.
Scrolling down a bit and you’ll see a block with tabs and quite a lot of settings. We go through them one by one.
Ports
Setting up ports is very important if your server should be reached from the public internet. Within the container, which encapsulates the gameserver from everything else, you can define which ports should be exposed to the outside world. In this case, we need to expose the Minecraft port 25565 and it needs to TCP.
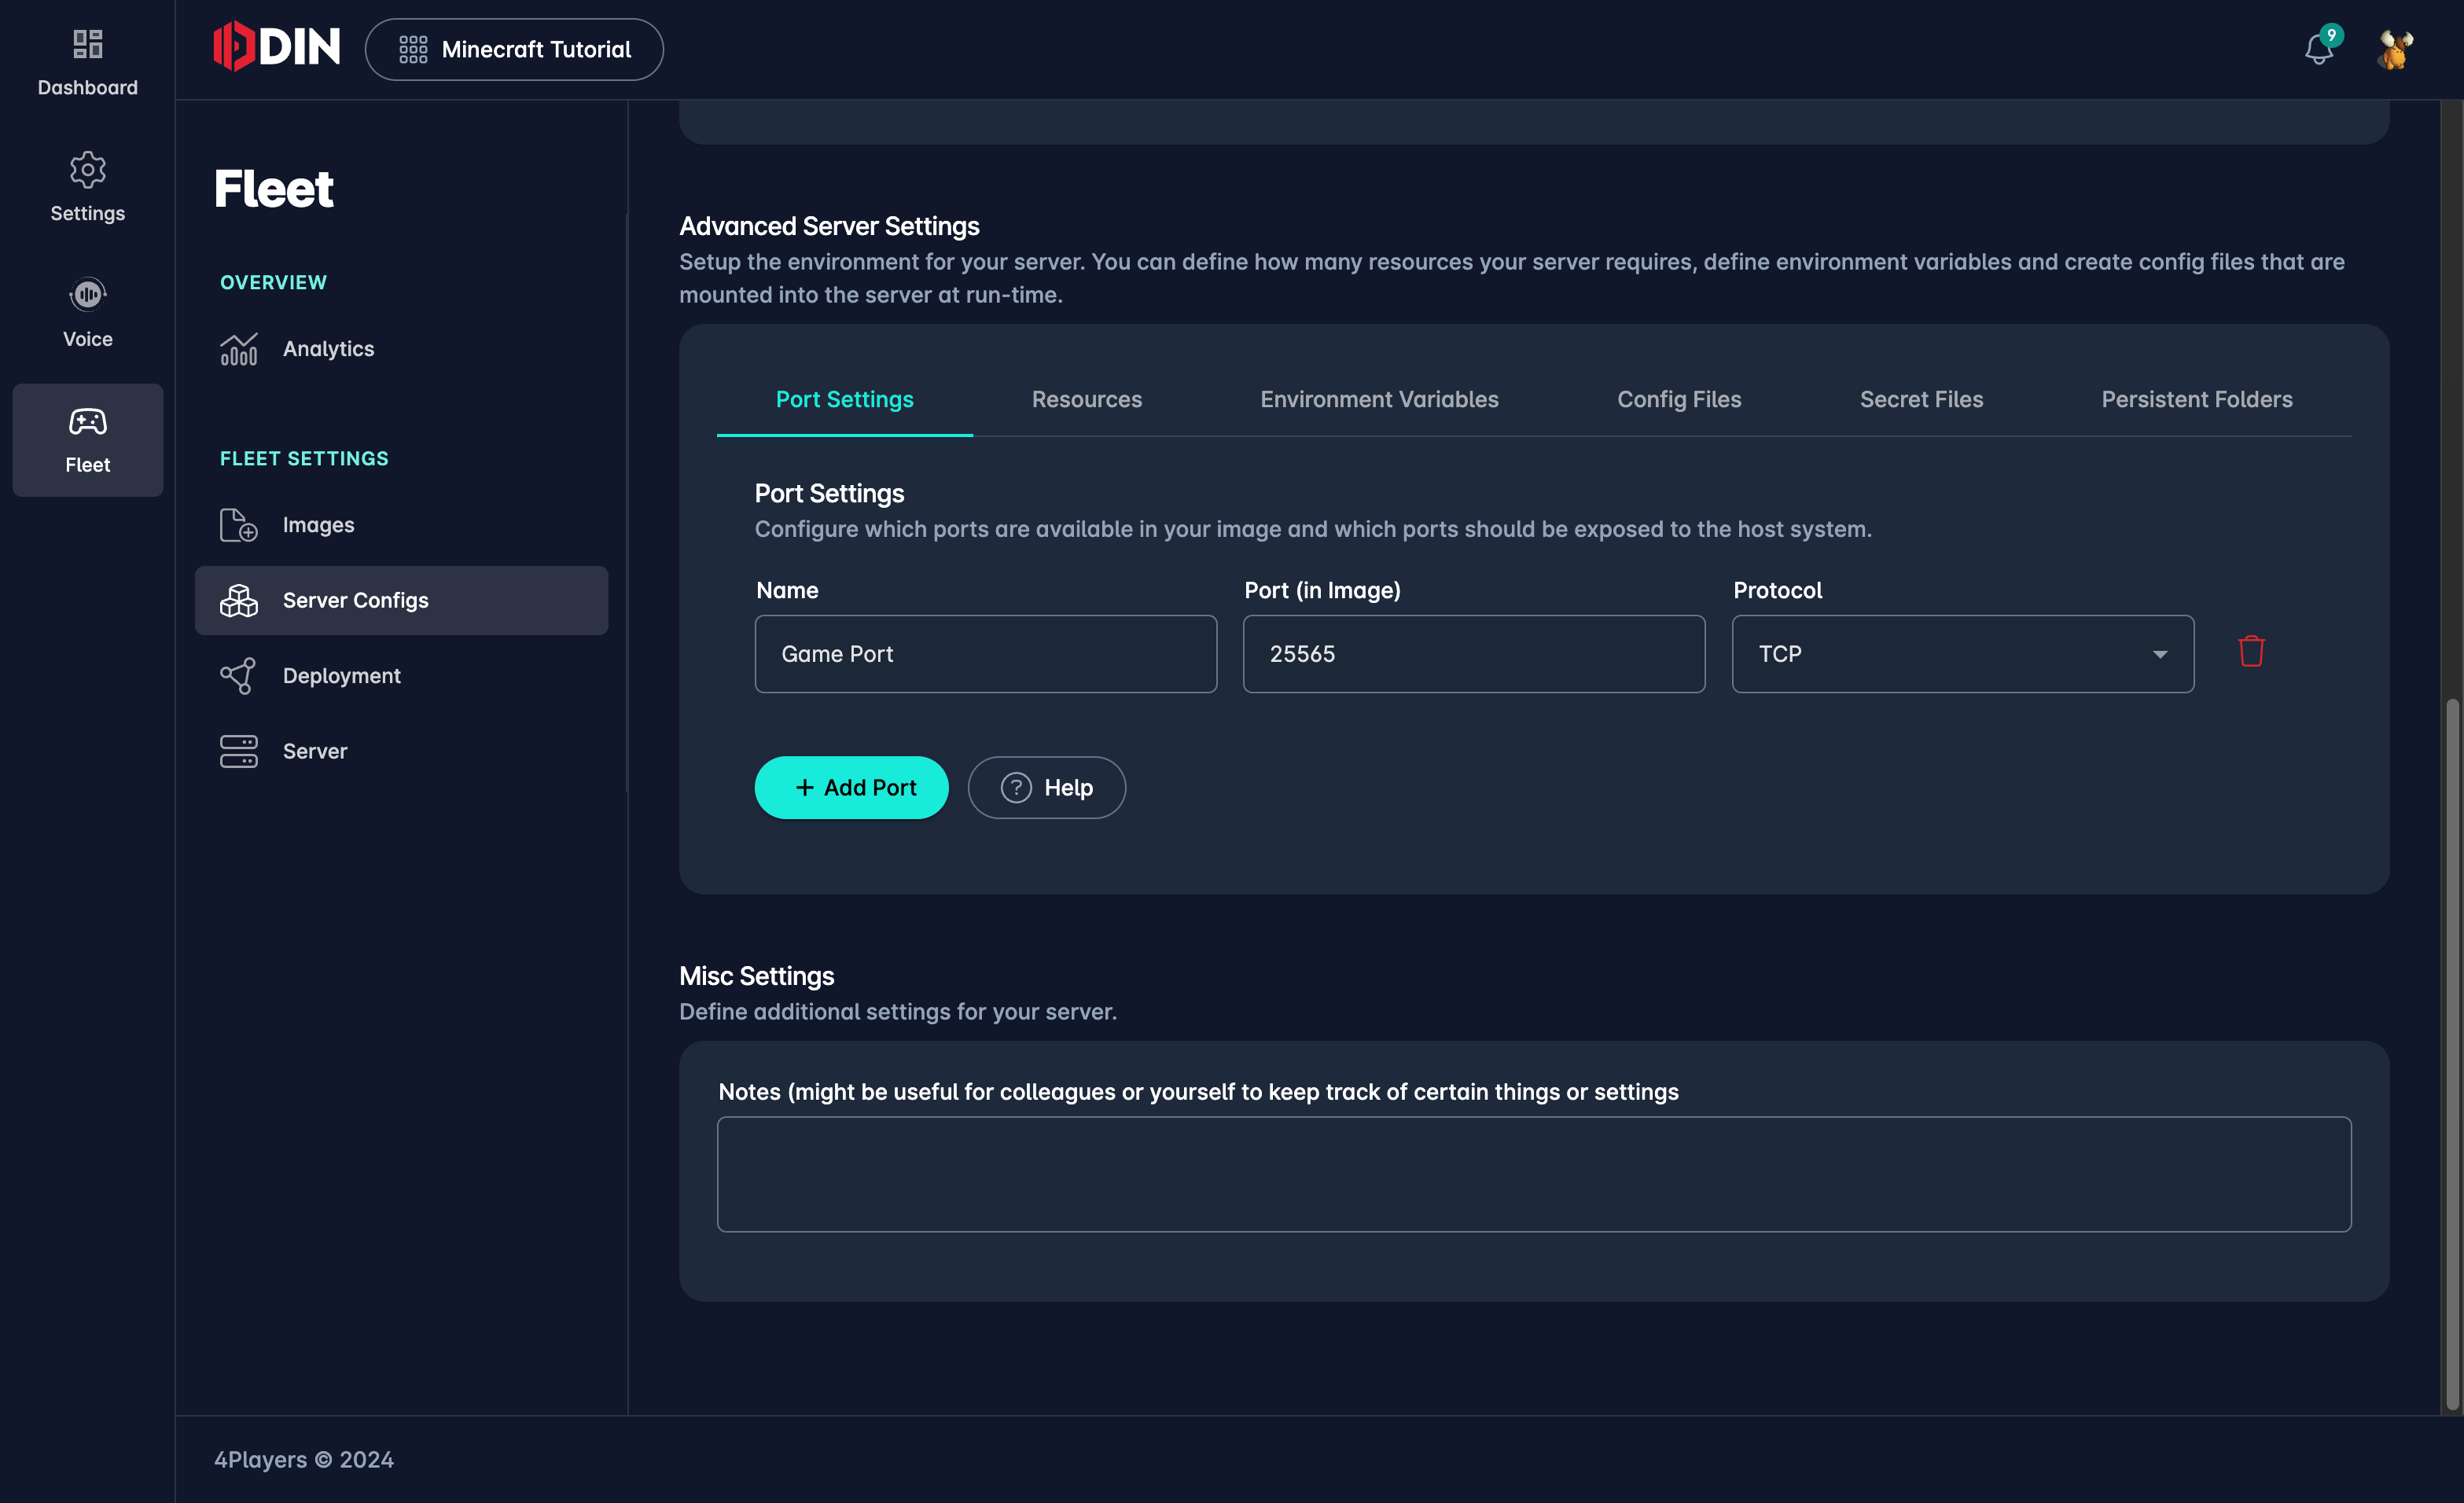
For every port that you define here our runtime will assign an available port and map that to the internal port. This way you can run multiple gameservers on the same machine without port conflicts.
This diagrams shows what’s going on under the hood. It shows multiple containers (i.e. gameservers running in docker containers) and how they are mapped to the public internet. Container 4 has two ports described in the server config and as such two ports are published to the internet.
flowchart TB
    Internet((Internet))

    subgraph Machine
        direction LR
        P1["Published Port 30001"] --> G1
        P2["Published Port 30002"] --> G2
        P3["Published Port 30003"] --> G3
        P4["Published Port 30004"] --> G4
        P5["Published Port 30005"] --> G5
        P6["published Port 30006"] --> R4

        subgraph Gameserver1["Container 1"]
            direction TB
            G1["Gameserver Port 25565"]
        end
        subgraph Gameserver2["Container 2"]
            direction TB
            G2["Gameserver Port 25565"]
        end
        subgraph Gameserver3["Container 3"]
            direction TB
            G3["Gameserver Port 25565"]
        end
        subgraph Gameserver4["Container 4"]
            direction TB
            G4["Gameserver Port 25565"]
            R4["RCON Port 25566"]
        end
        subgraph Gameserver5["Container 5"]
            direction TB
            G5["Gameserver Port 25565"]
        end
    end

    Internet --> |Port 30001| P1
    Internet --> |Port 30002| P2
    Internet --> |Port 30003| P3
    Internet --> |Port 30004| P4
    Internet --> |Port 30005| P5
    Internet --> |Port 30006| P6
Resources
In the next tab we need to define the resources that we want to allow this gameserver to consume. This is very important as it defines how much of the underlying machine the gameserver can use. For Minecraft as Small tier with 1 CPU and 2 GB RAM is enough. If you don’t know what to choose, we suggest to start with a higher tier, run the server through its paces and then check the stats (described later) to see the peak usage of the server. You should always choose a tier that has a bit of spare but not too much. If you have too much spare, you are wasting money. If you have too little, the server might be slow or even crash. We’ll do an experiment in another guide.
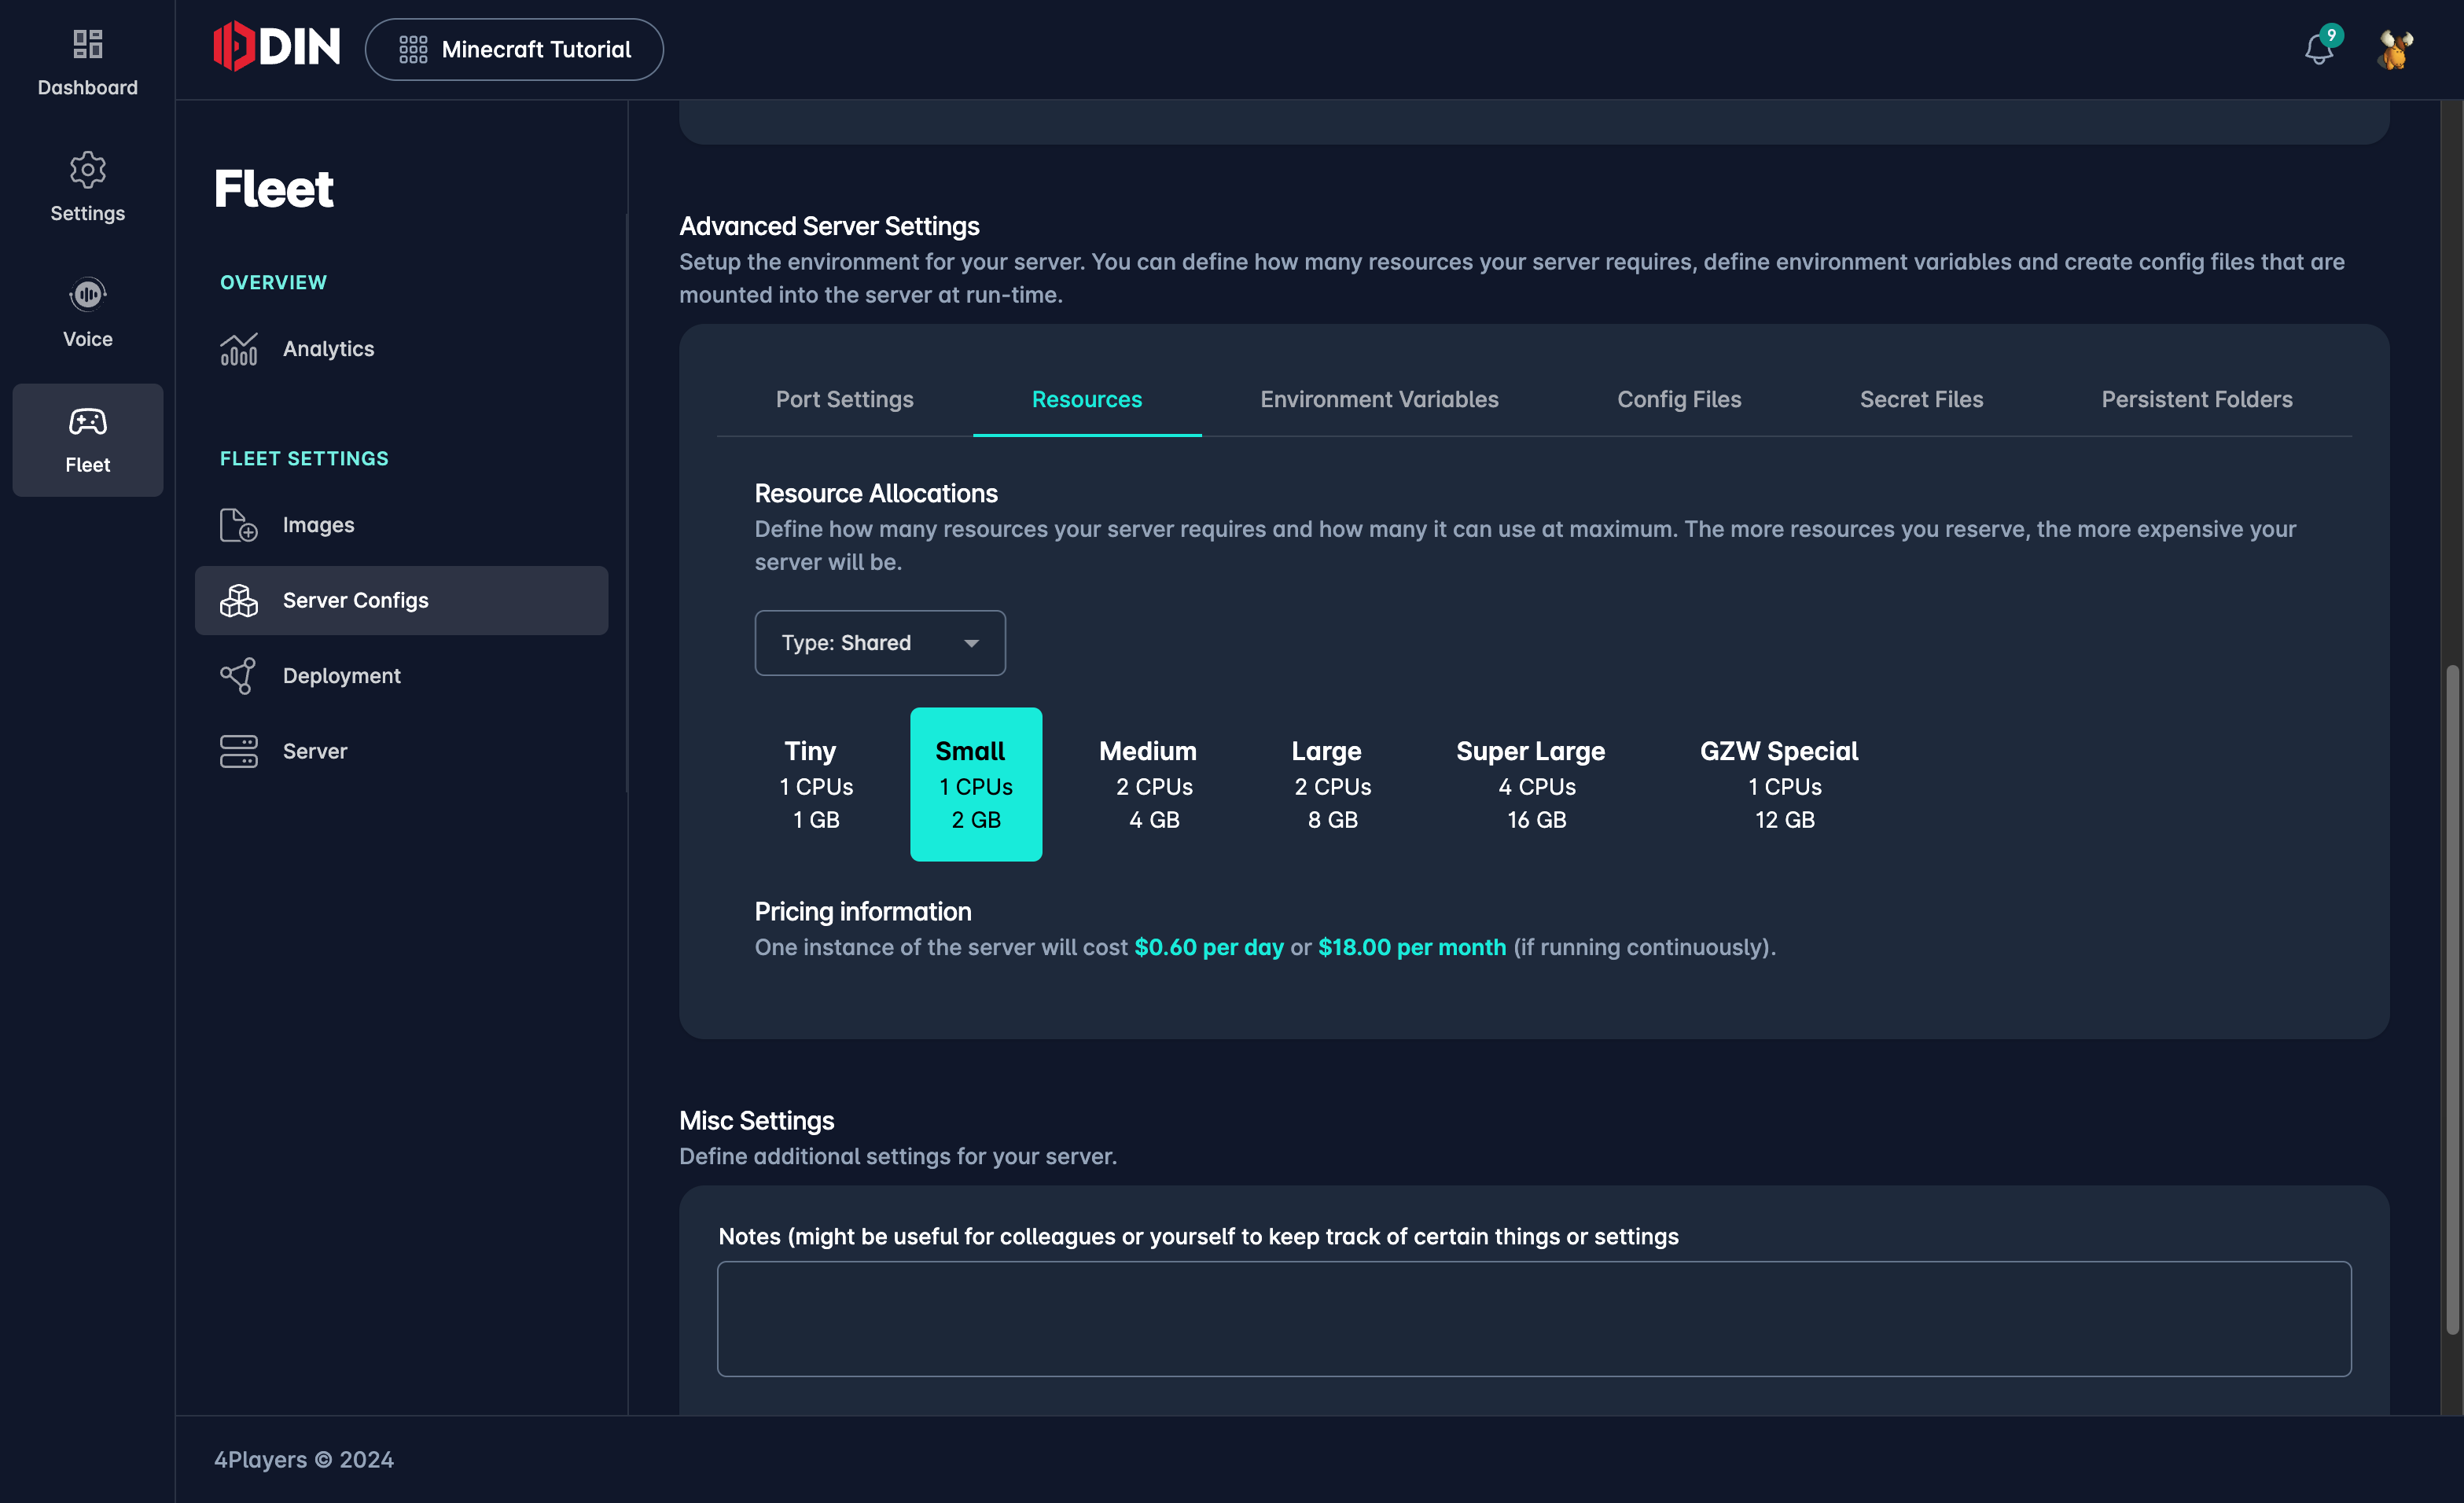
We have two types of resources: Shared and Dedicated. Shared resources are shared between all gameservers on the machine. Our backend tries to minimize the “noisy neighbour” problem but that is not always easy to do. If you decide to use shared resources, we might “overbook” the machine a bit. This means that we might assign more resources to the gameservers than the machine actually has. This is not a problem as long as the gameservers don’t use all the resources at the same time. If they do, the machine might become slow and the gameservers might crash. This is why we have the dedicated resources. If you choose dedicated resources, the resources are reserved for your gameserver and no other gameserver can use them. This is more expensive but also more reliable.
Environment Variables
The next very important part are environment variables. Many gameservers are configured via environment variables. This is also the case for the Minecraft server. The Minecraft server has a lot of environment variables that you can set. Only one is really required: EULA. However, in this tutorial we have defined a bit more as that also shows why we have server configuration. In this example we have set the DIFFICULTY to hard. You might have another server config that is soft and this way you can deploy different server configurations with different settings.
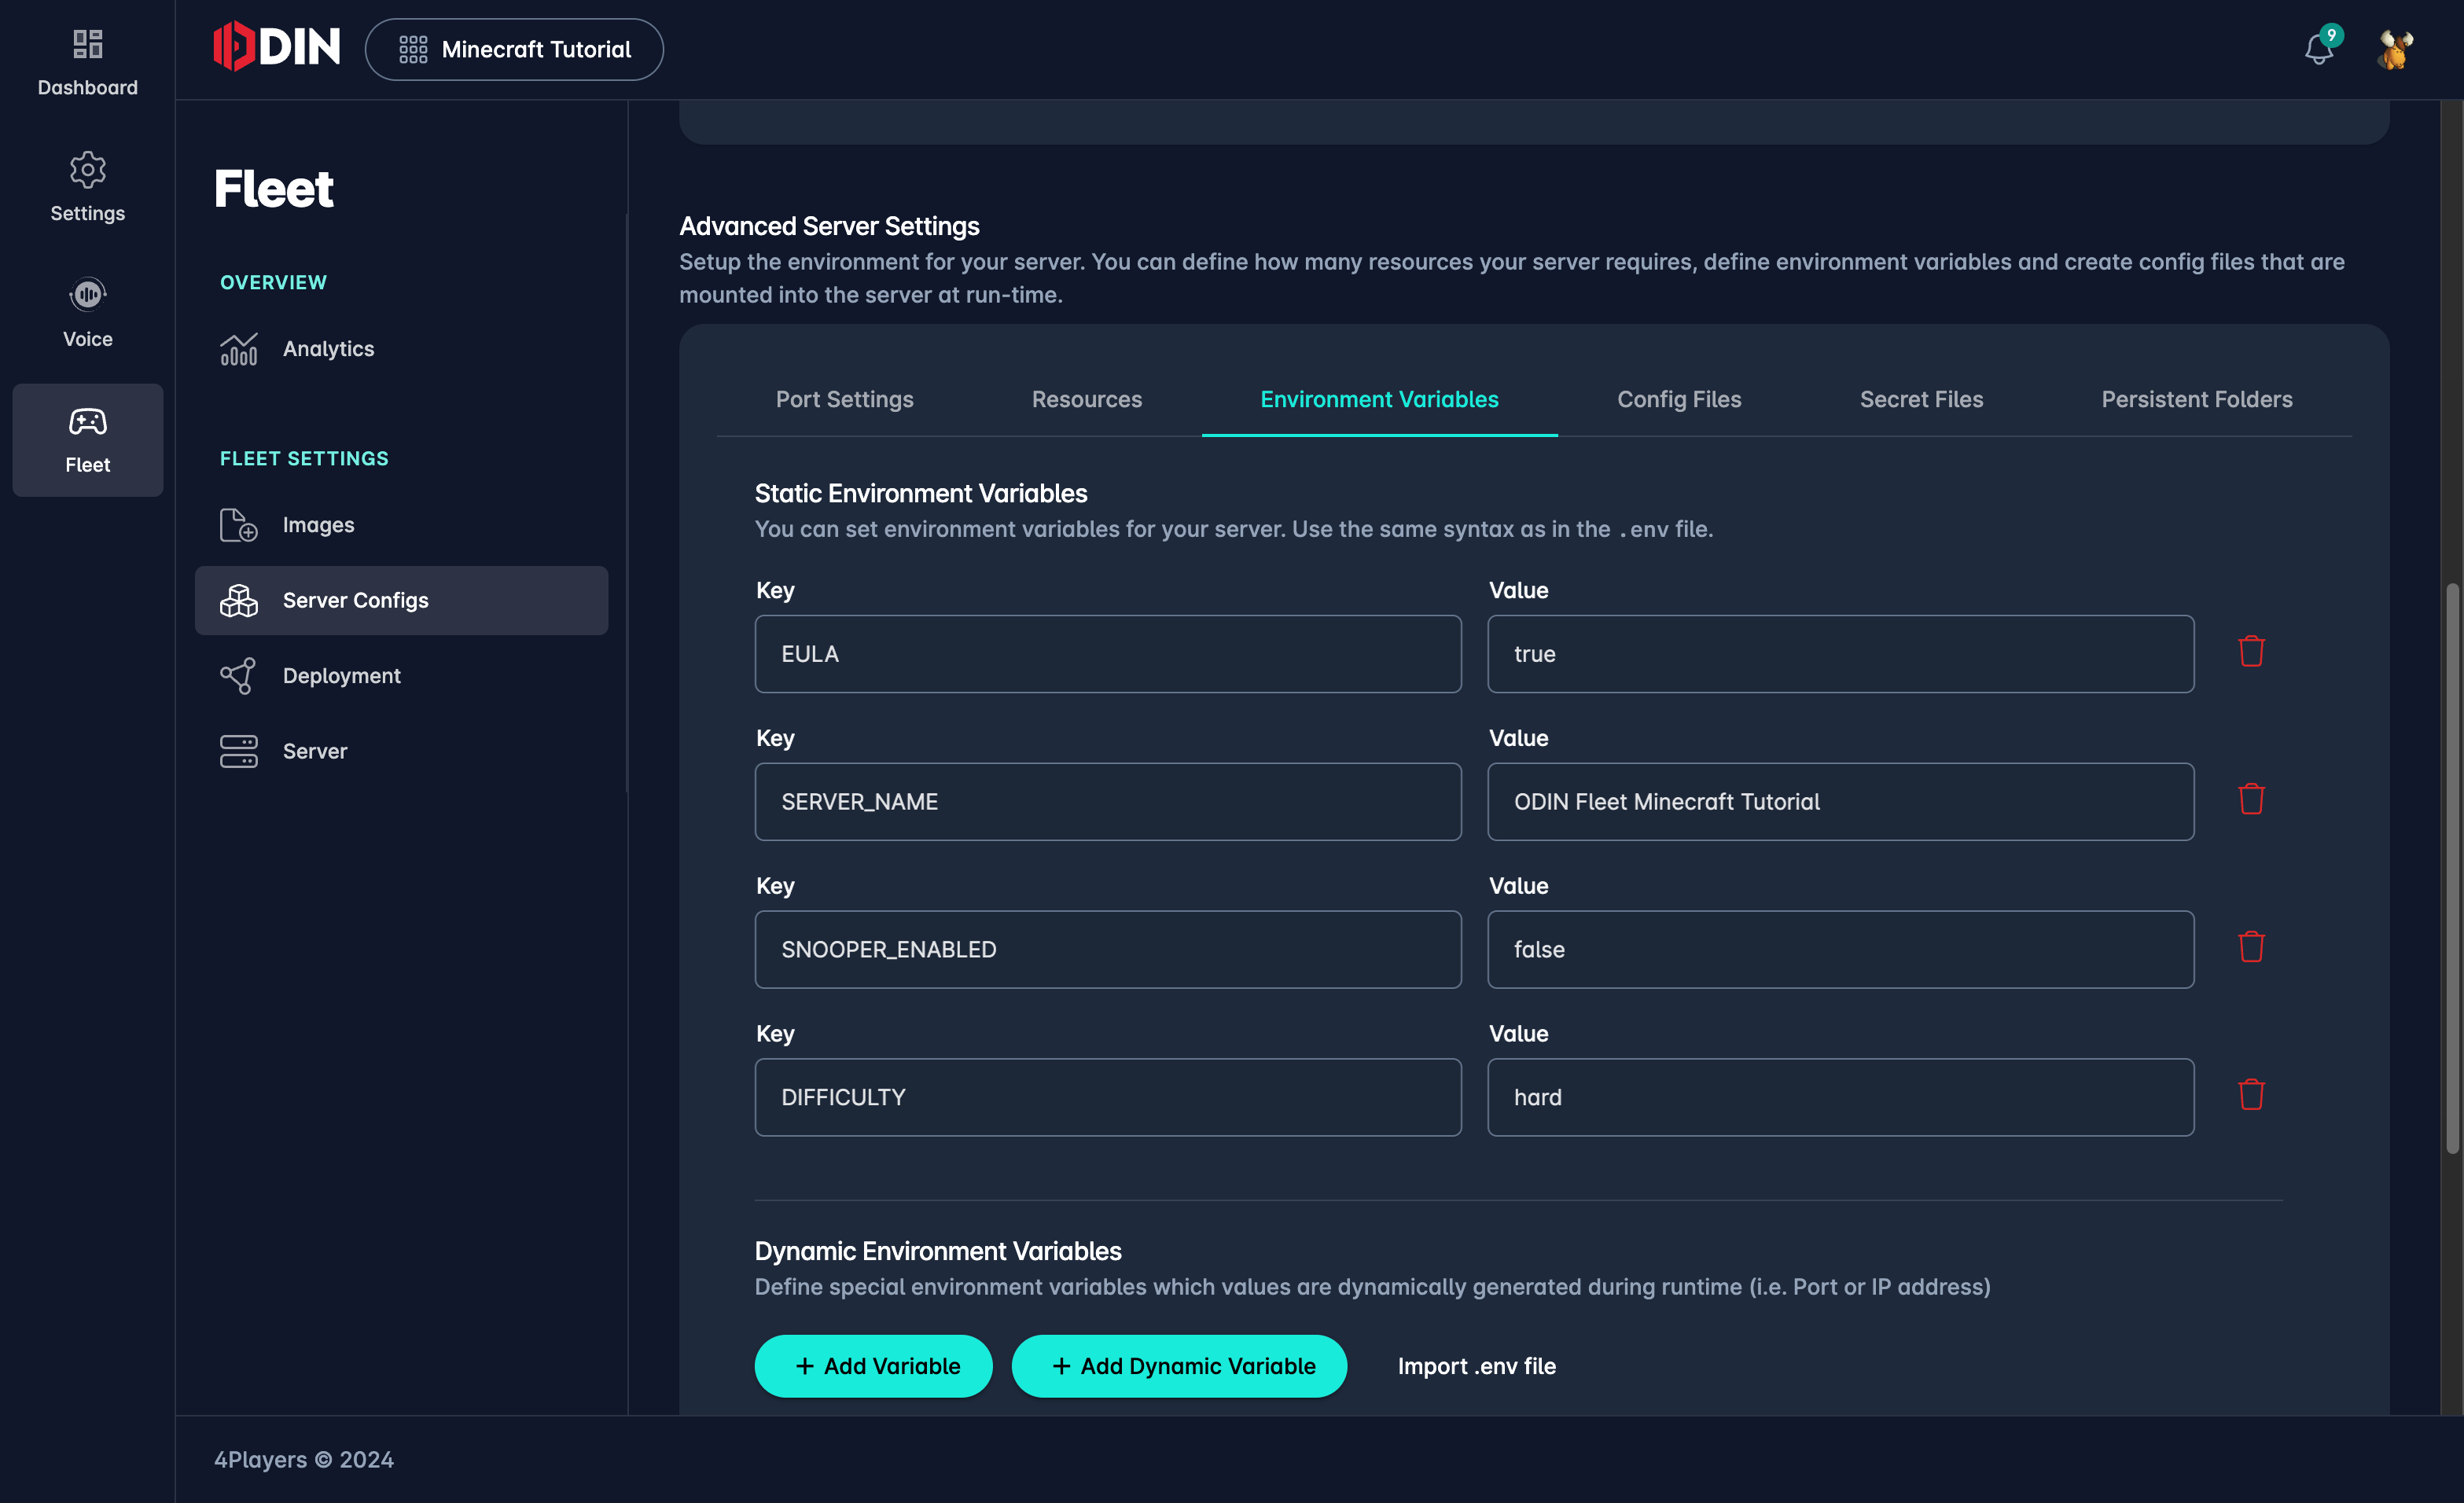
There are two types of variables:
- Static: These are variables that have a fixed value. This is the most common type of variable.
- Dynamic: These are variables that are calculated at runtime. This is not used very often but can be very powerful.
Sometimes your gameserver might need to know on which IP and port it is running, i.e. for telemetry or to connect to a database. In this case you can use dynamic variables. You ca create a dynamic variable and set the type to “Port”. Then choose the game port that you have defined earlier. At runtime the environment variable will have the value of the published port. The same applies to the IP address which is also a dynamic variable.
Config Files
There is not much to do here for Minecraft. But instead of configuring your gameserver with environment variables you can also just use a config file. You define the content of the config file in the Dashboard and it will then be mounted into the specified path and filename in the container.
Secret Files
These are basically the same as config files, but these are encrypted. This is useful if you have a config file that contains sensitive data like passwords or API keys. You can create a secret file and then use it in the same way as a config file.
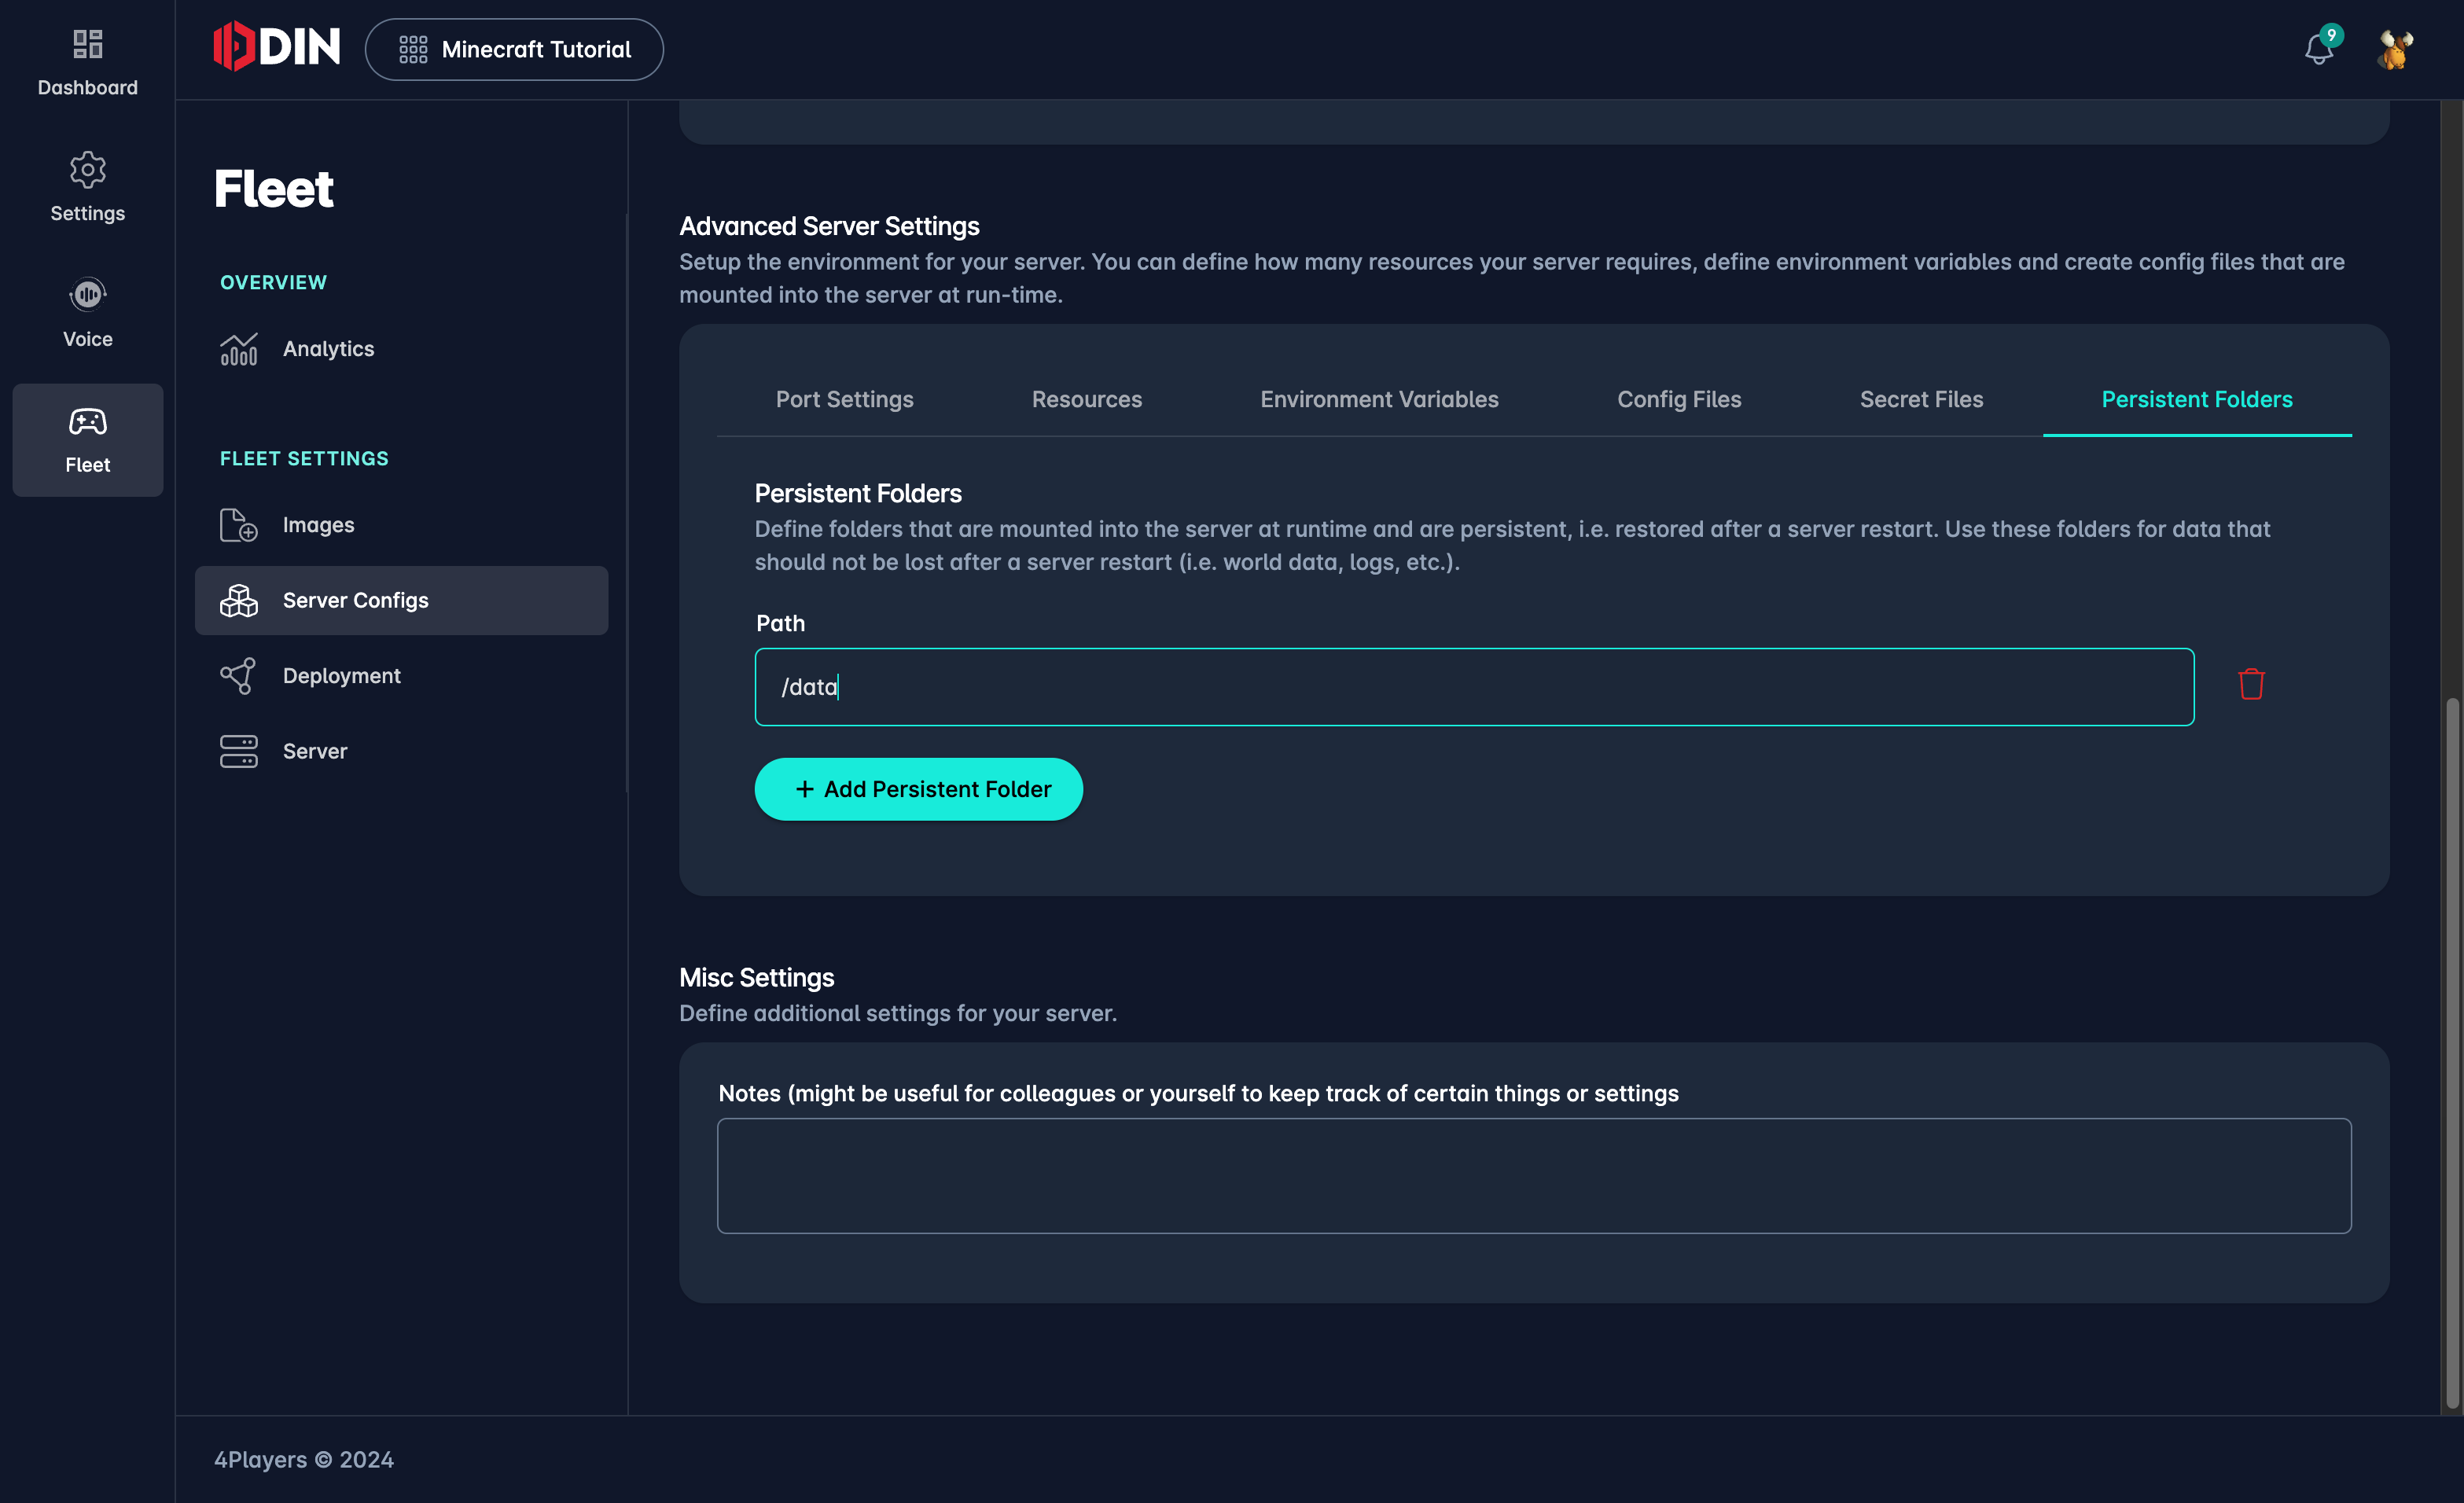
Mounts
Minecraft is a stateful server. This means that it stores data on the disk. This data is important and should not be lost. In this case, we mount a volume to the /data folder in the container. This way the data is stored on the host machine and not in the container. This is important as the container can be deleted at any time and the data would be lost.
Saving and moving on
Click on Save (scroll up) to save the server config. Next, we can finally deploy our configures server to the world.
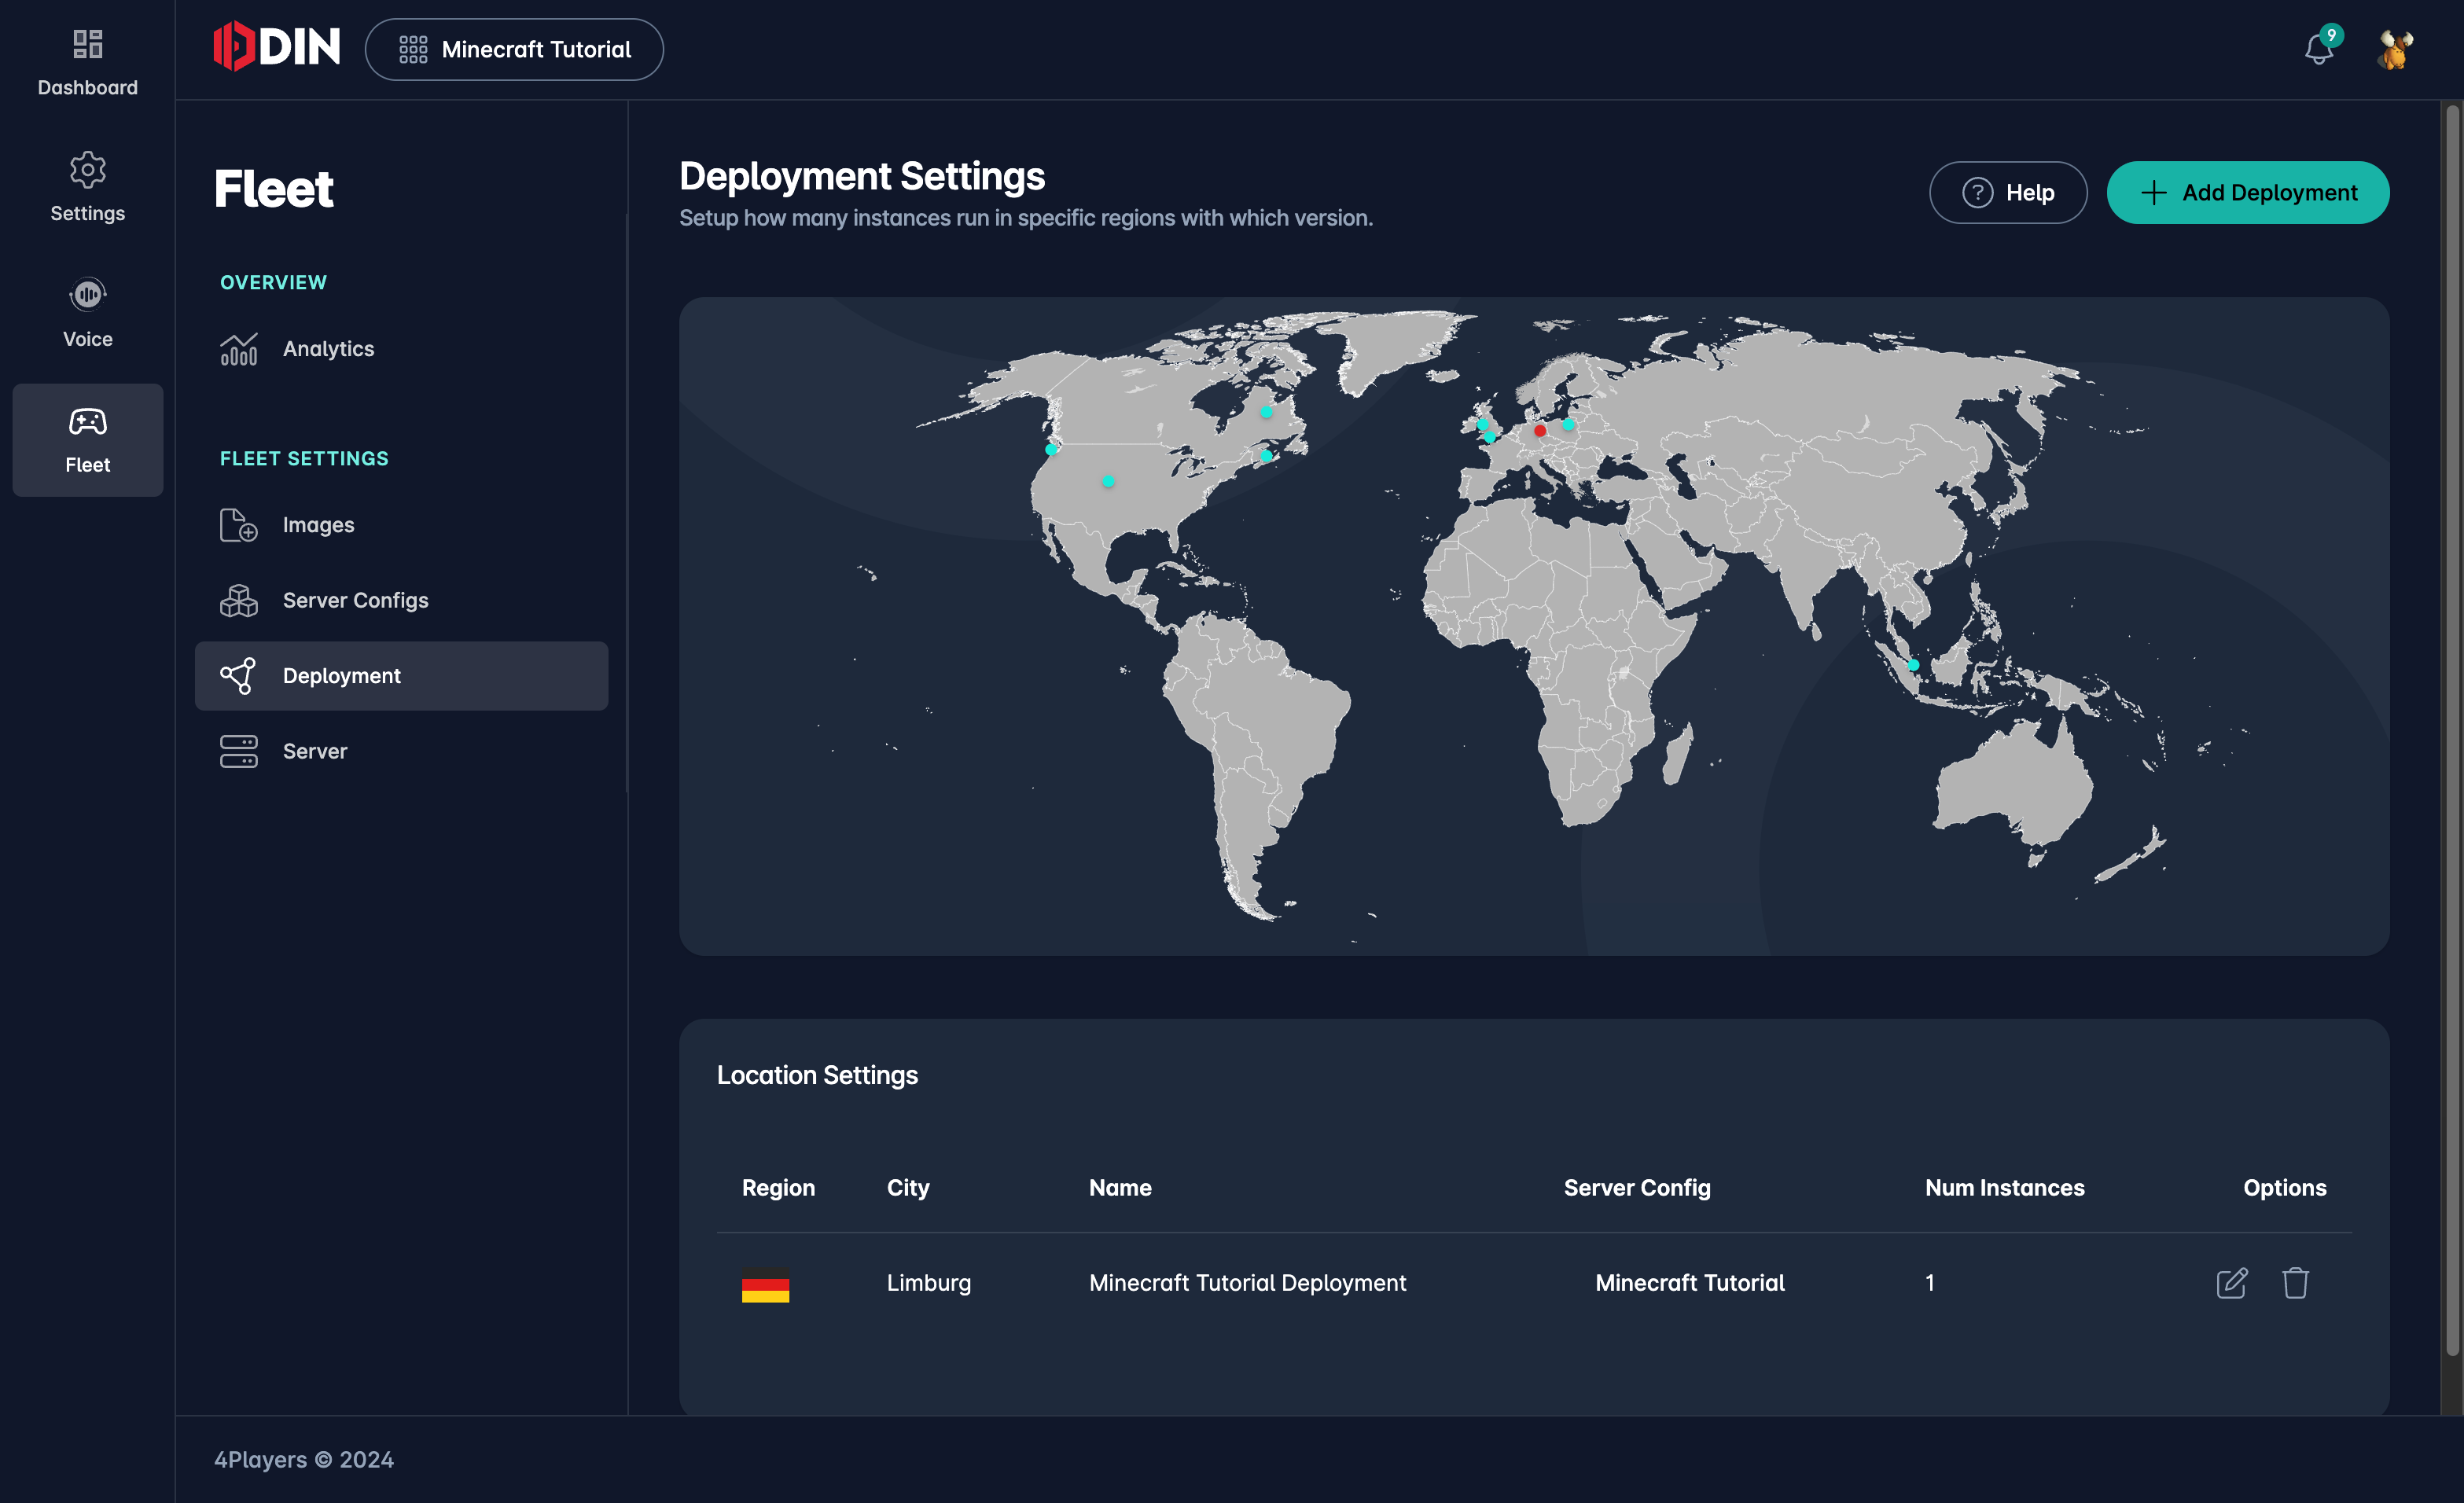
Creating a Deployment
Navigate to Deployments on the left side. You’ll notice a world map where you can see all available locations where you can deploy your gameserver. Click on Add Deployment to start the process.
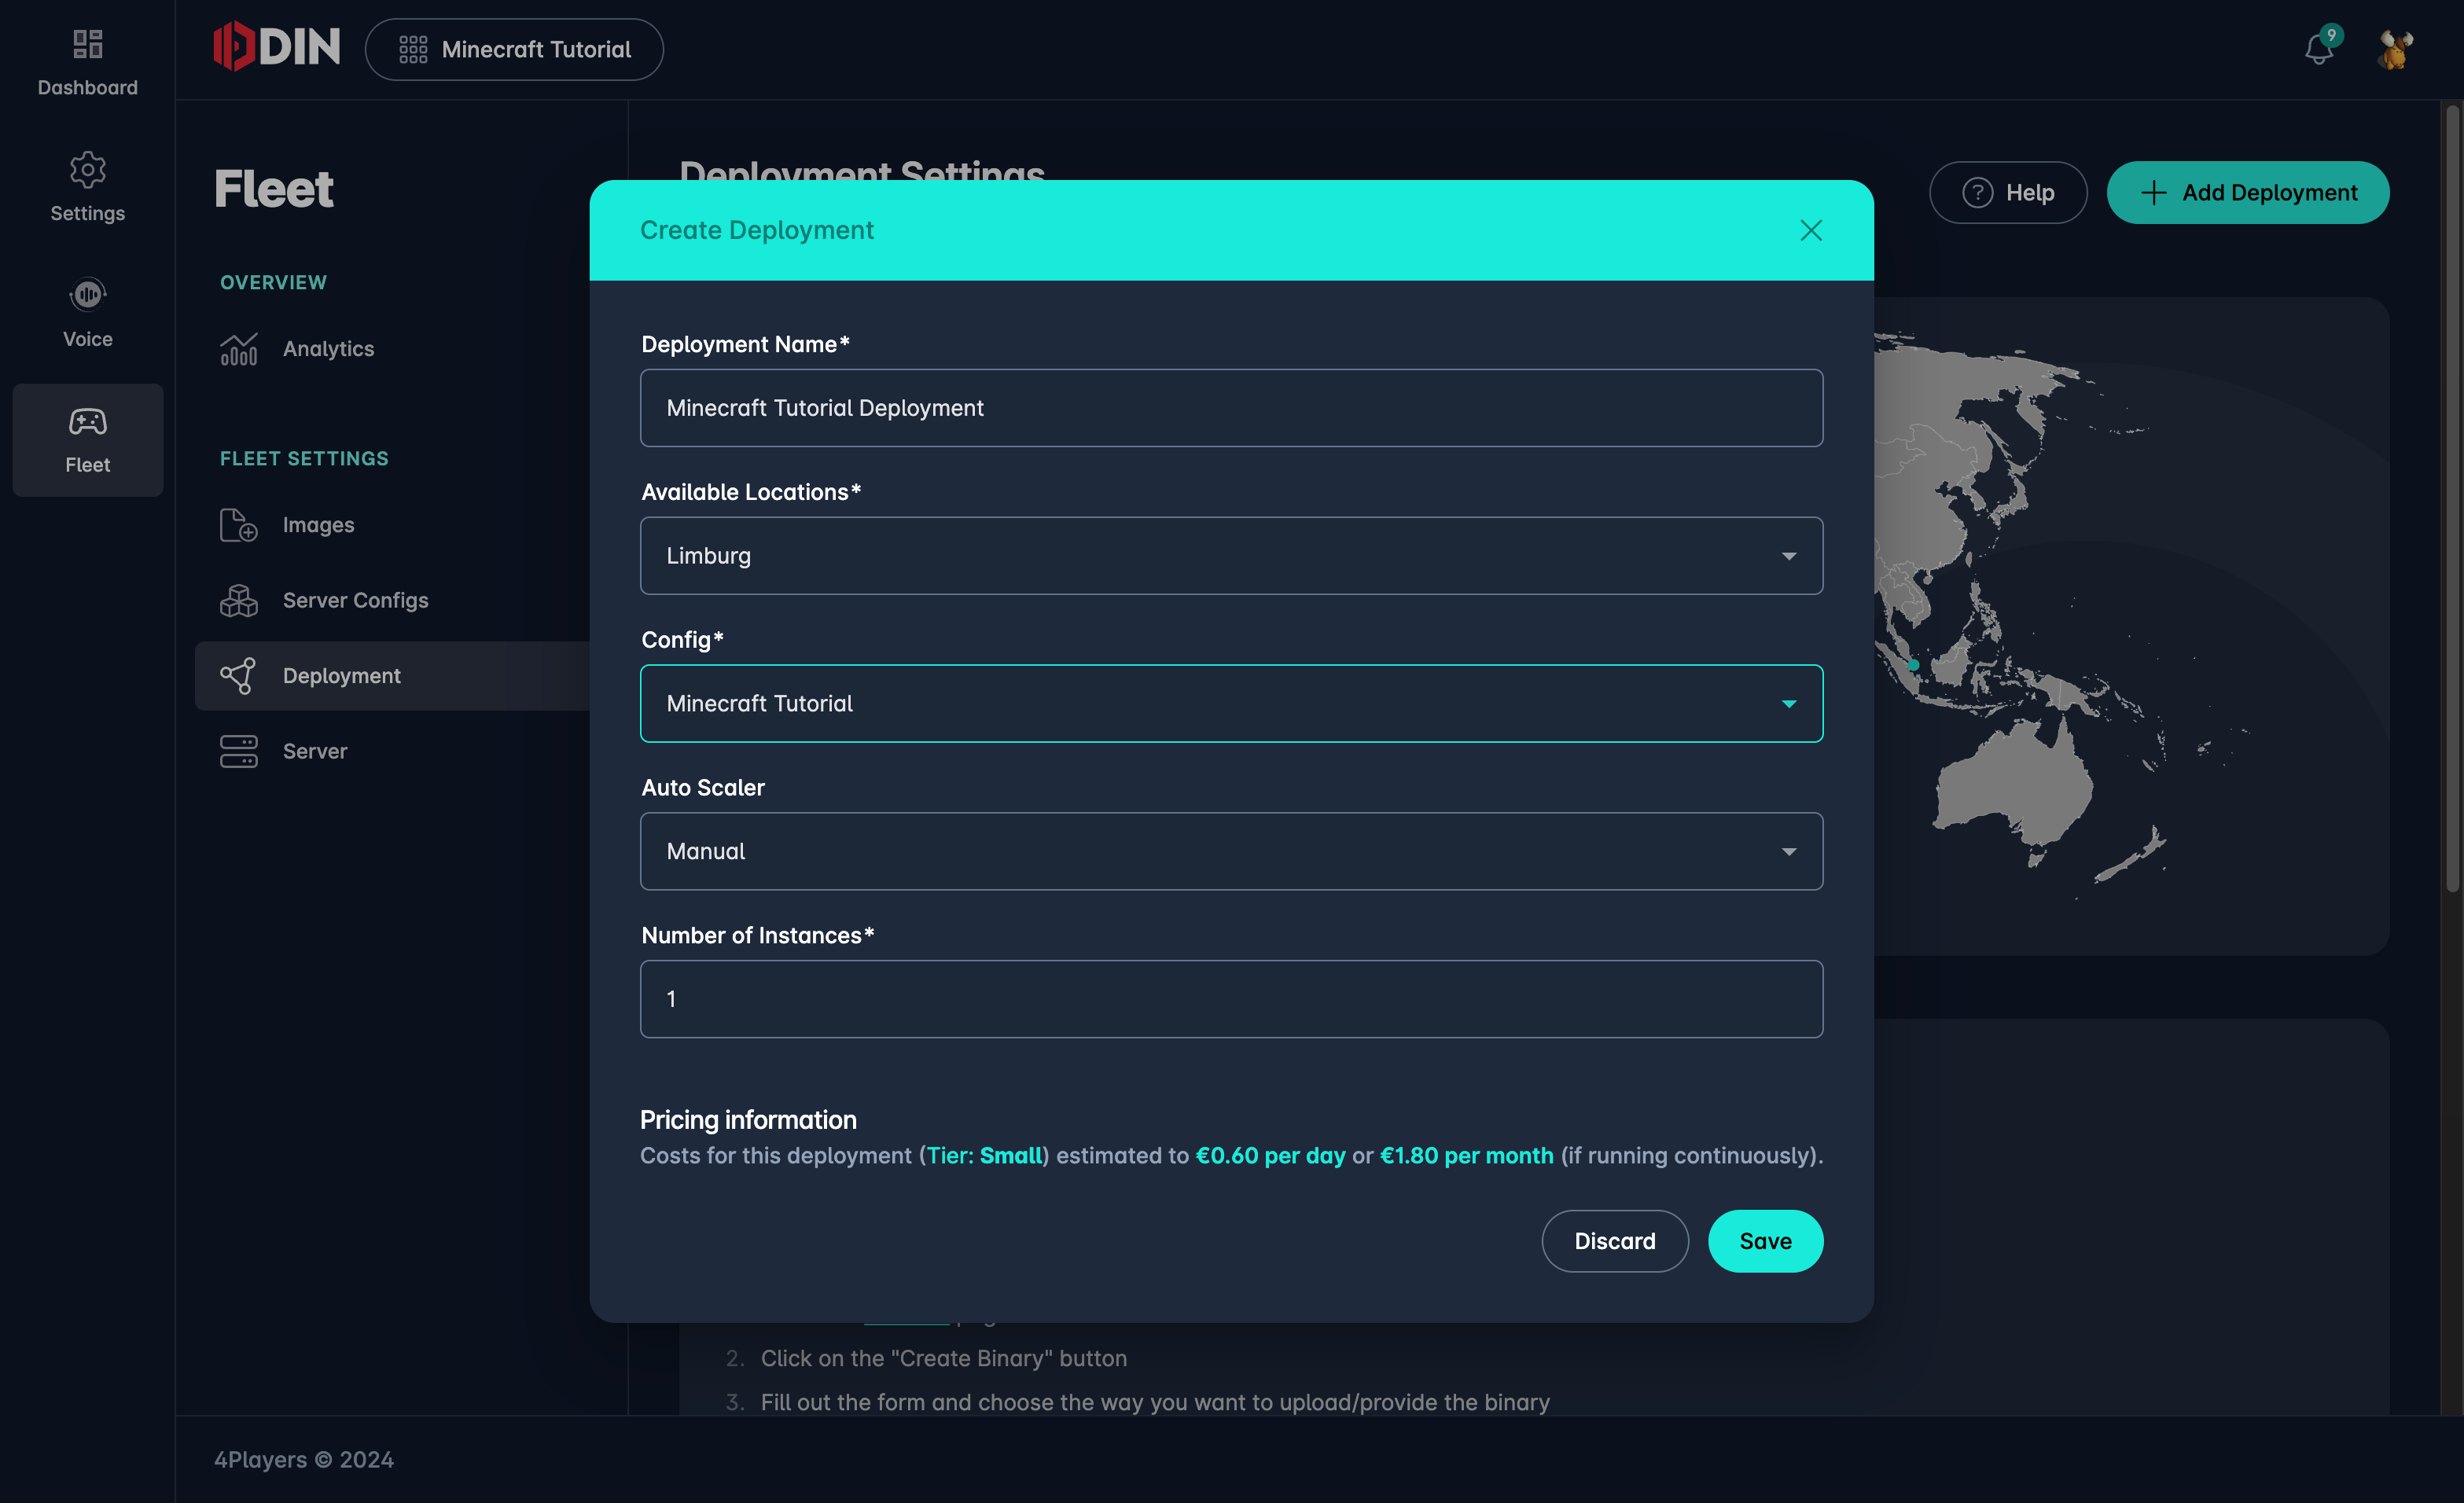
You’ll need to enter a few details:
- Name:
Minecraft Tutorial(This is the name of the deployment to keep track of it) - Location:
Limburg(Choose the location where you want to deploy the gameserver) - Config:
Minecraft Tutorial(This is the server config that you have created earlier) - Auto-Scaler:
Off(This is a feature that automatically scales the deployment based on the number of players. We’ll come to that later) - Num Instances:
1(This is the number of servers that you want to deploy)
When creating a deployment a cost estimation is displayed which is based on the resources you have chosen. This is only an estimation and the actual costs might be different. You can also see the costs in the dashboard.
After you saved your deployments the screen changes a bit and shows the deployment that we have created just yet.
That’s it. ODIN Fleet will do the rest. Depending on your restart settings (we had it on Always) you will not have to do anything. No babysitting, no cost control, no manual restarts. ODIN Fleet will take care of everything.
Monitoring
You can monitor your deployment in the dashboard. You can see the state of the server, the logs, the resources used and much more. You can also create backups of the persistent folders that you have defined in the server config.
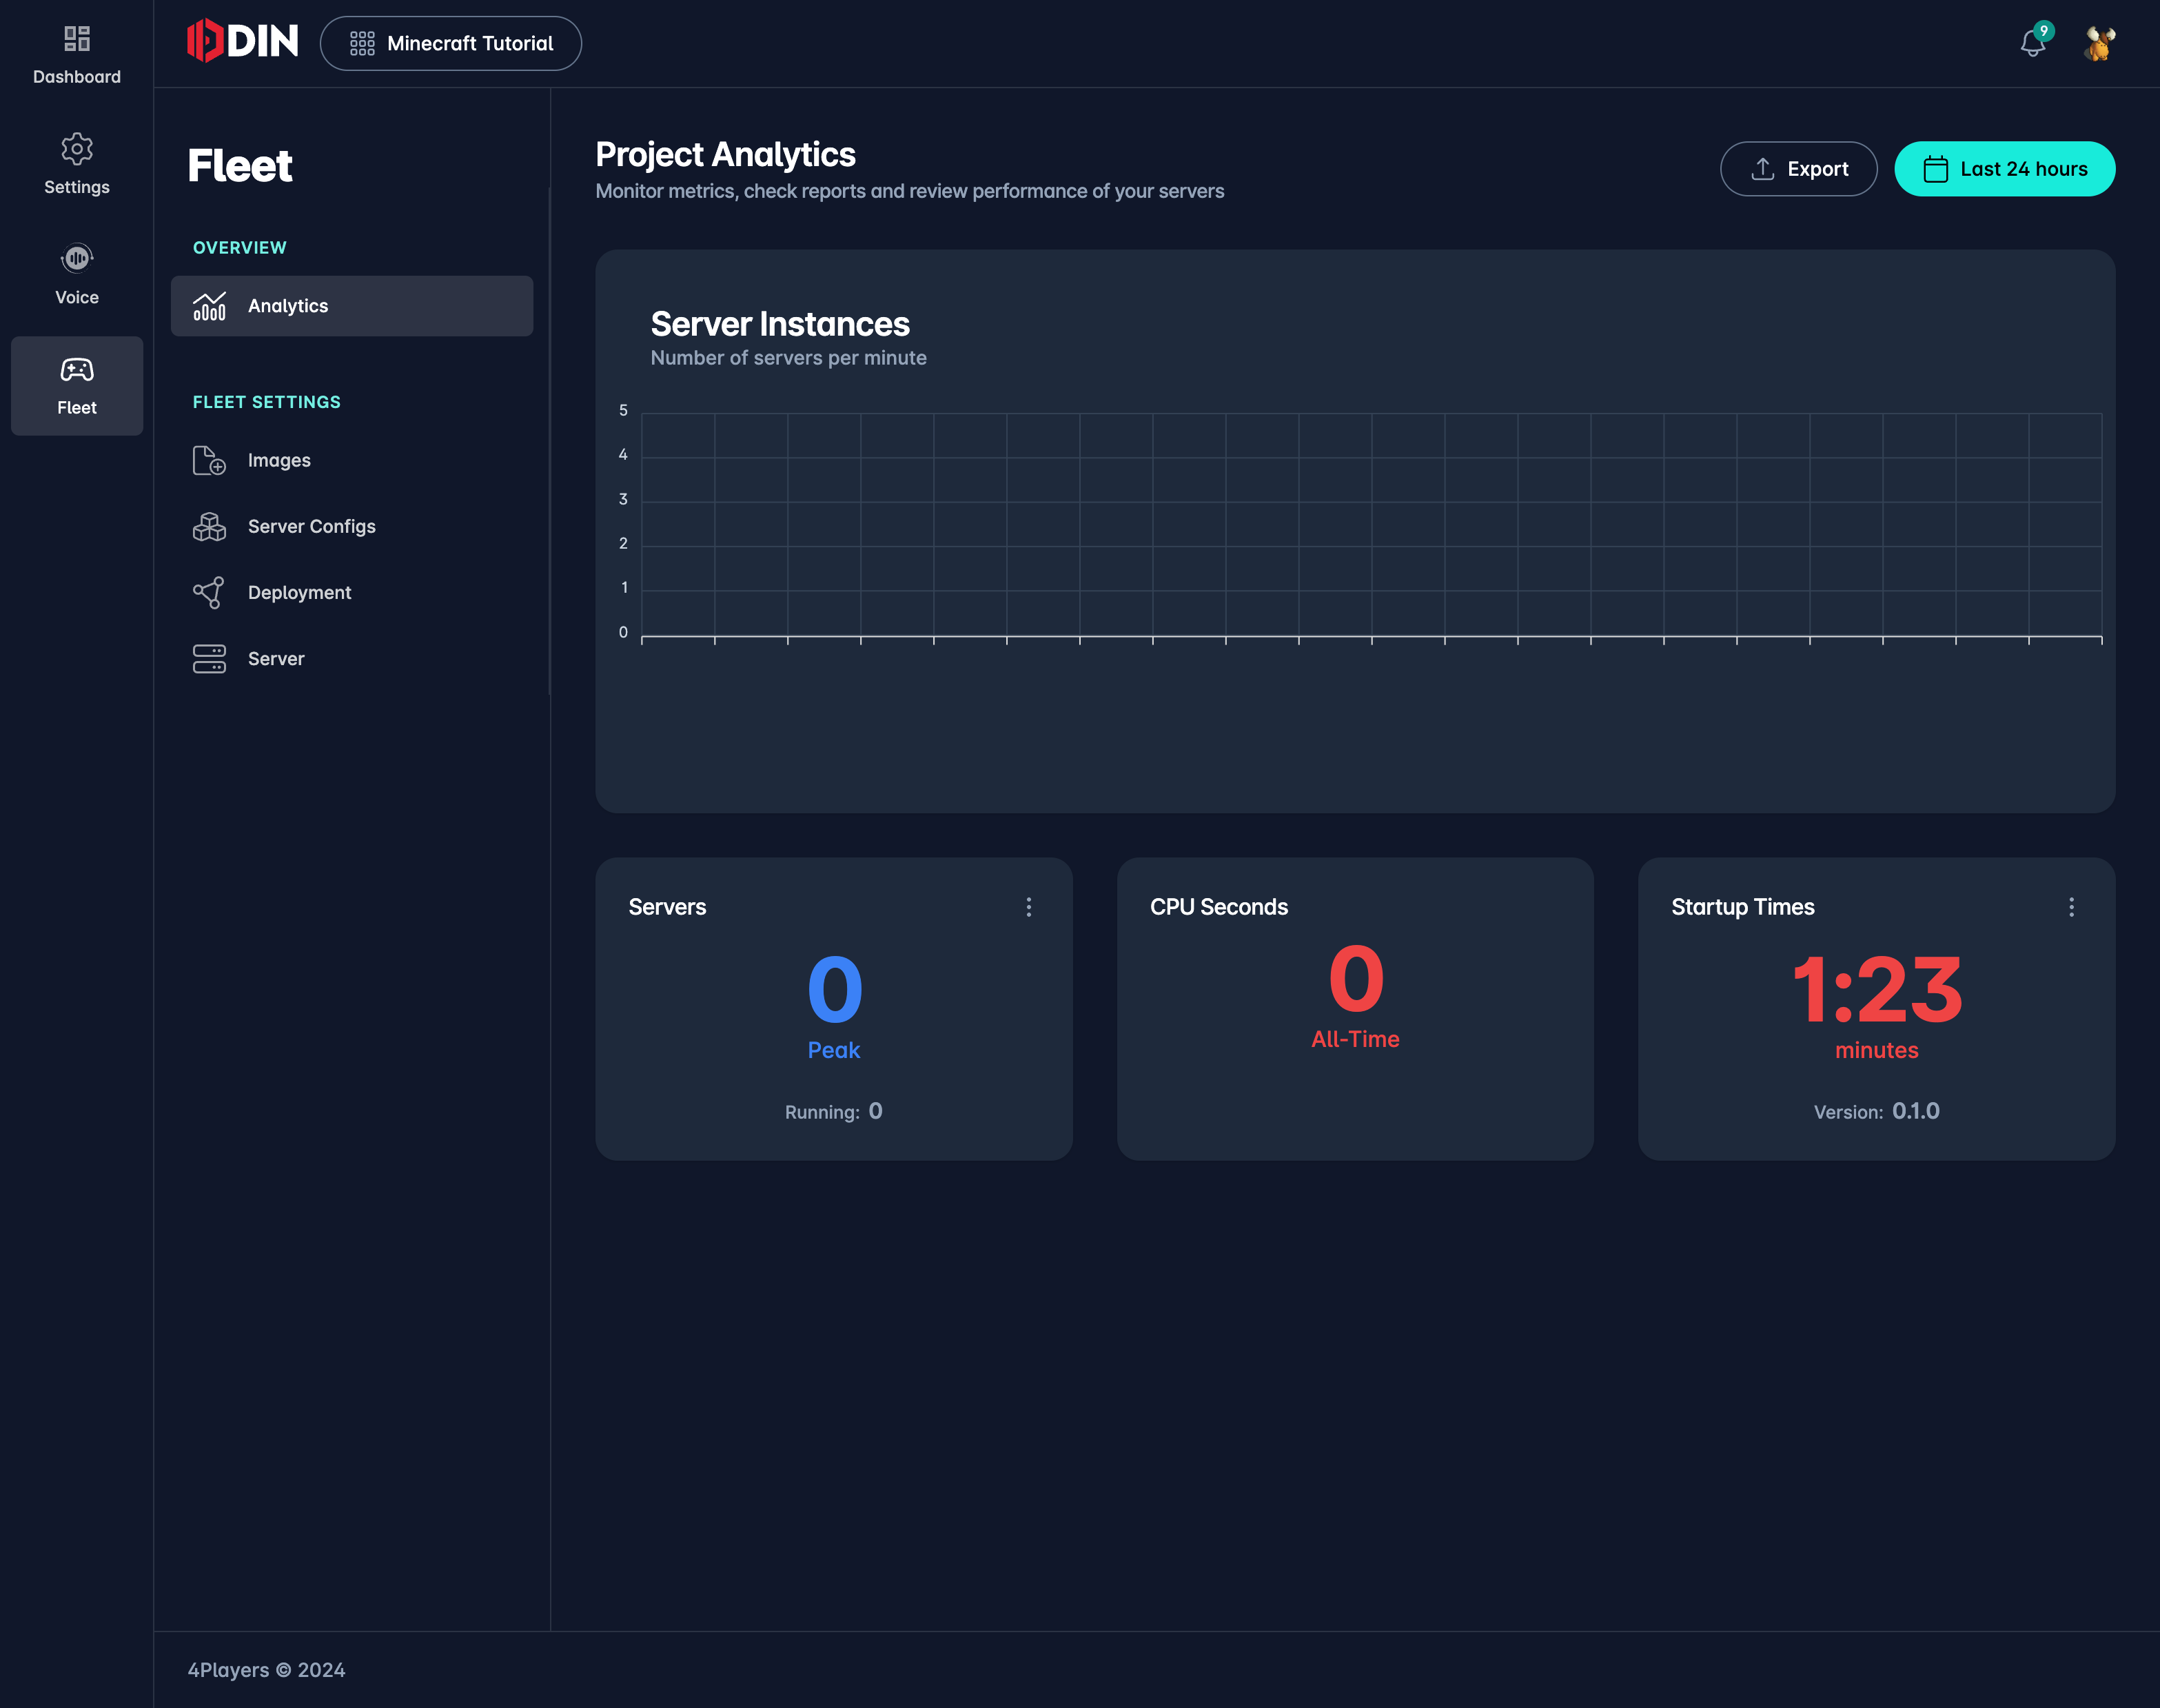
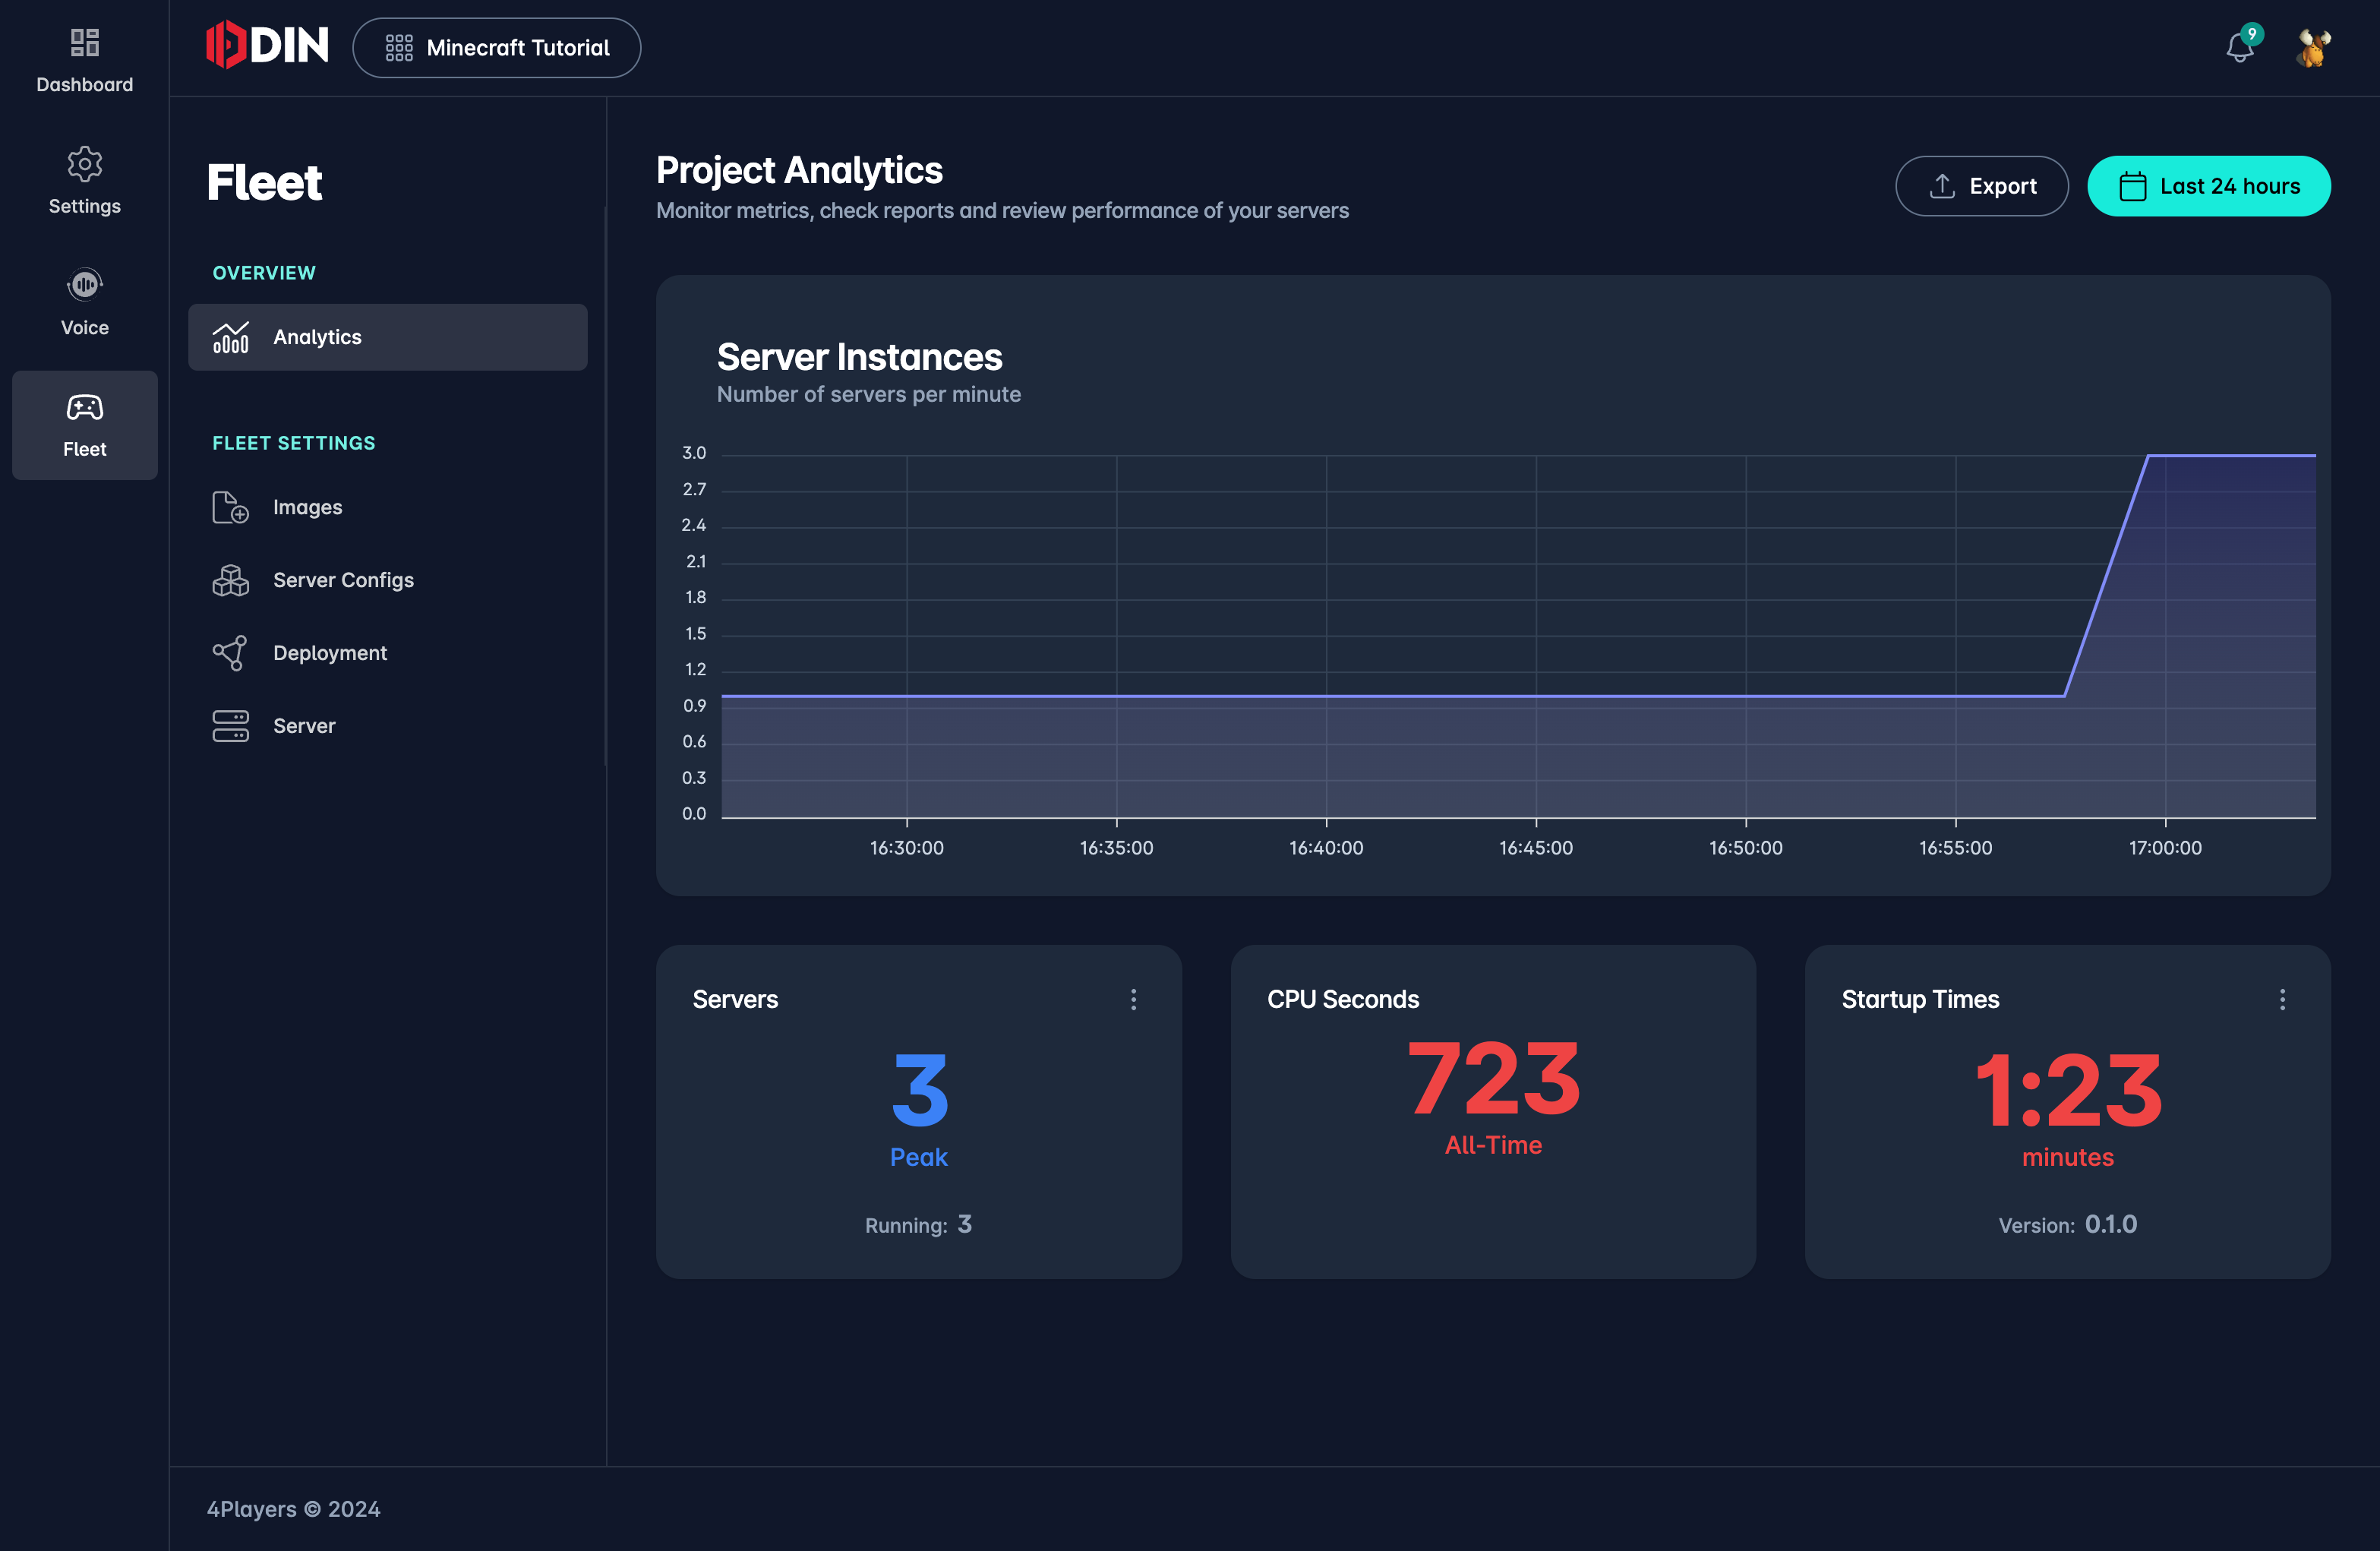
First, let’s navigate to Analytics. Here you can see how many servers ran throughout the billing period, within the last hours, etc. It’s an easy to use cost control as this is what we charge you. The peak number of running instances per day.
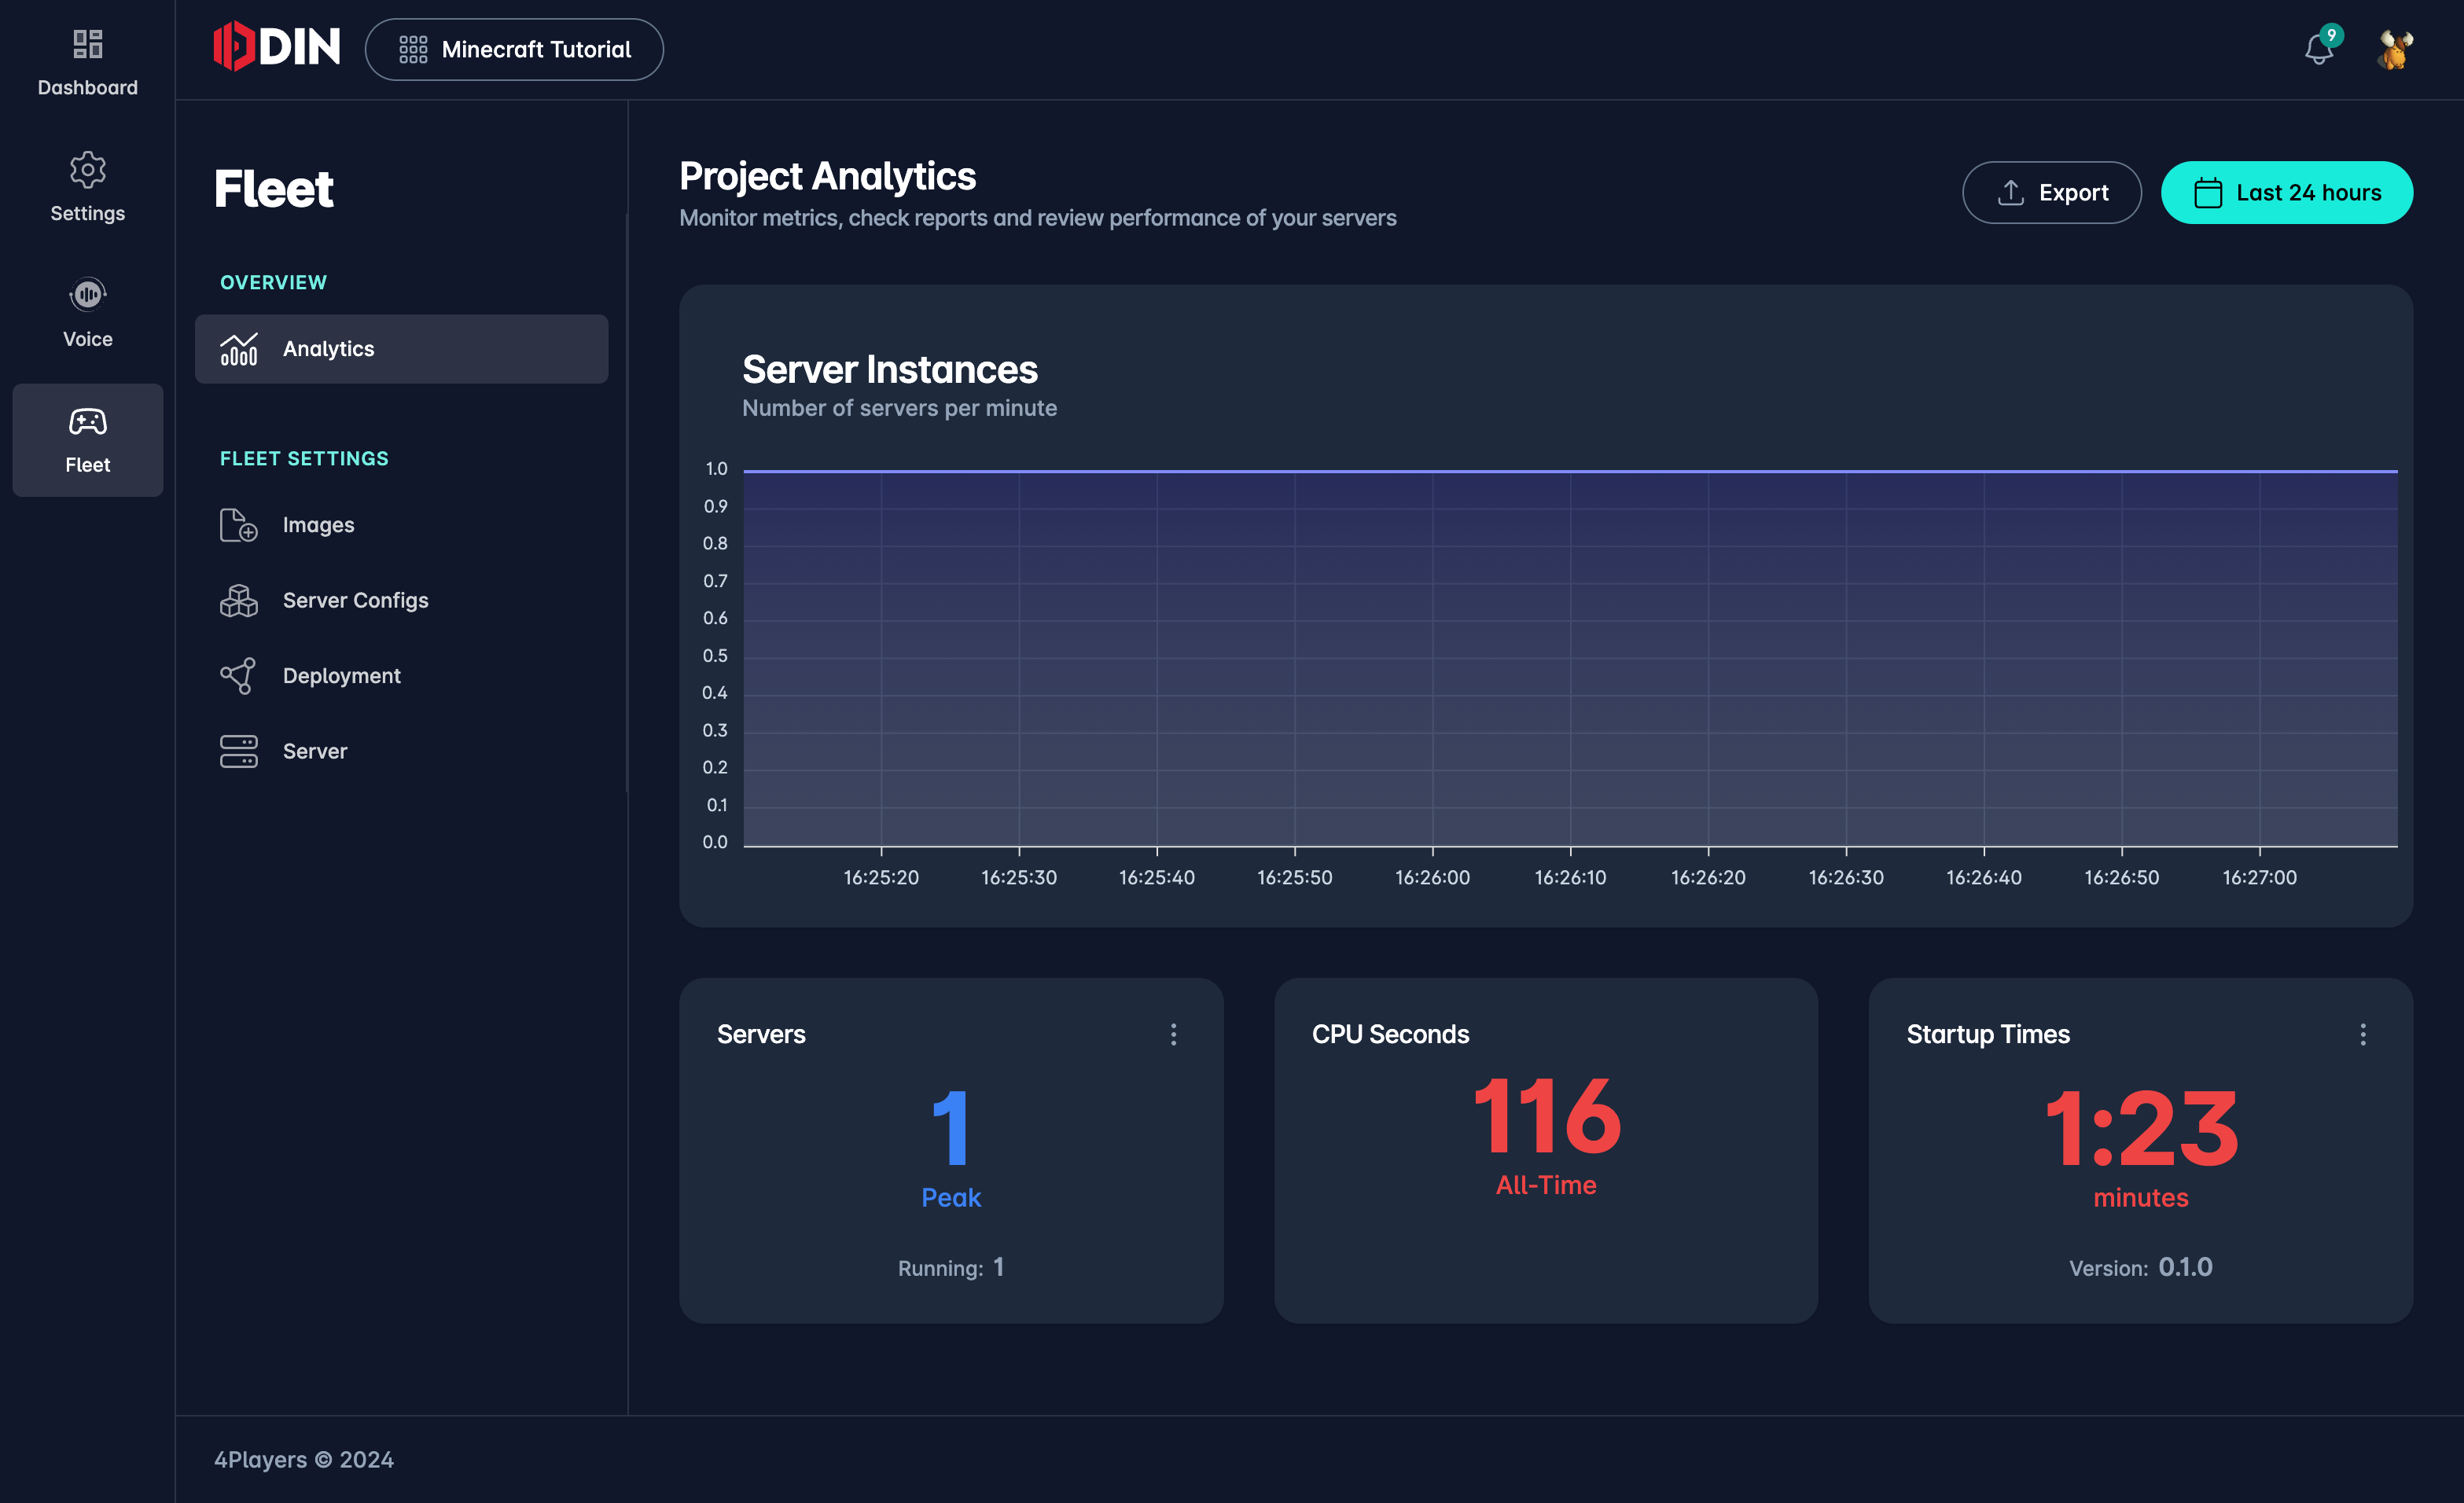
As you can see, it’ll show one instance running.
But, we want to dig deeper and understand which servers have been deployed and how many resources they are consuming. Click on Servers on the sidebar and you’ll see a list with all running servers from all deployments. Click on the server to see more details.
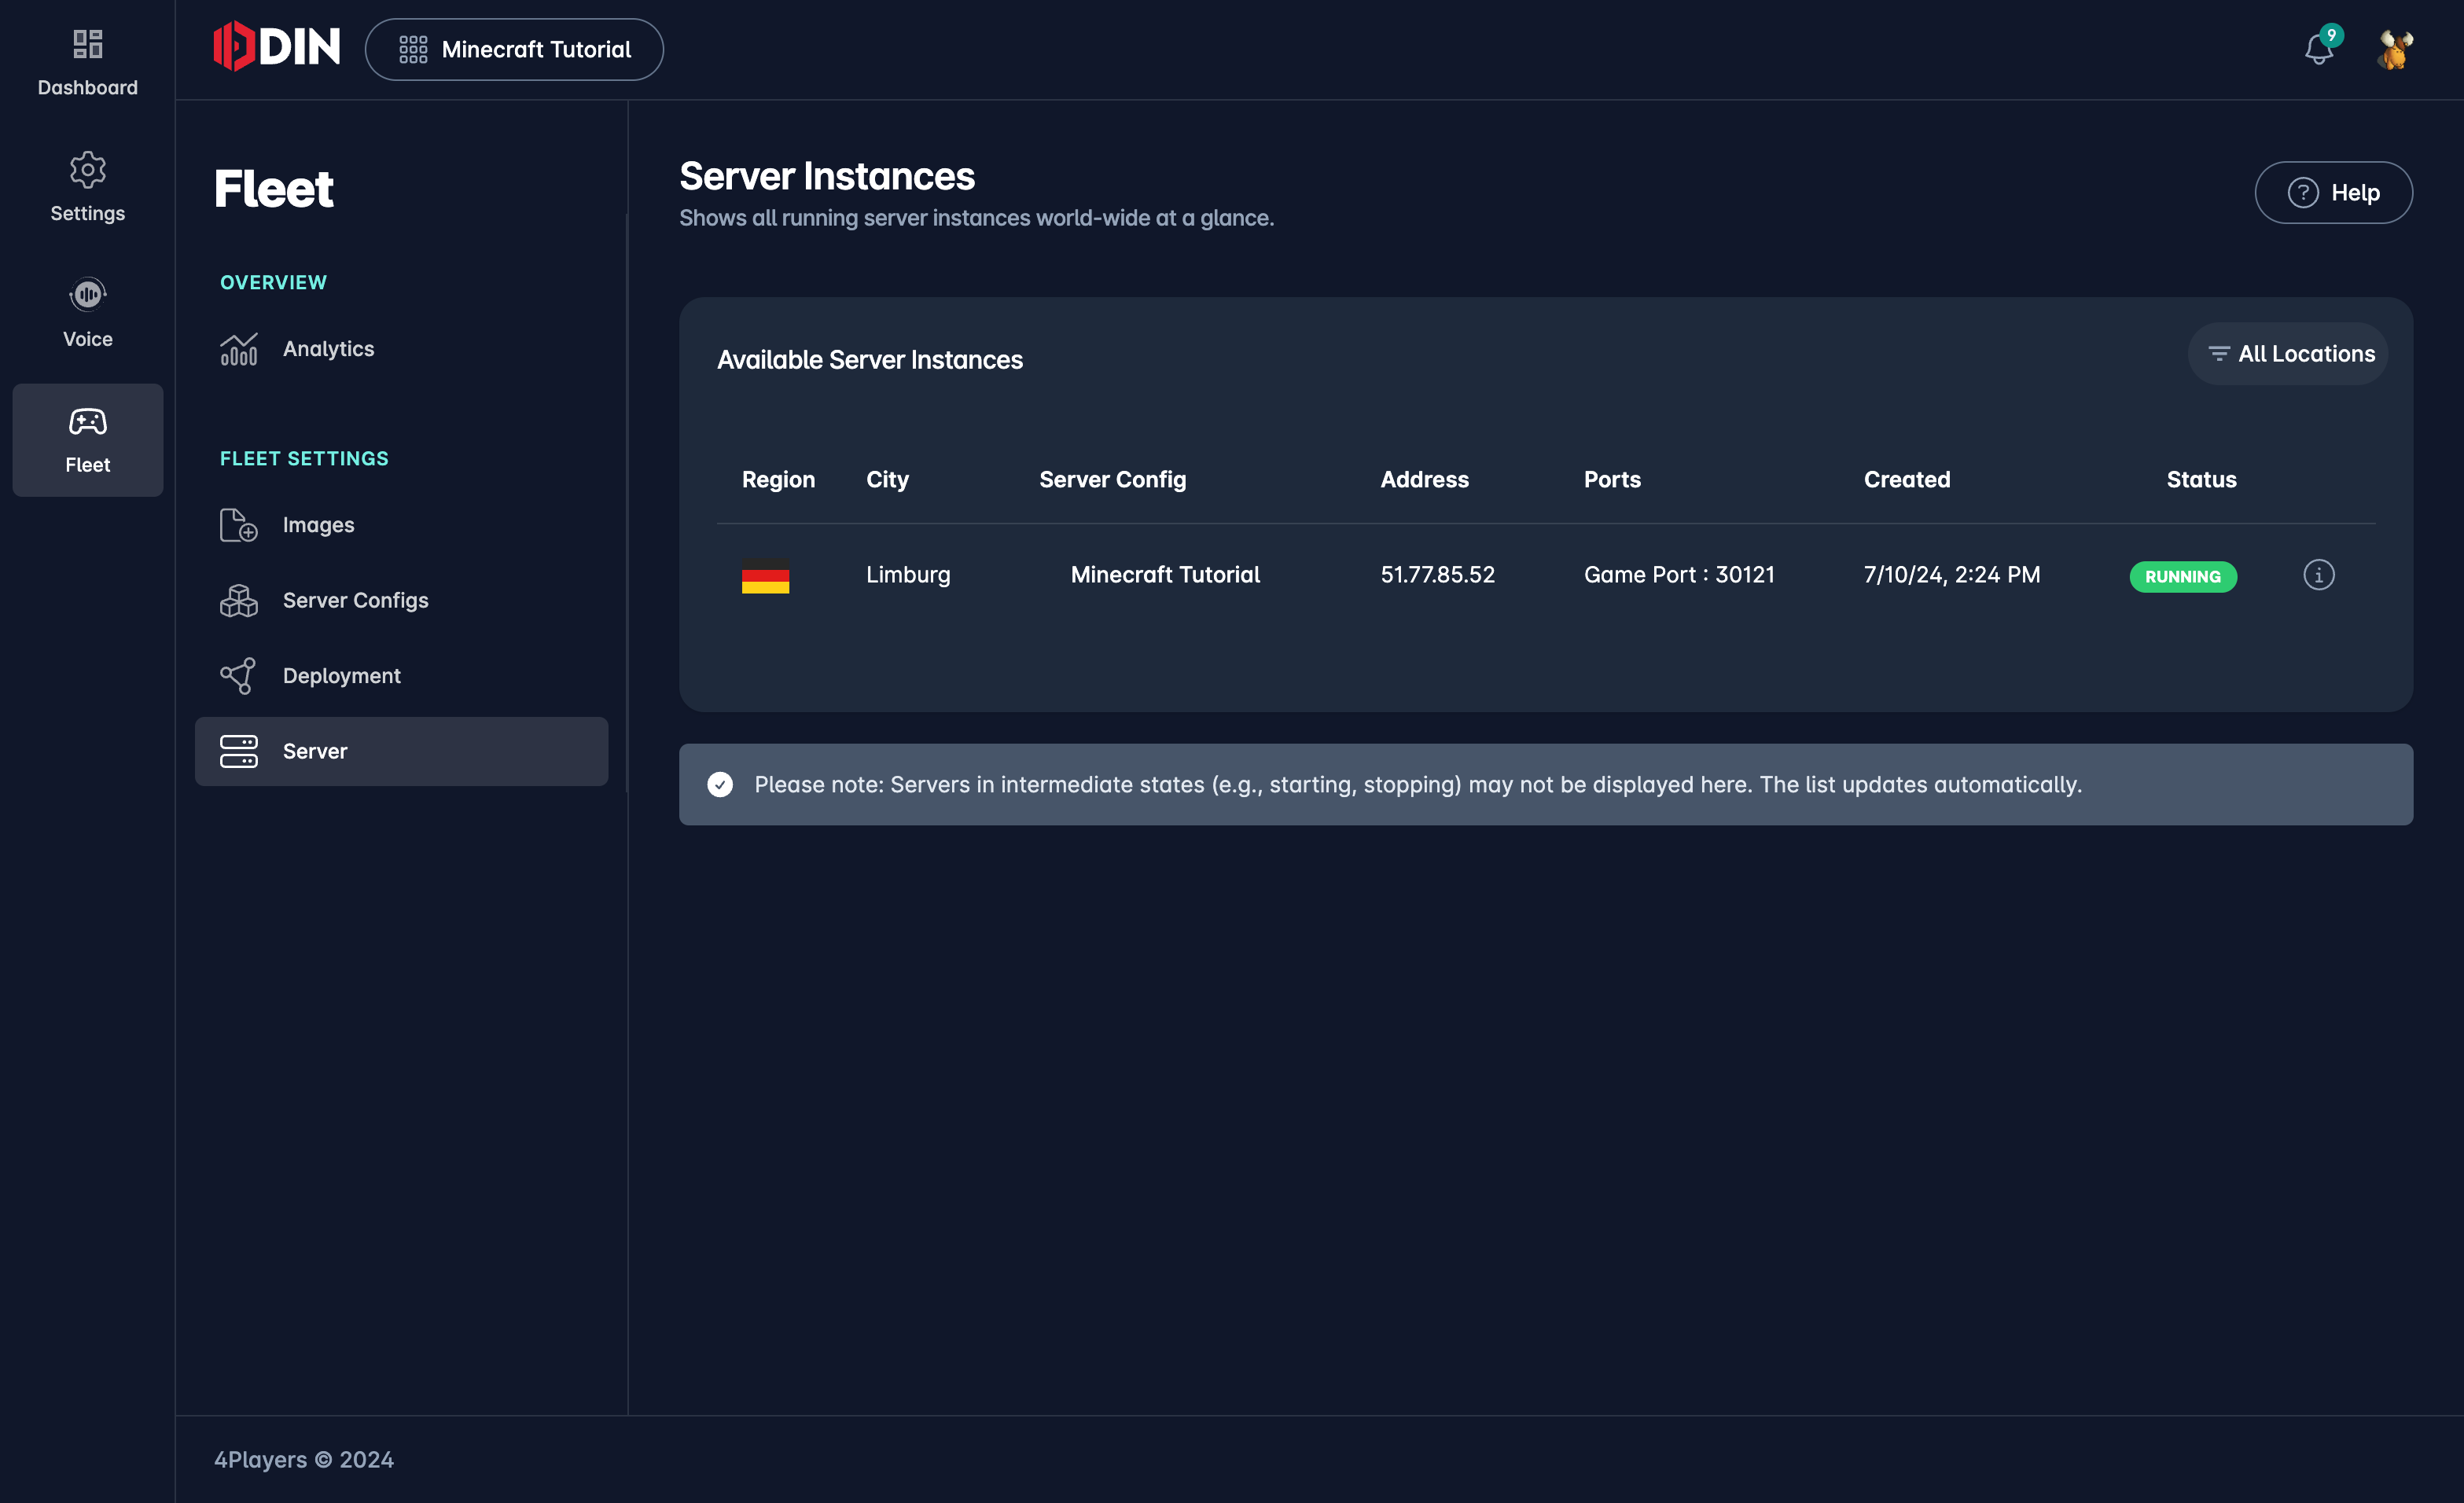
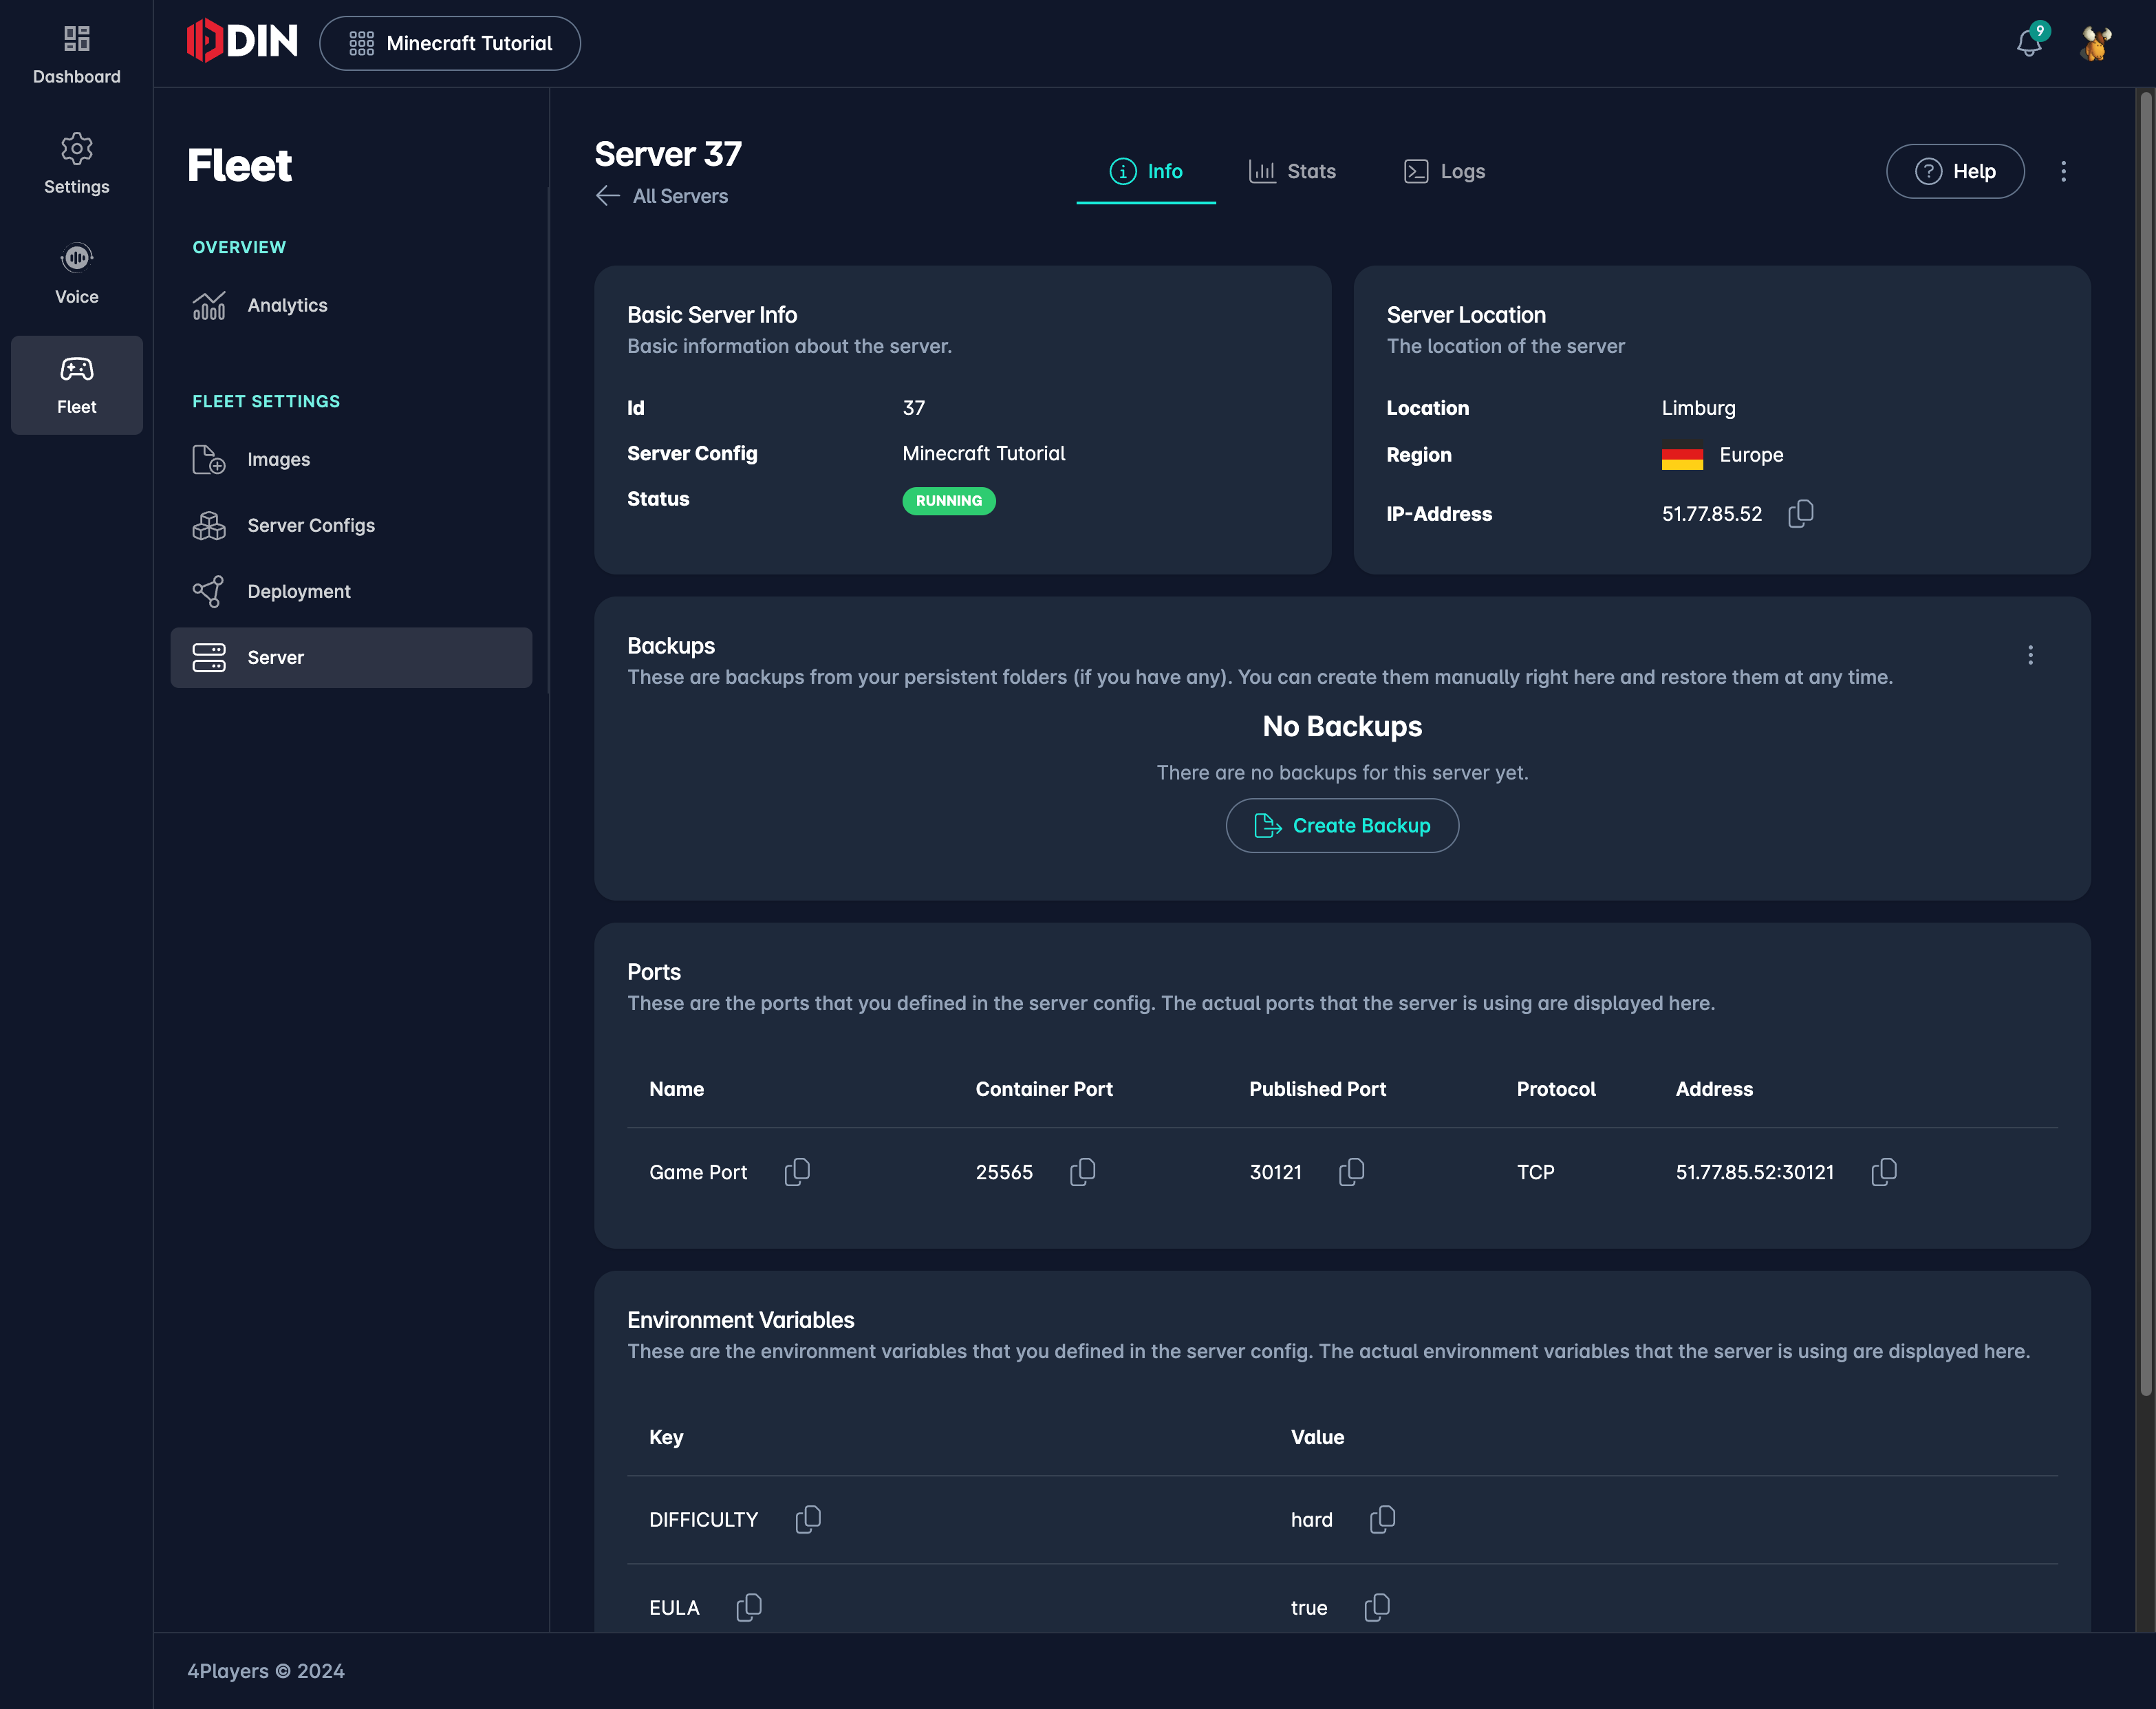
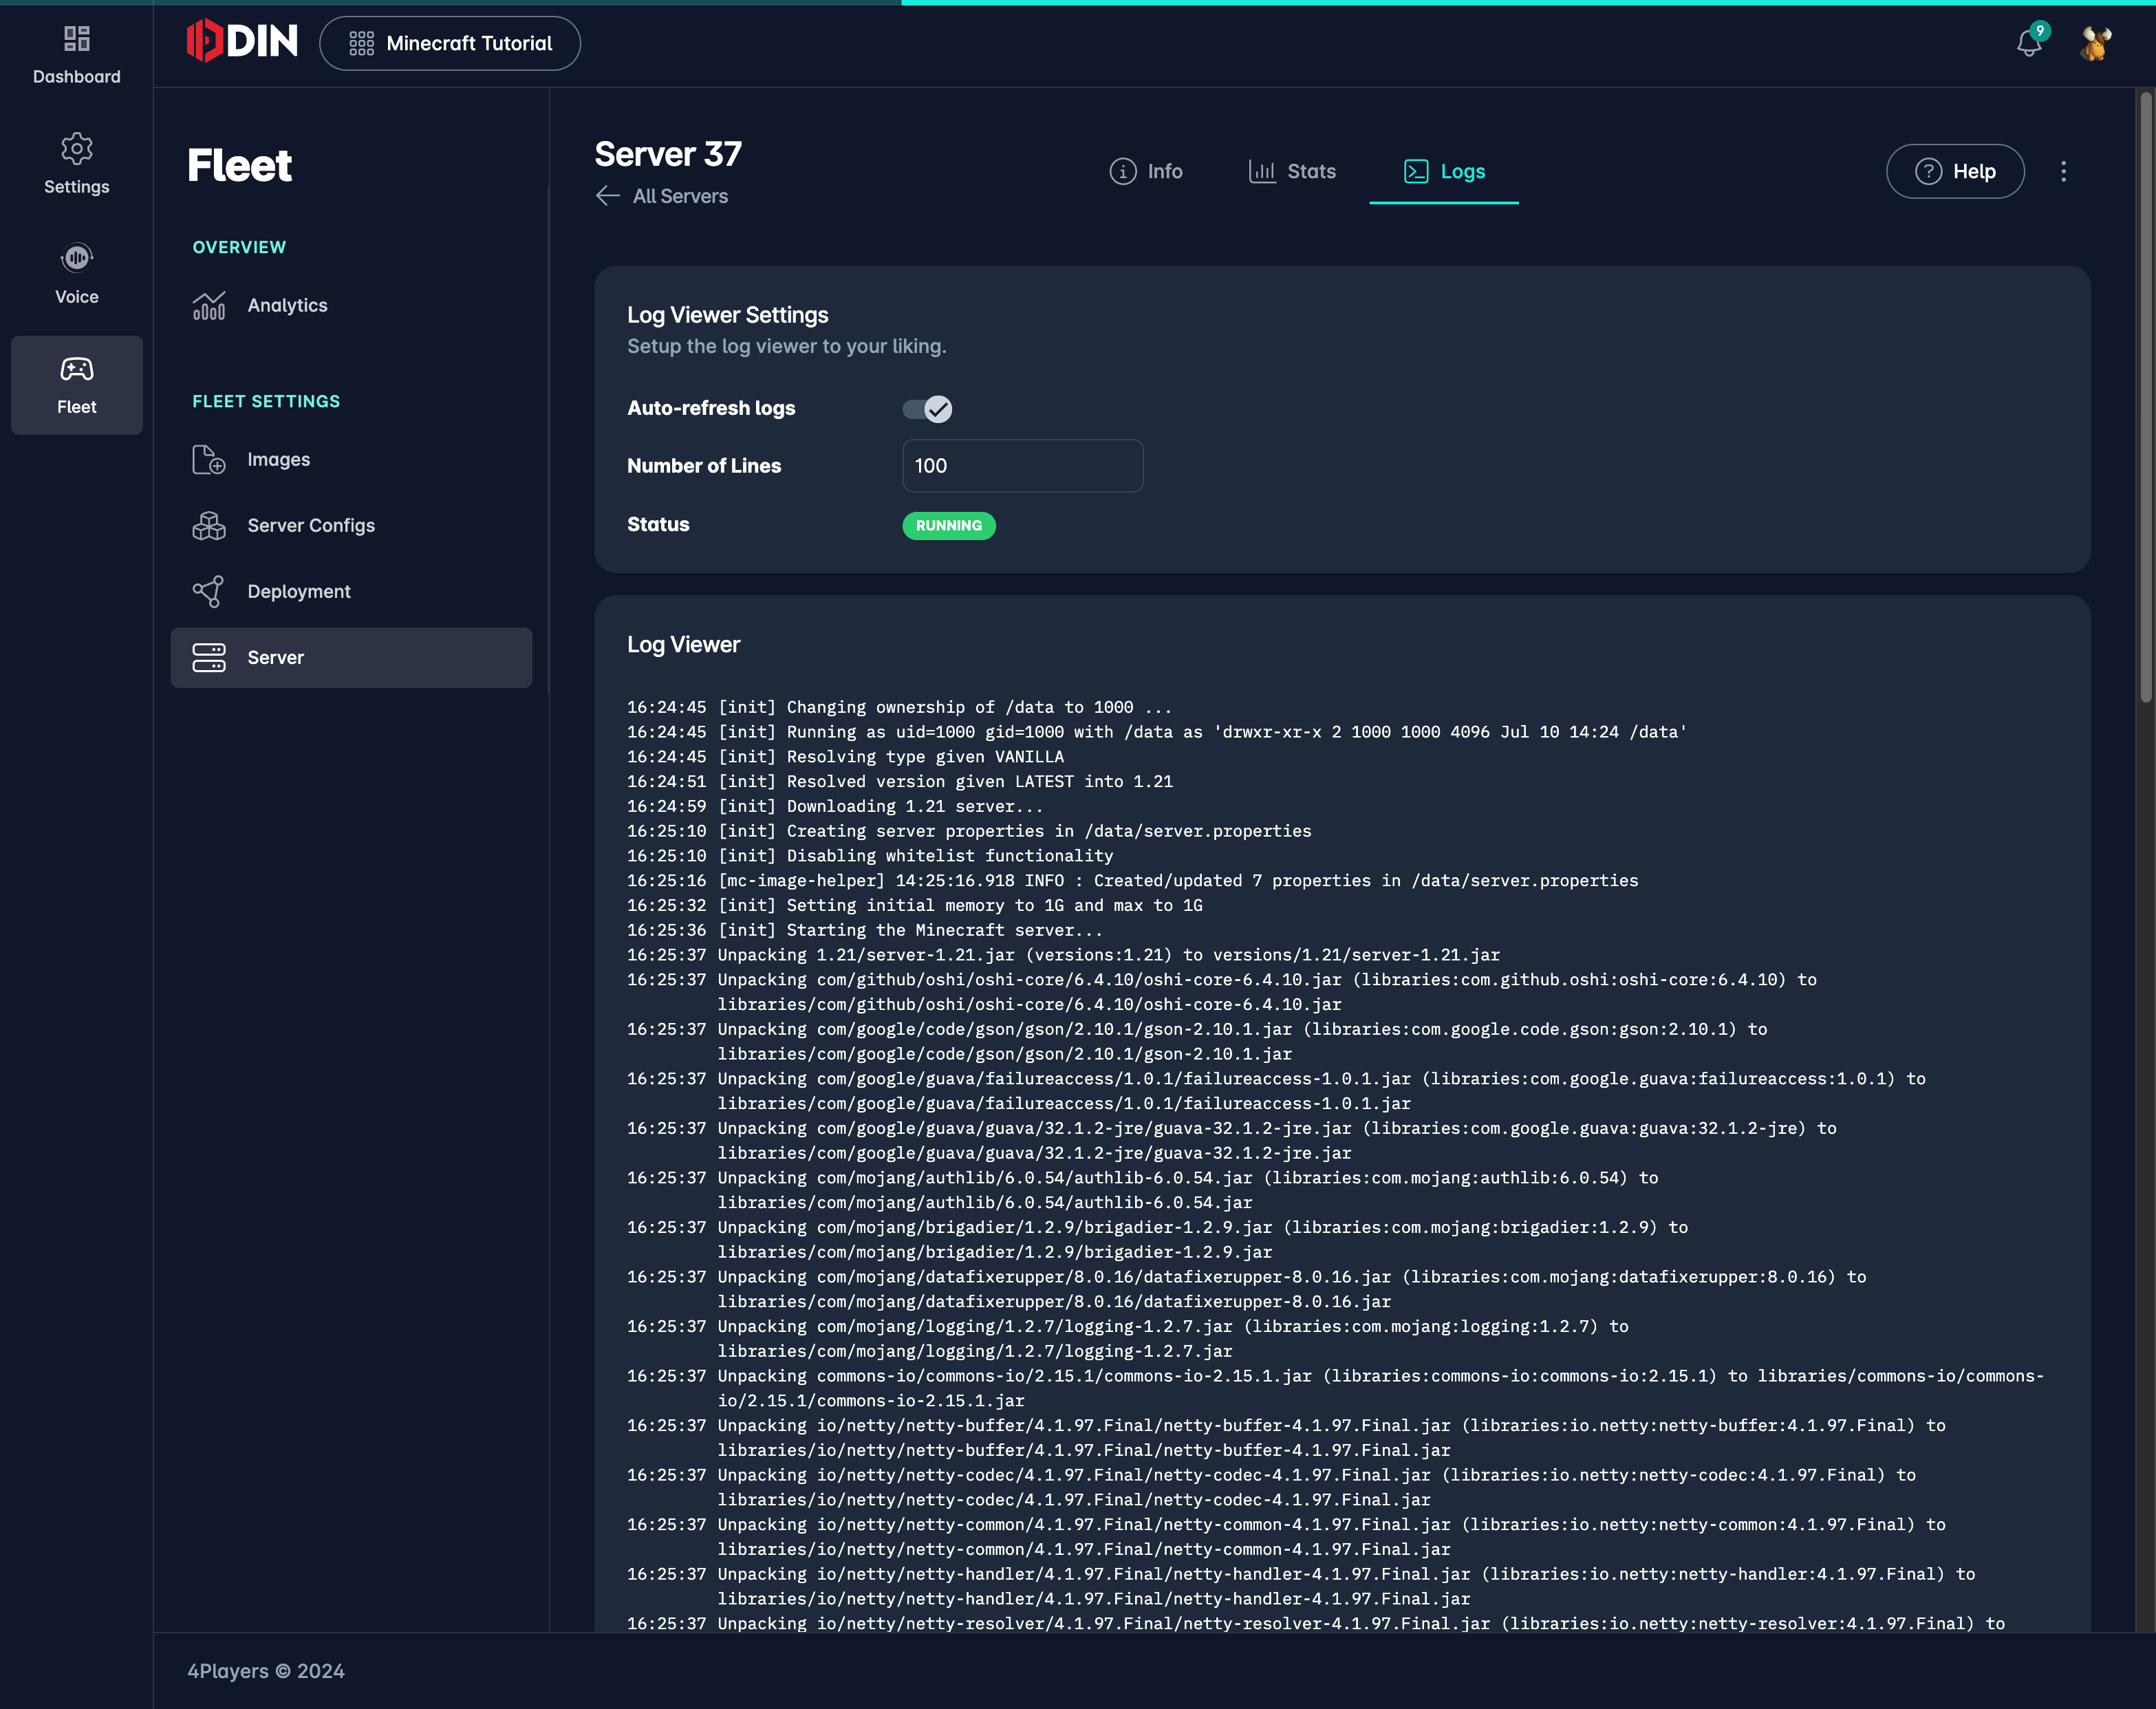
Click on the (i) icon on the right side of the list to reveal more details of the specific server. You can see the logs, the resources used, the environment variables, the mounts and much more. Click through the gallery to see some screenshots of that.
Checking server stats
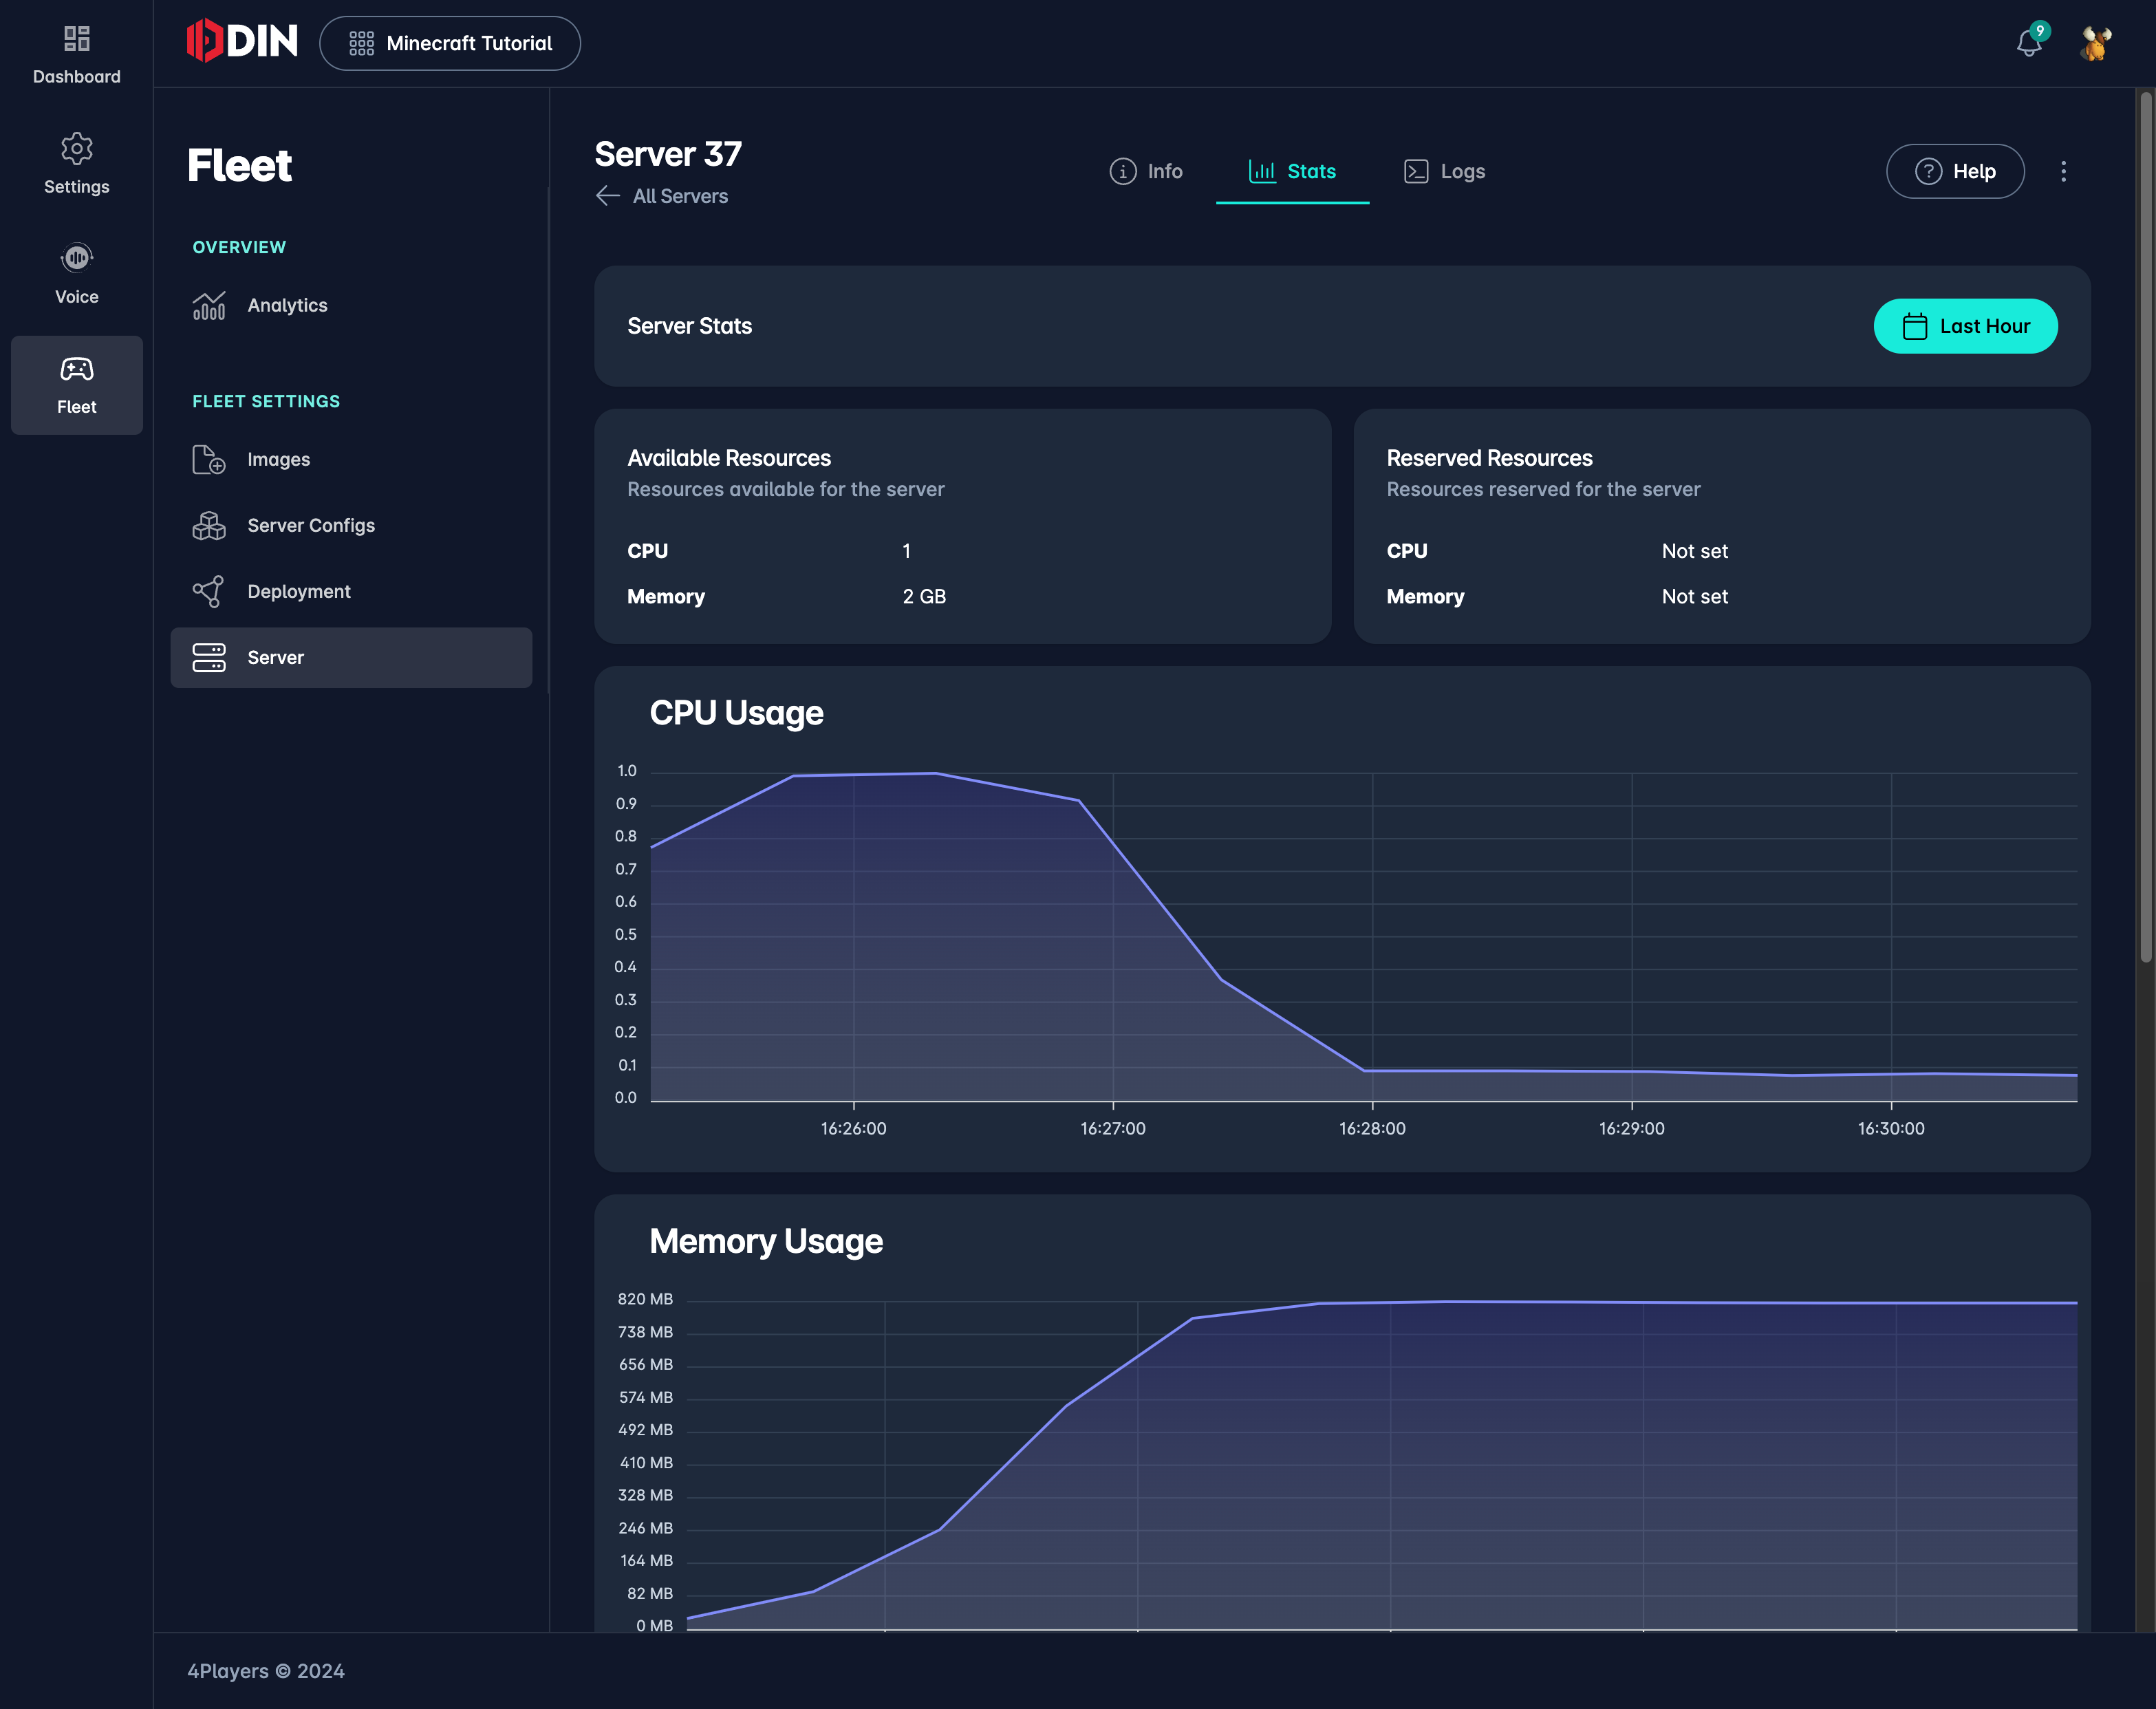
Let’s get to the server stats and see how much resources the server is using. Click on the Stats tab to see the resource usage of the server. You can see the CPU, Memory, Disk and Network usage. This is very important to determine if the server is running smoothly or if it needs more resources.
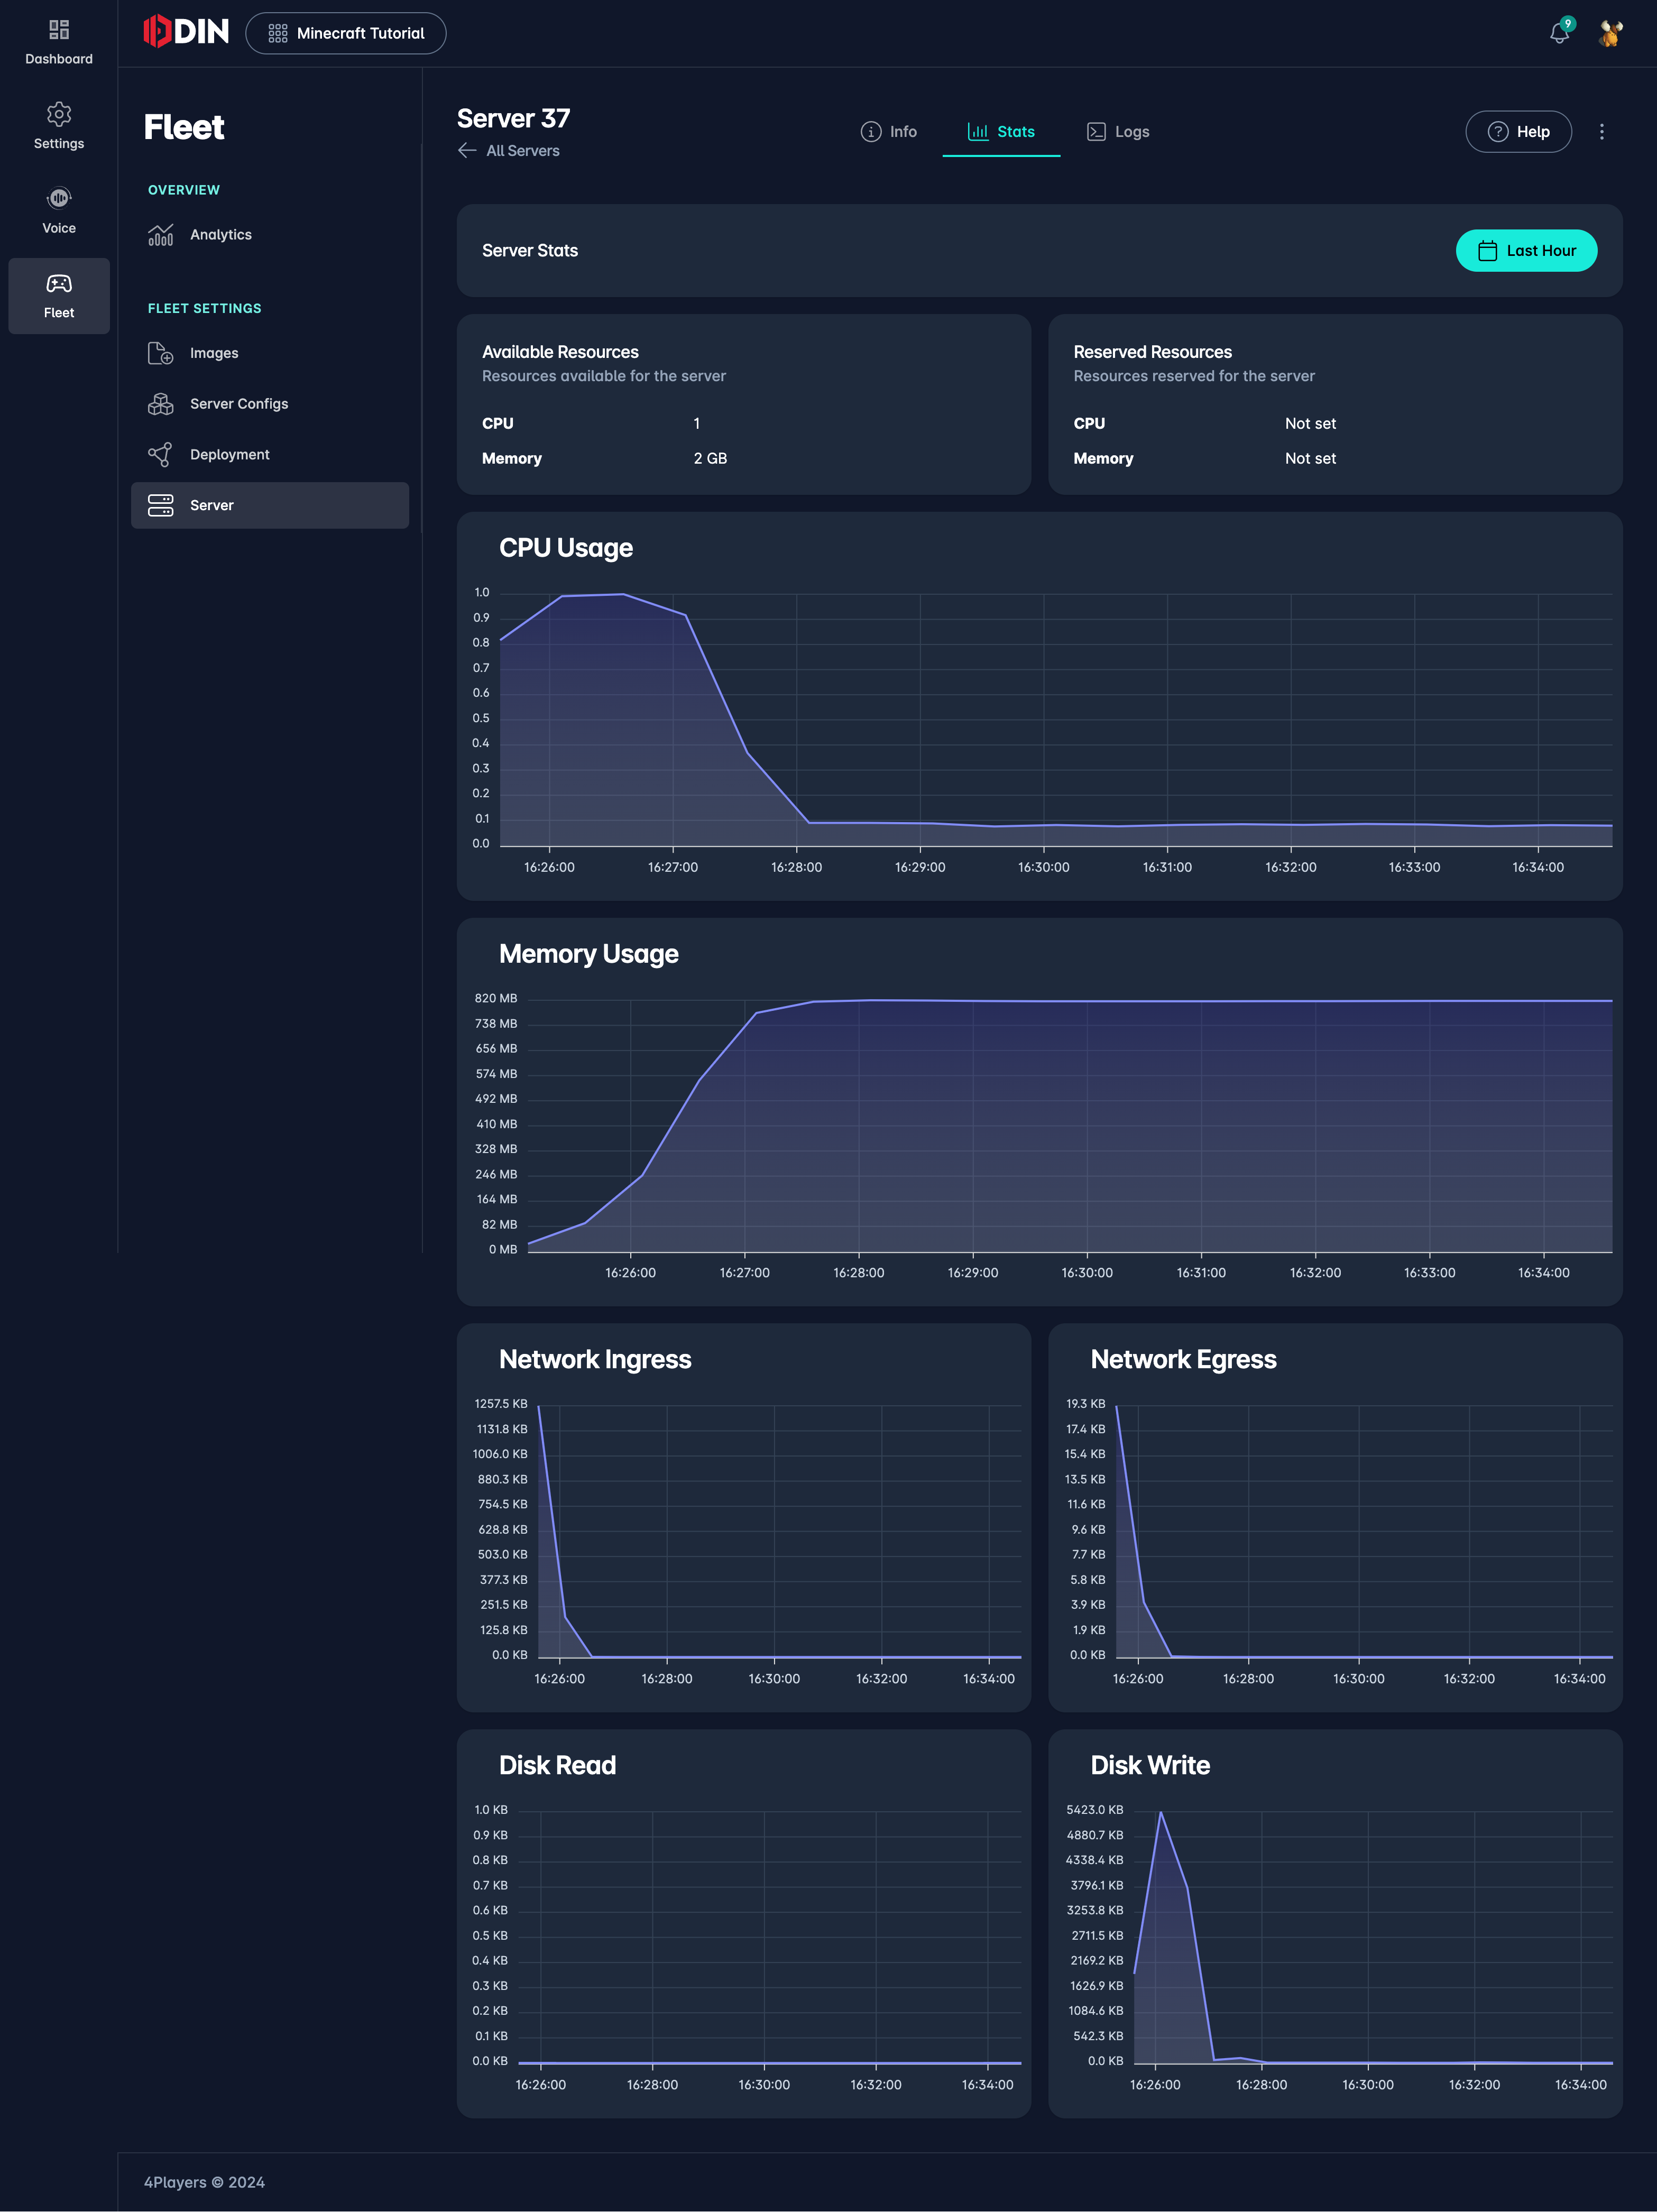
As you can see, CPU is using the core available (we have set it to one) at the beginning to 1 and then drops to 0.1. Which means the average load is 10%. Memory slowly moves up to 820 MB which is 40% of the available memory. It seems that we could reduce the resources. Let’s fire up our Minecraft client and connect to the server to see if stats are changing if the server has something todo.
Connect to the server
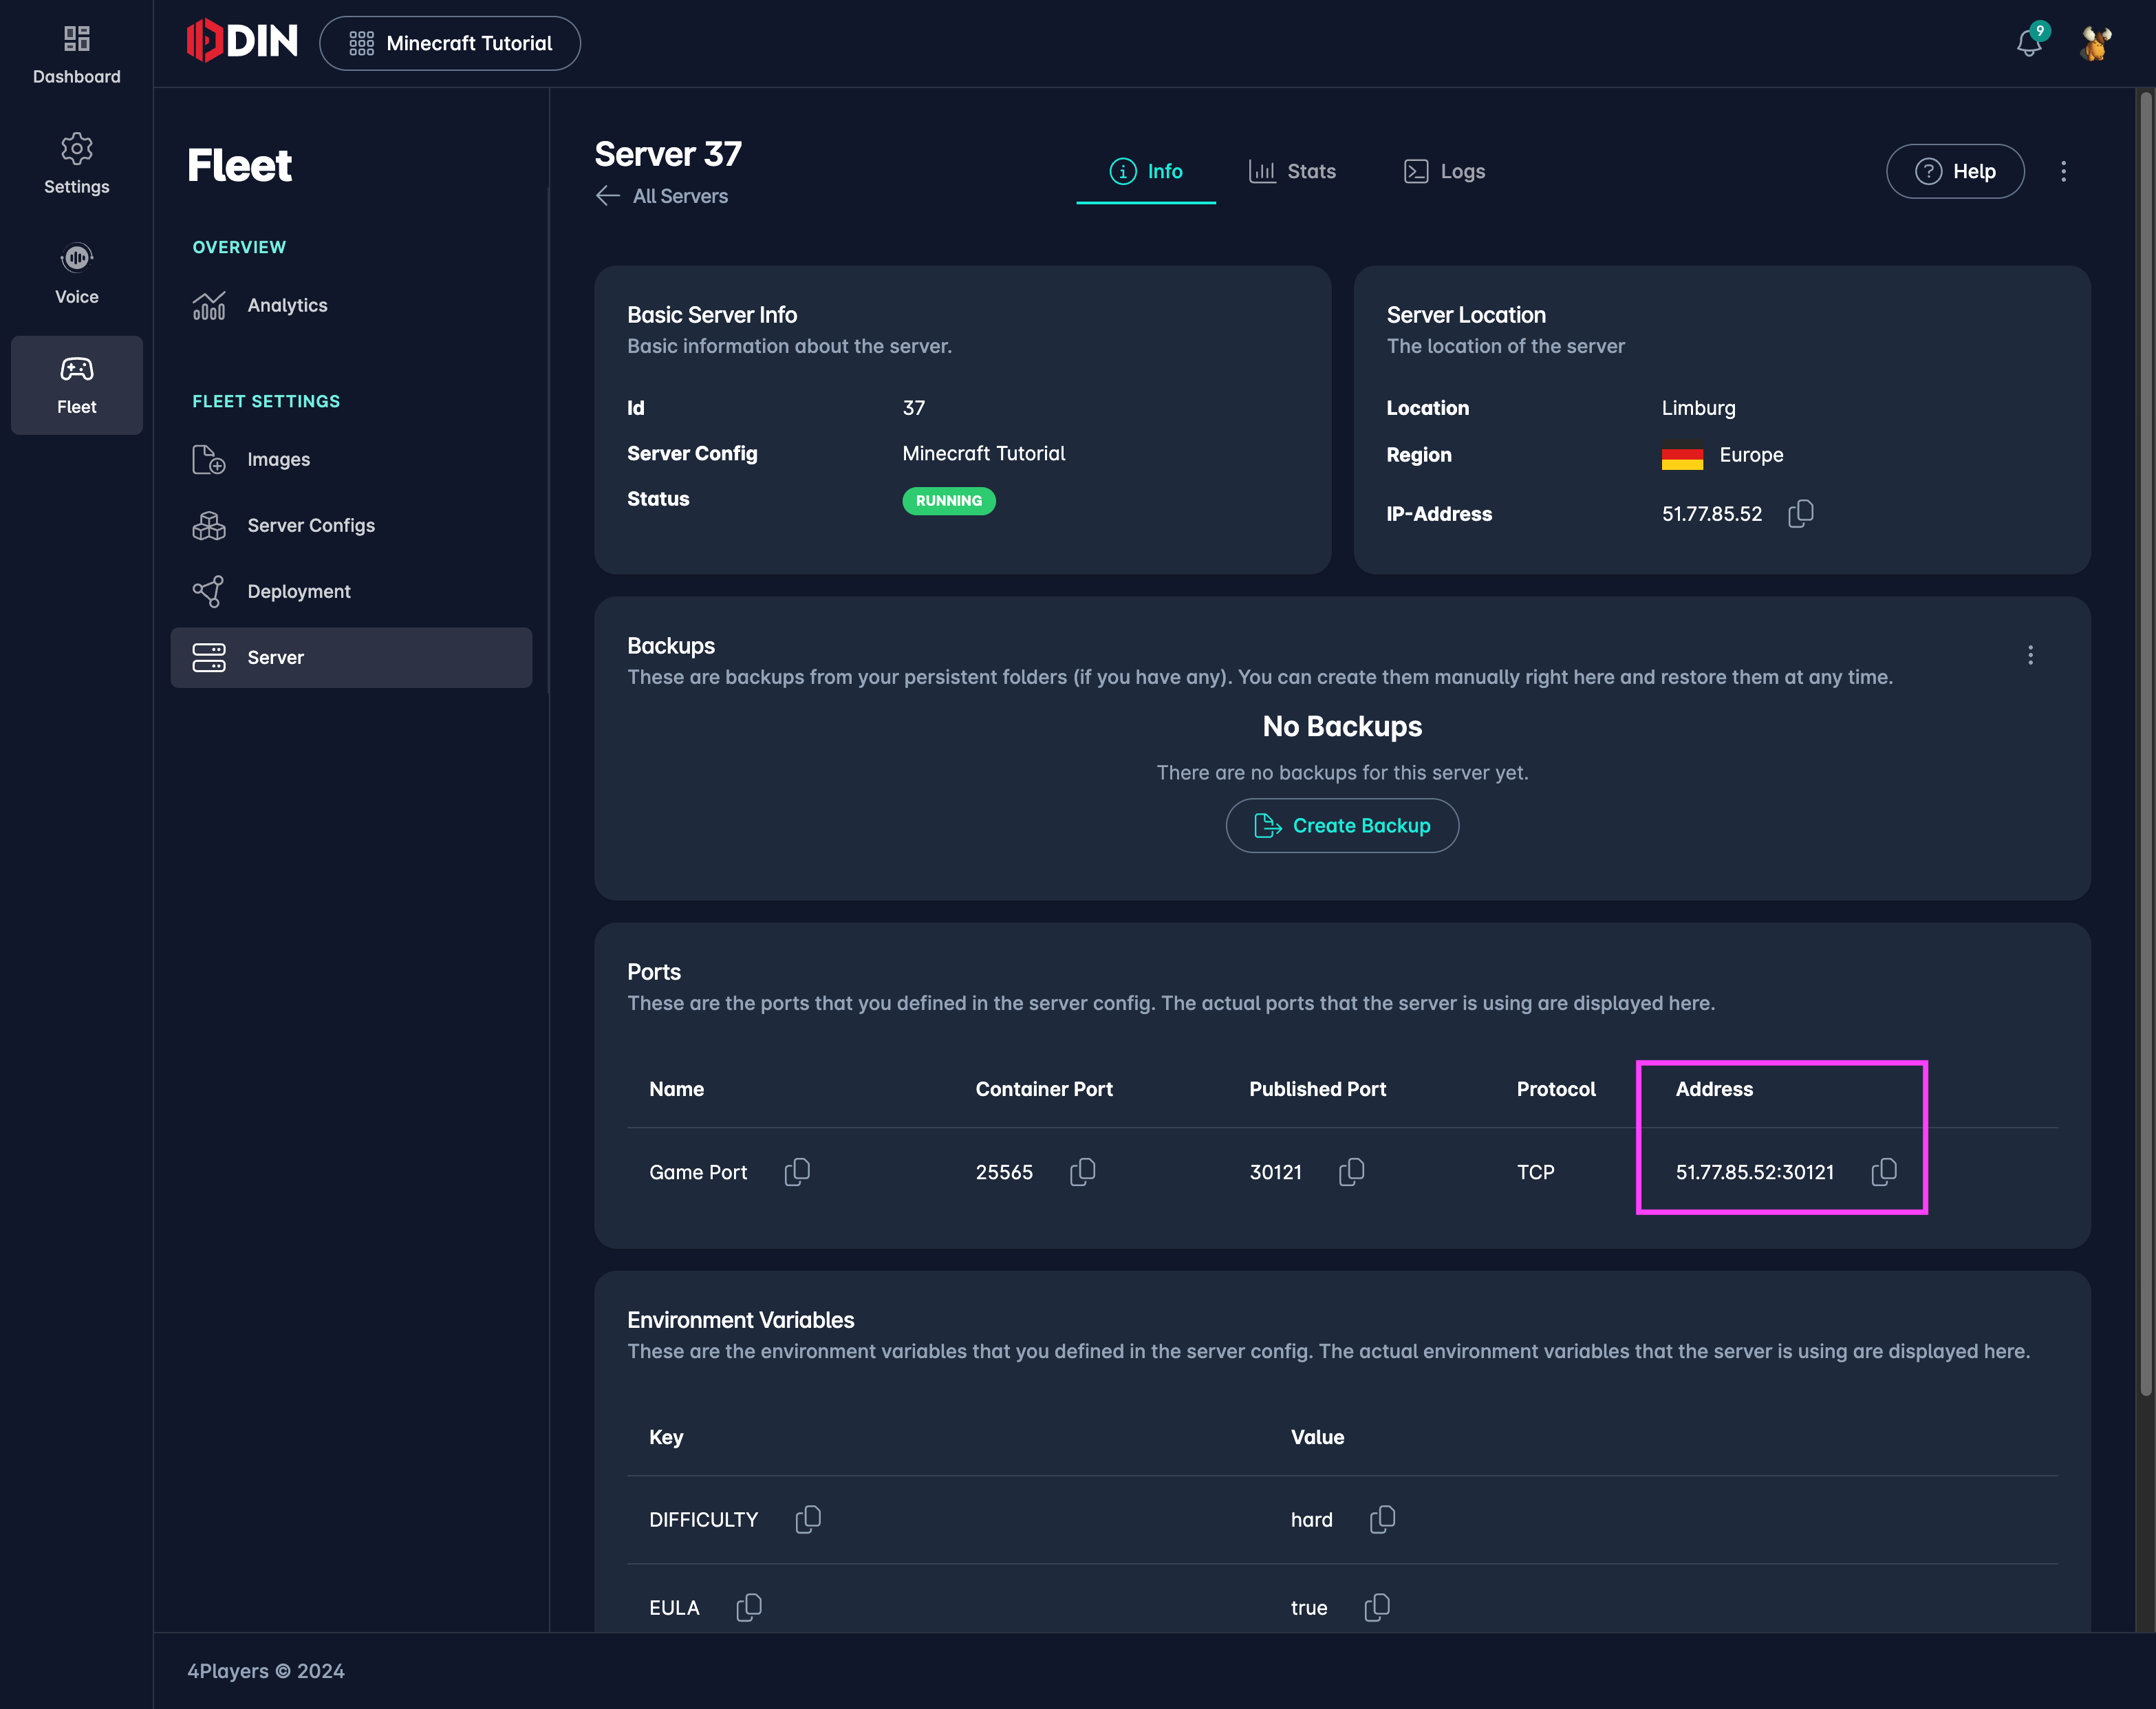
In the Info tab you can see the IP address and the port of the server. You can use this information to connect to the server. In this case, we have a Minecraft server running on 51.77.85.52:30121.
In the Minecraft game I choose Multiplayer and click on Add Server. I enter the IP and the port like this:
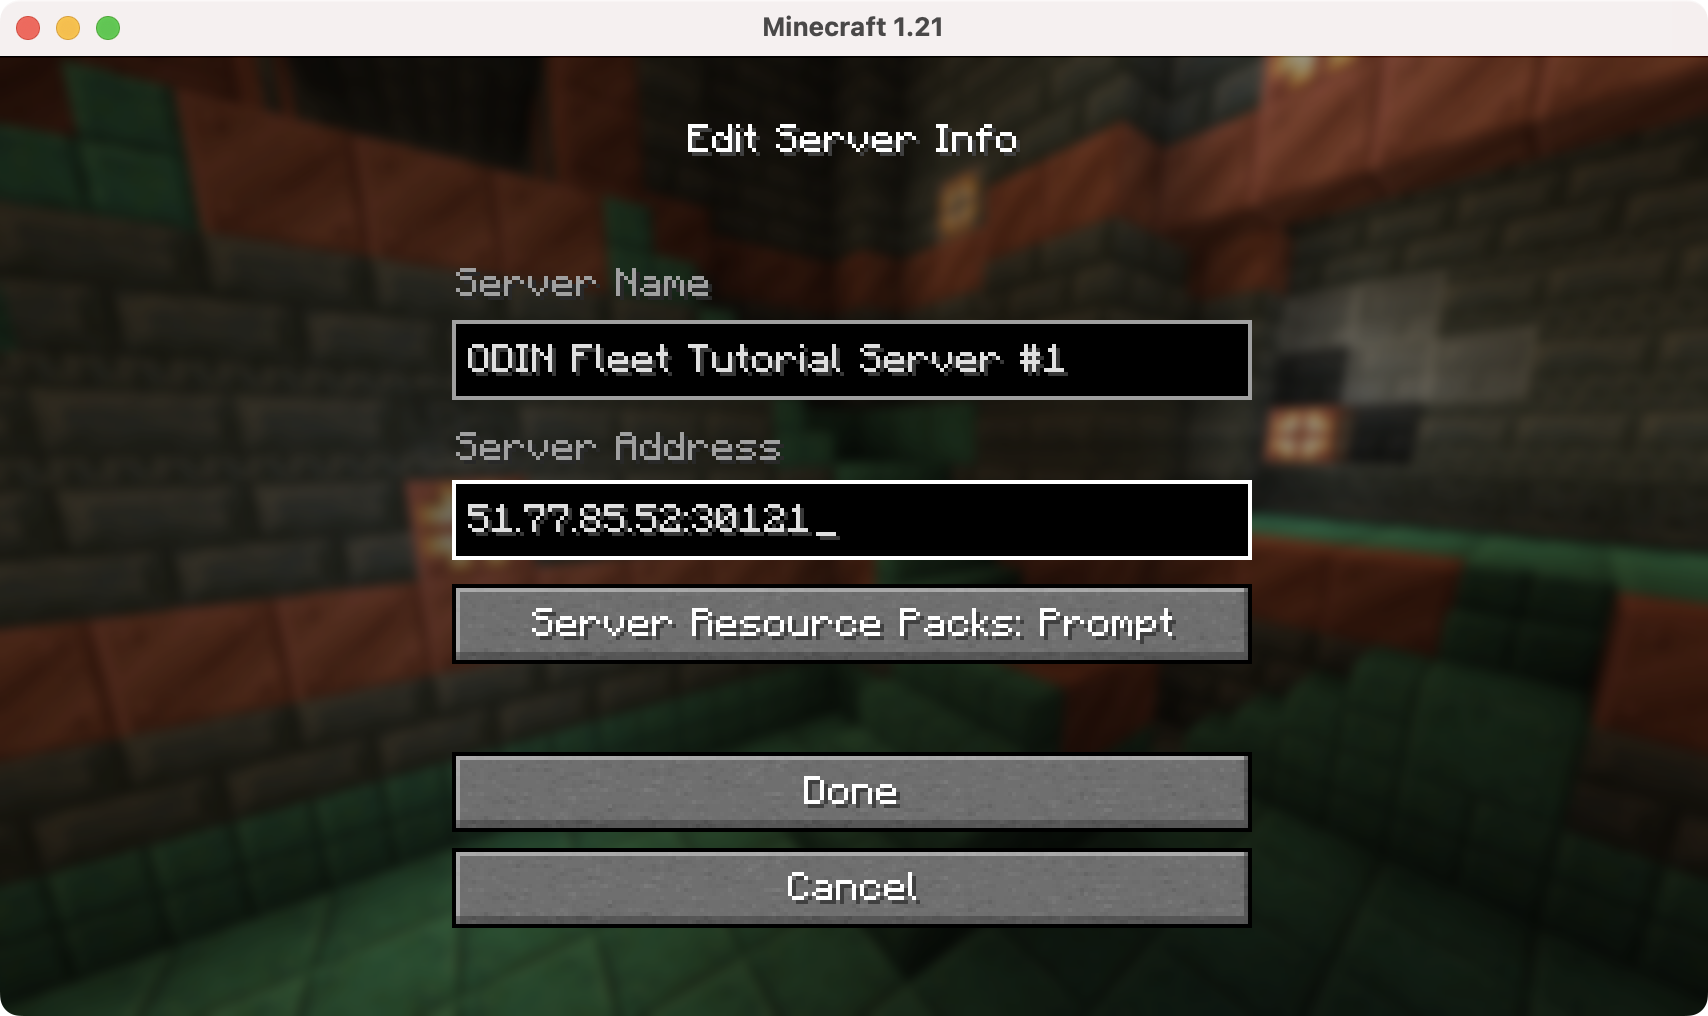
After clicking on Done you’ll see the server in the list (I have highlighted the server that I just added):
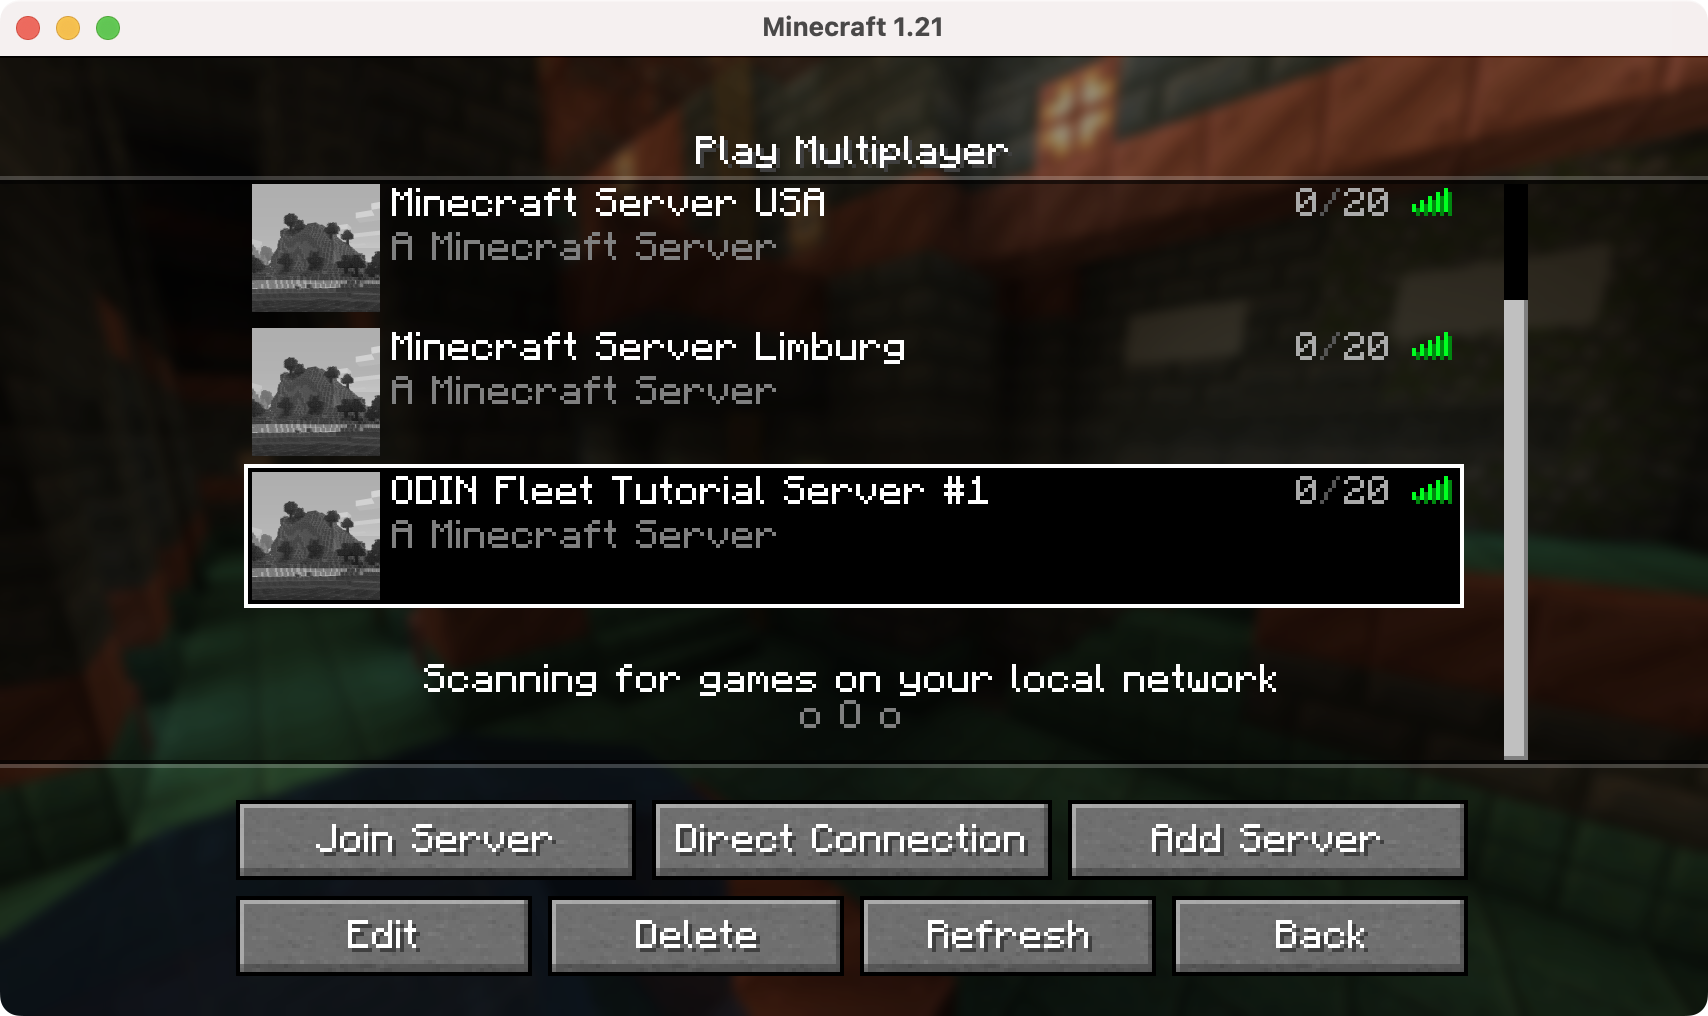
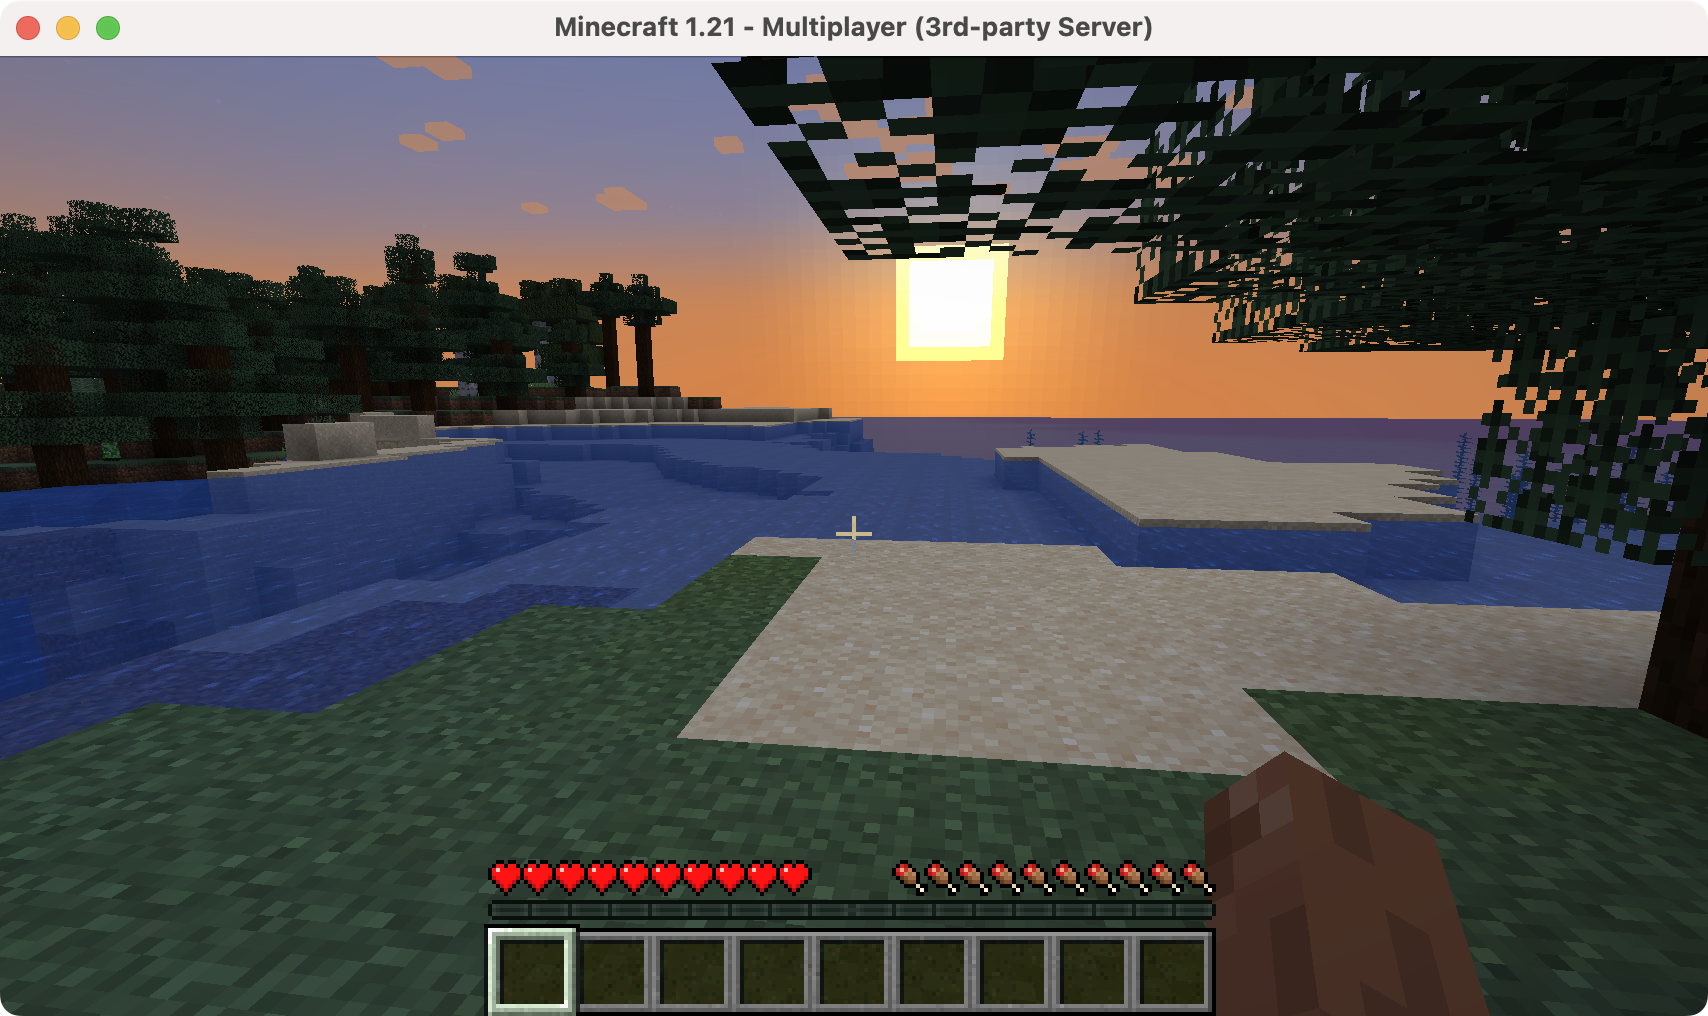
Click on Join Server and you’ll be right in Minecraft and can start playing. Yes, you have deployed your own Minecraft within a few minutes!
Checking server stats again
Let’s run around a bit on the server, create and remove some blocks. After a couple of minutes playing, let’s check our Server Stats again:
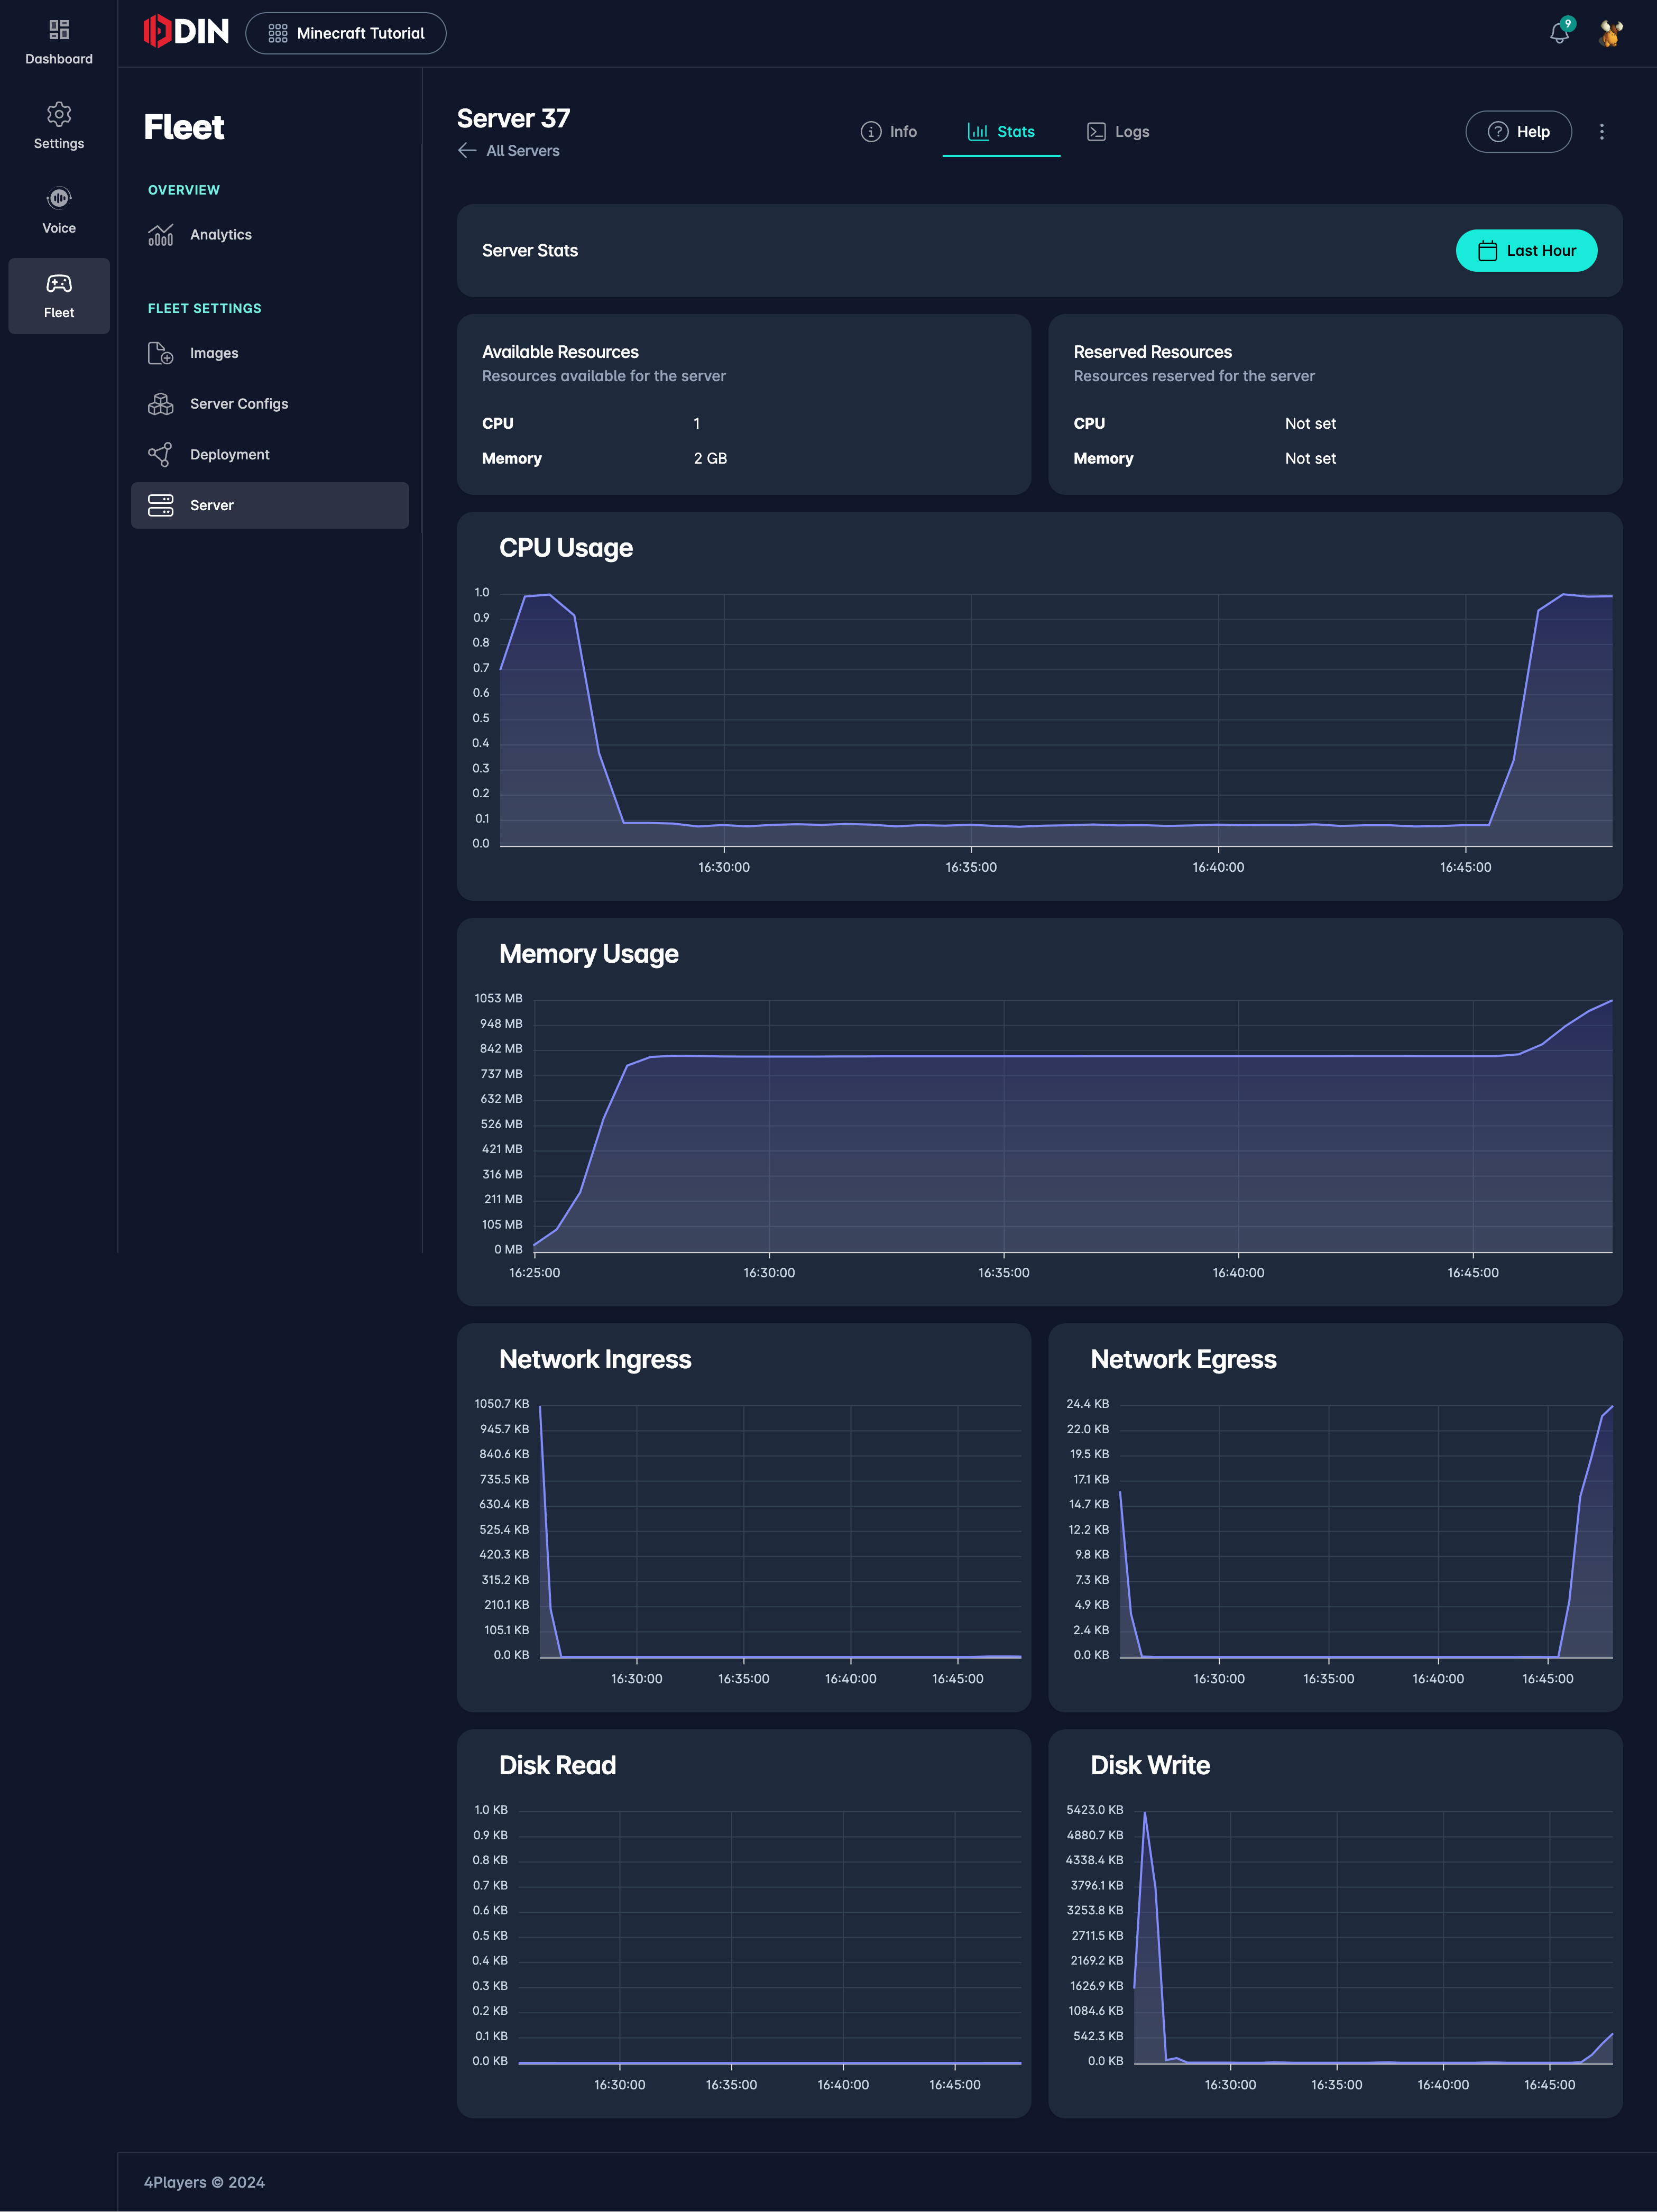
Let’s see what we have here:
- CPU is now at 1 which is quite different to before. The CPU is at 100%, which does not mean that we need to have more CPU. But we should test the server with more players to see if the CPU is the bottleneck.
- Memory is now at 1053 MB which is 52% of the available memory. However, it’s more than 1024 MB that we would have in the Tiny tier. So, it’s very likely that the server will crash and in fact if you change the tier to Tiny the server will crash after a short period of playtime. Feel free to try it out.
- Network Egress (i.e. server sending data) is expected and is not a problem. The server is sending data to the clients and this is what we want.
- Data Write is expected, too. The server is writing data to the disk. This is the world data that is stored on the disk.
This way you can easily determine the resources required by your gameserver and adjust the resources accordingly.
Scale Up or Down
Let’s say you need another set of servers in the USA and you need to scale up the servers in Germany to handle the load. You can easily do that by scaling the deployment. Navigate to the deployment in Limburg and click on Edit. You can change the number of instances and click on Save.
Next, click on Add Deployment and add 1 Server in Seattle (USA). You can also choose another location if you want. After that, your servers list in the Servers part of the Dashboard will look like this:
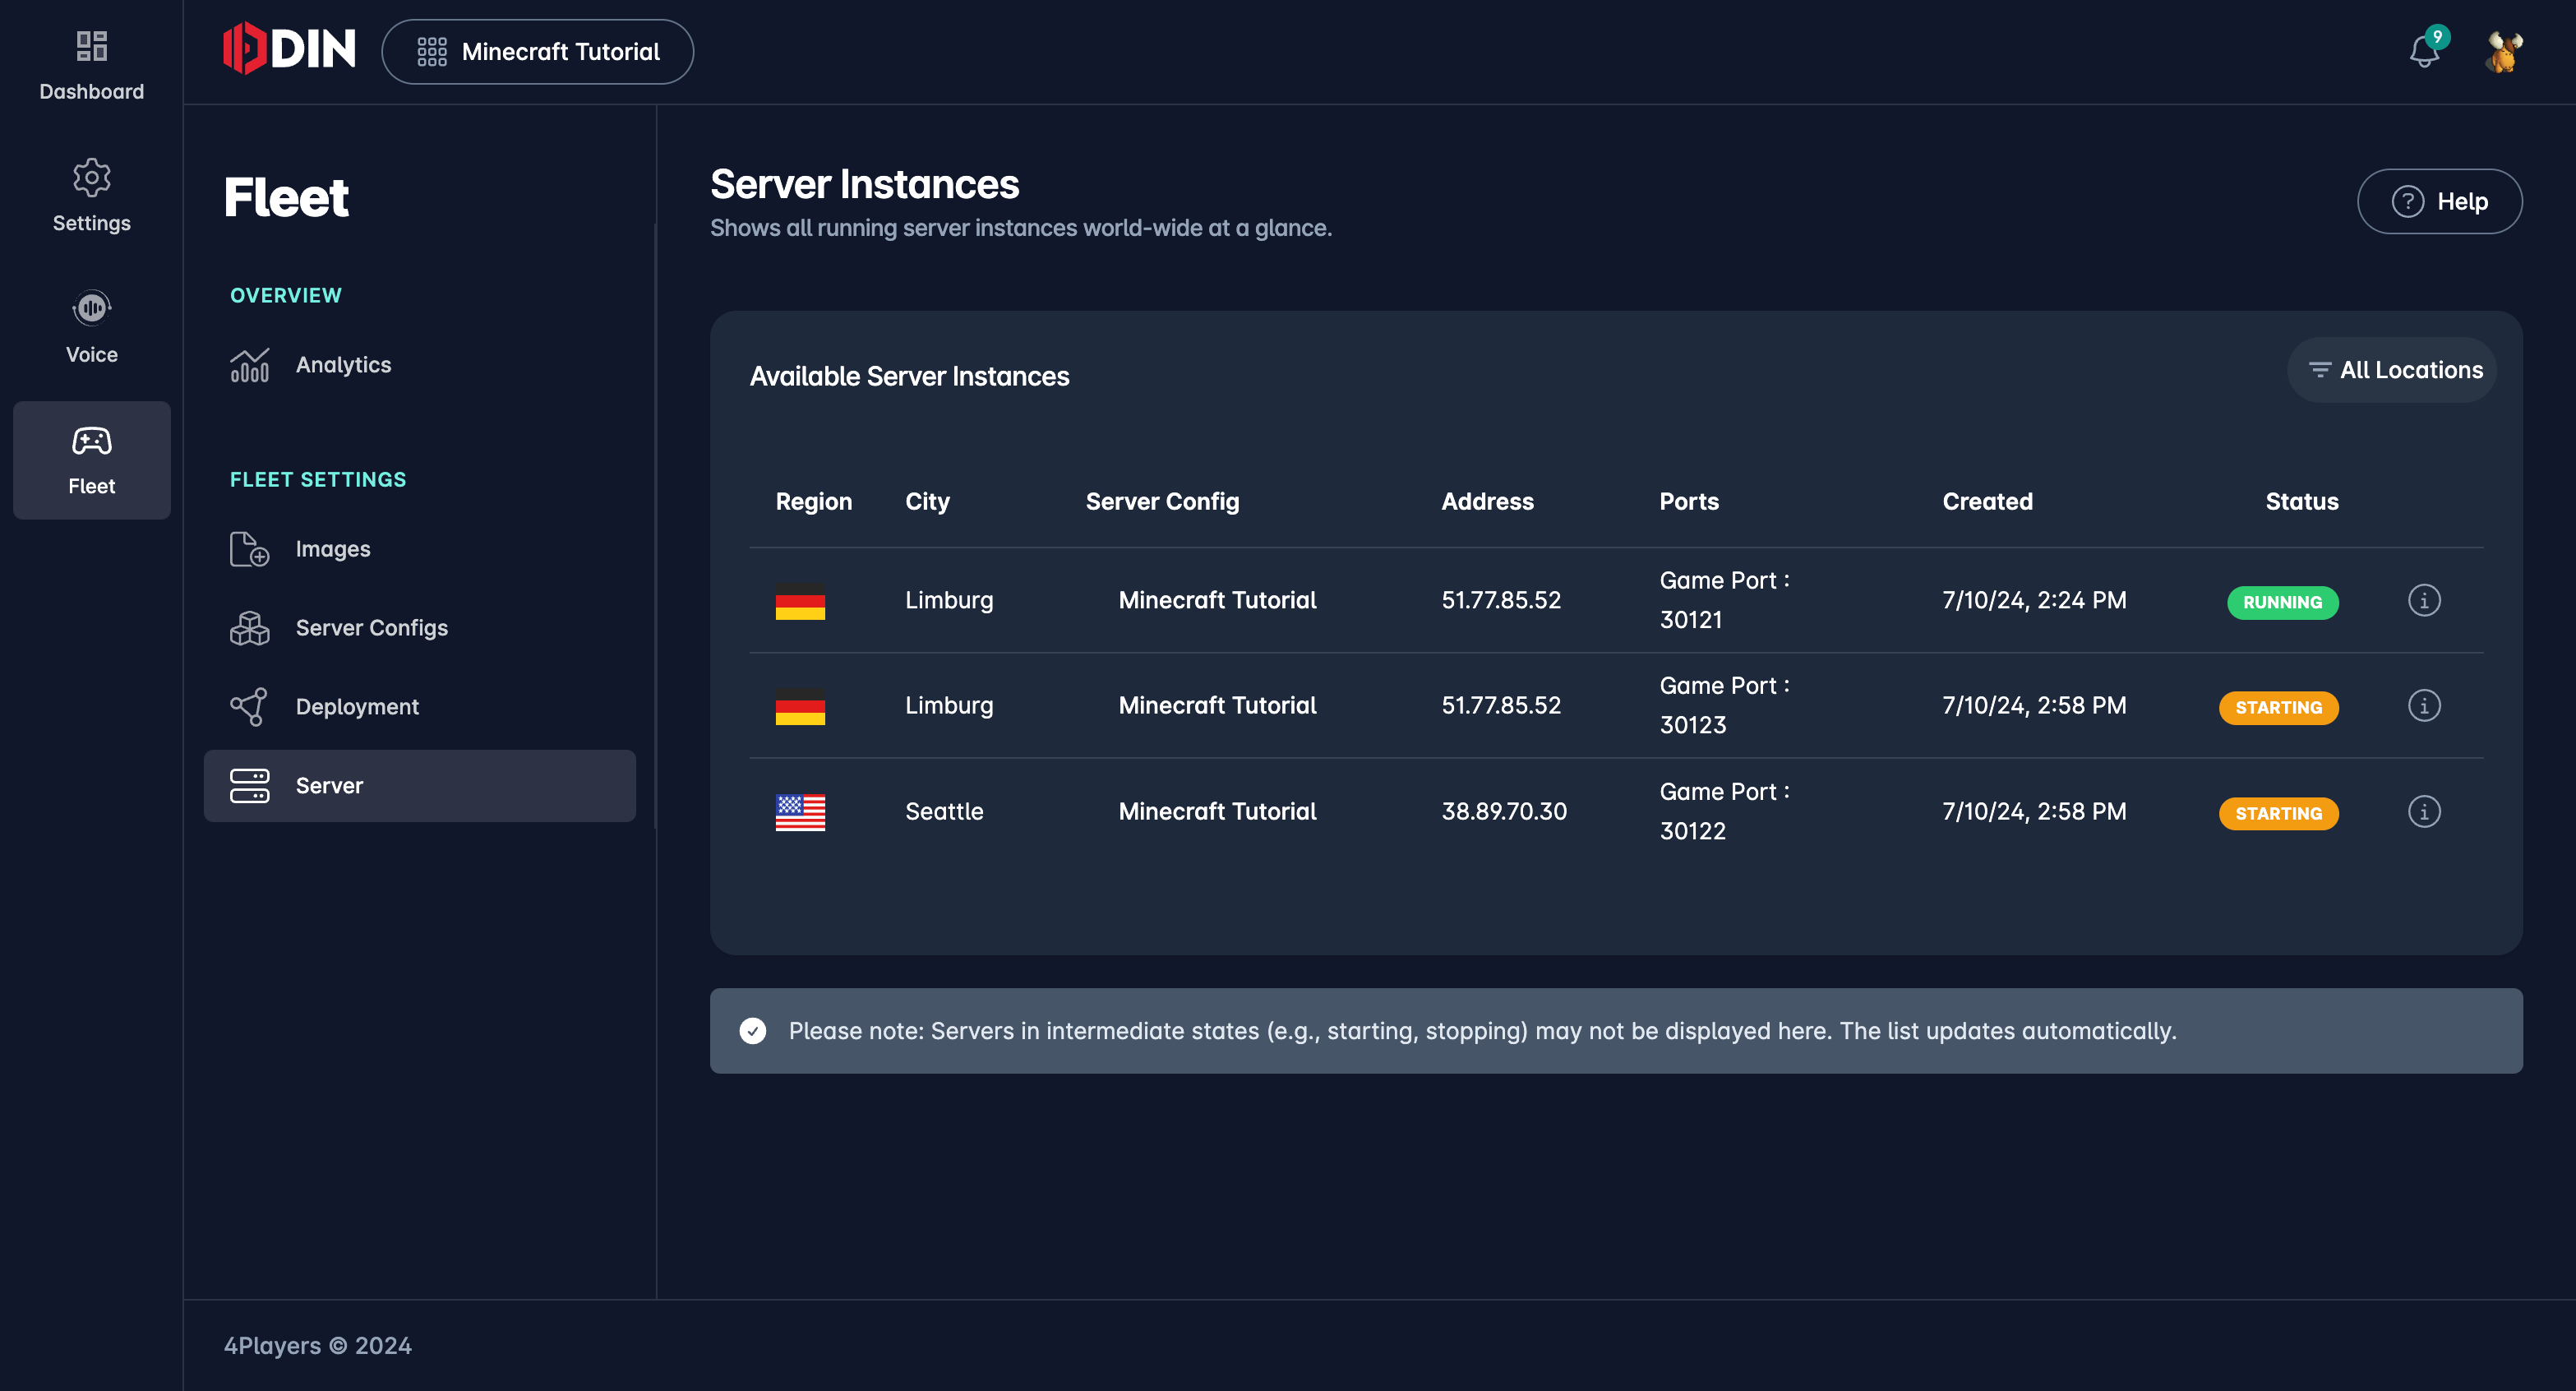
You can see that we have 2 servers in Limburg and 1 server in Seattle.
It depends on how you do any up- or downscaling. We have customers that review weekly the usage of their servers and scale them up or down manually in the Dashboard. We have others that have a fixed number of servers and only scale them up if they see that the servers are overloaded. And we have customers that have written scripts that automatically check the load of the servers and scale them up or down via script using our Fleet CLI or within a script using one of our SDKs (i.e. NodeJS).
Cost Control
After scaling up and waiting for 1 or 2 minutes (until servers are up and running) navigate back to Analytics. You’ll see that the number of running instances has increased. You can also see the costs of the deployment.
That is basically all there is for cost control. No hidden costs, no super complex charts, tables with hundreds of non-understandable invoice positions with literally no chance to understand what you are paying for. With us it’s simple, in this case we would charge you the 3 instances running today, if it’s a Small tier it would be 0.43€ per instance per day, i.e. in this case we would charge you 1,29€ for this day and 38,7€ per month. That’s it, that’s the price.
Clean Up
Navigate to the Deployments and remove the deployments. This will stop the servers and remove all resources that are associated with the deployment.
Next Steps
This was a very basic example of how to deploy a Minecraft server with ODIN Fleet. You can now start to experiment with different server configurations, different images, different locations, etc. You can also start to automate the deployment process with our API or CLI.